e
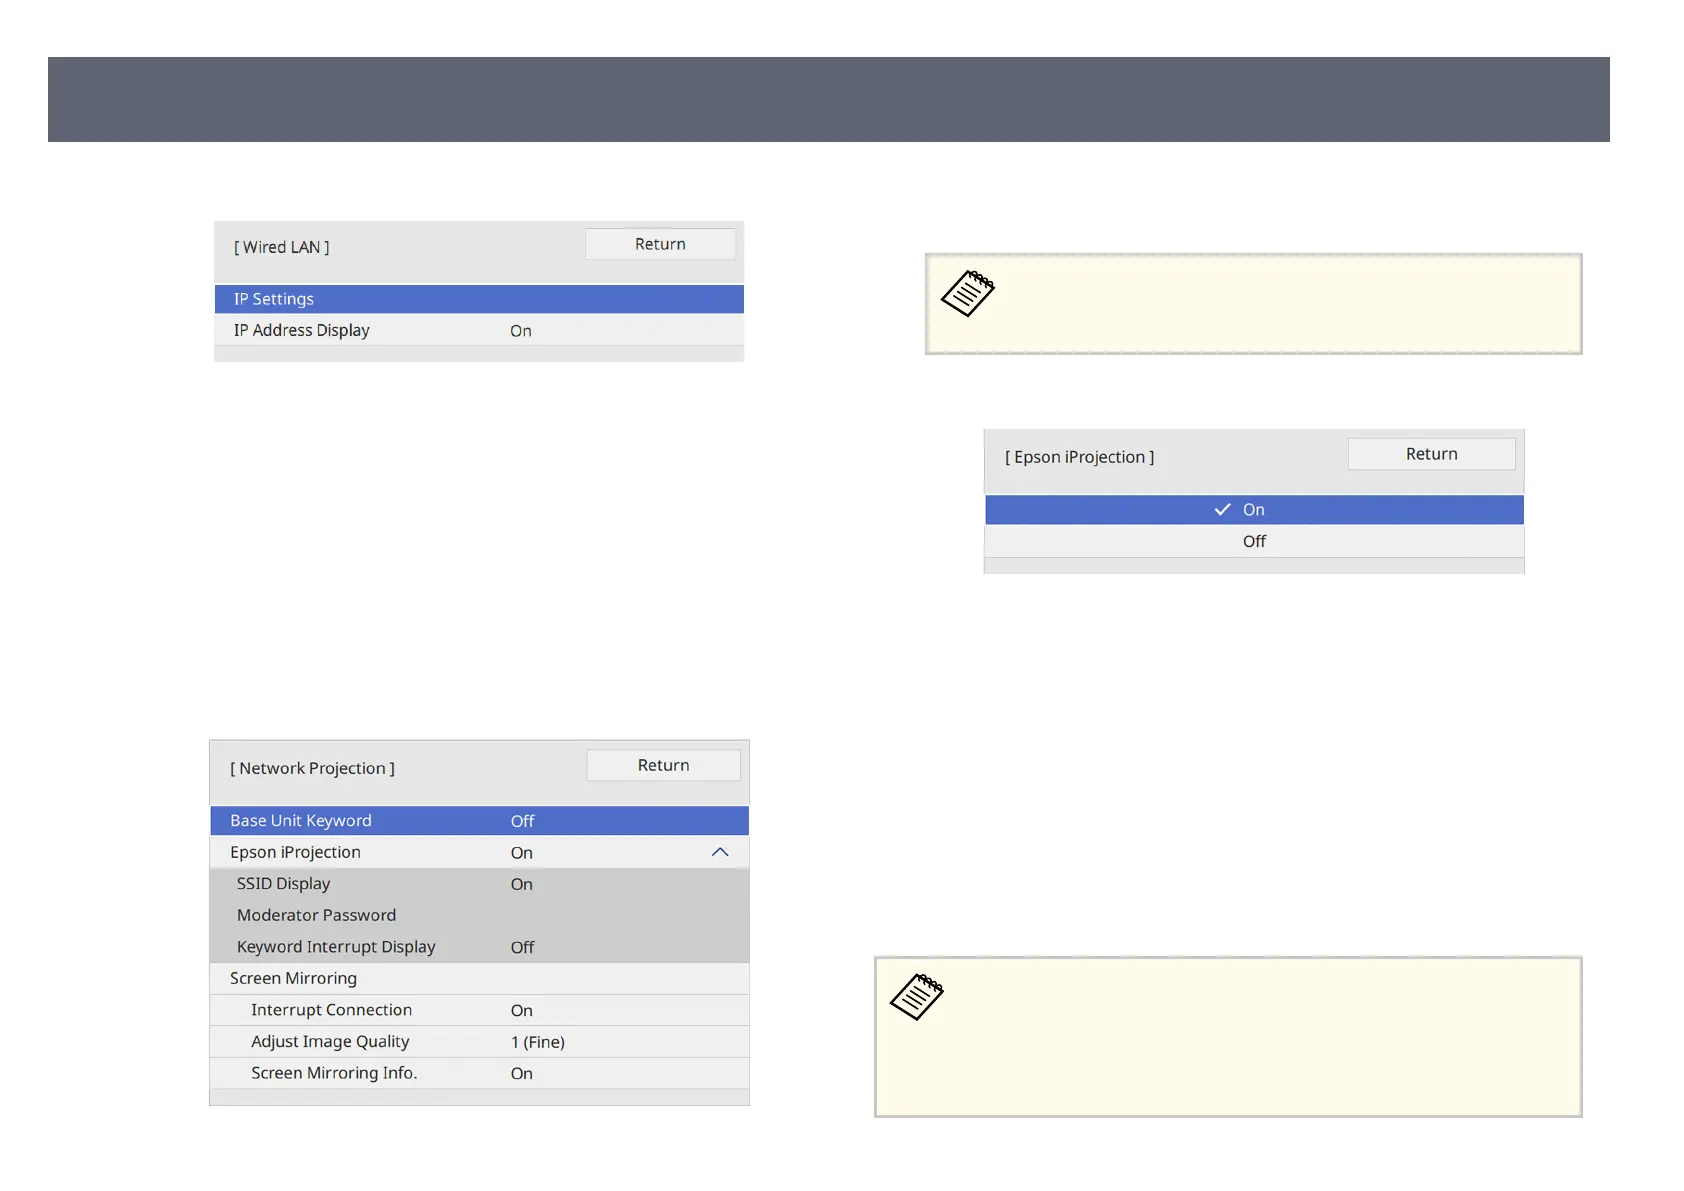
Select the Wired LAN menu and press the Enter button.
f
Assign the IP settings for your network as necessary.
•
If y
our network assigns addresses automatically, select IP Settings to set
the DHCP setting to On.
•
If you must set addresses manually, select IP Settings to set the DHCP
setting to O, and then enter the base unit's IP Address, Subnet Mask,
and Gateway Address as necessary.
g
To prevent the IP address from being displayed on the network
inf
o
rmation screen, set the IP Address Display setting to O.
h
Select the Network Projection menu and press the Enter button.
i
Turn on the Base U
nit Keyword setting if you want to prevent access to
the base unit by anyone not in the room.
When you turn on this setting, you must enter a displayed,
rando
mized keyword from a computer using Epson iProjection to
access the base unit and share the current screen.
j
Set the E
pson iProjection setting to On.
k
Select the options as necessary.
•
Mo
derator Password lets you enter a four-digit number password for
accessing the base unit as a moderator using Epson iProjection. (No
password is set by default.)
•
Keyword Interrupt Display lets you select whether to display a base
unit keyword on the displayed image when accessing the base unit
using Epson iProjection.
l
When you ni
s
h selecting settings, go back to the Network Settings
screen, select Set, and follow the on-screen instructions to save your
settings and exit the menus.
•
If n
o Web Control Password has been set, a screen prompting you to
set a password is displayed before you can save the settings. Follow the
on-screen instructions to set the password.
•
You can check the IP address in Wired LAN Info. in the base unit's
Network menu.
Sharing Screens Using Epson iProjection (Wired Connection)
44