g
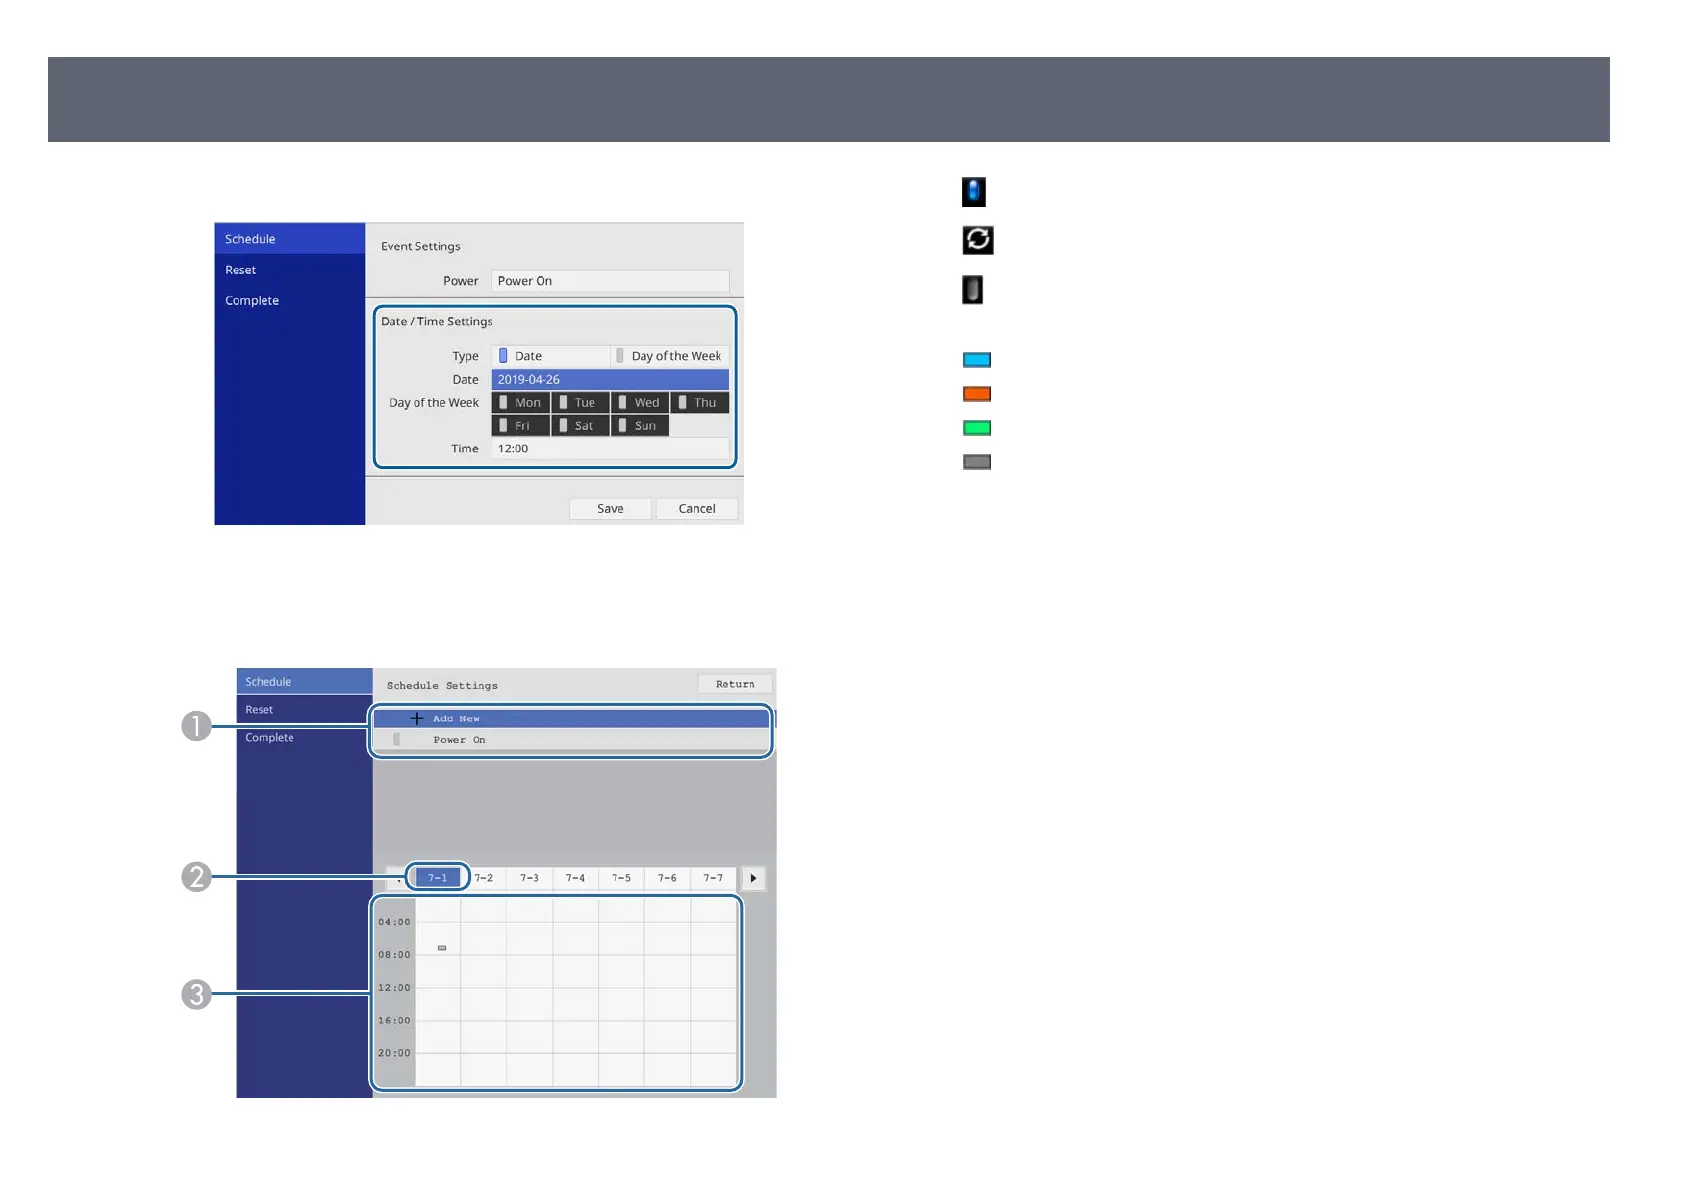
Select the date and time at which you want the event to occur.
h
Select Save and press the Enter button.
e scheduled events are displayed on the screen with icons indicating the
event status.
A
: valid schedule
: regular schedule
: invalid schedule
B
e date currently selected (highlighted)
C
: one time schedule
: regular schedule
: standby schedule (turns communication on or o
during standby)
: invalid schedule
i
To edit a scheduled event, select the schedule and press [Esc].
j
Select an option from the menu displayed.
•
On or
O lets you enable or disable the selected event.
•
Edit lets you change the event details or date and time.
•
Clear lets you remove the scheduled event from a list.
k
Select Setup complete, then select Yes.
T
o delete all scheduled events, select Schedule Reset.
g
Related Links
•
"Selecting Password Security Types" p.67
•
"Setting the Date and Time" p.37
Setting Event Schedules
79