4-29
EMP-TW1000
SEIKO EPSON Revision:A
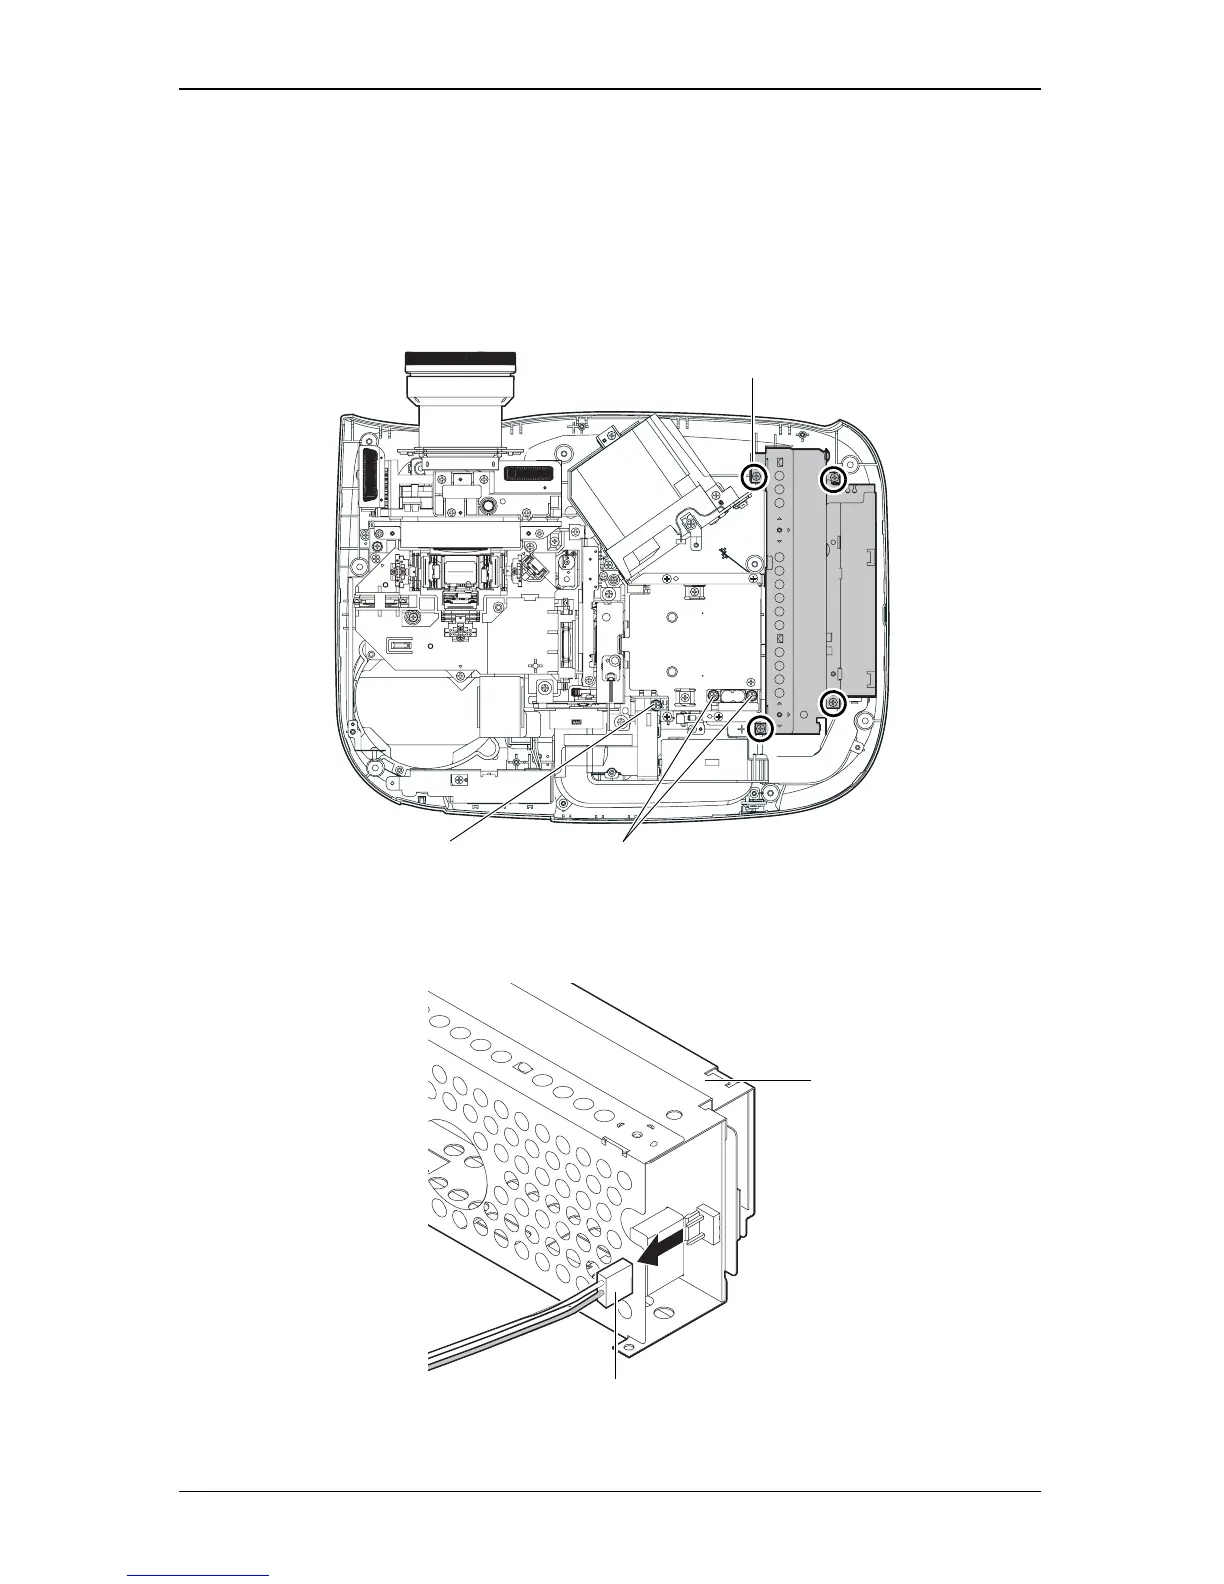
4.2.11 Removing the PS Ballast Assy.
1. Remove the screw (C.C.P-TITE SCREW 3x8, F/ZN-3C) that secures the Safety Switch,
and remove the Safety Switch.
2. Remove the two screws (C.C.P-TITE SCREW 3x8, F/ZN-3C) that secures the Ballast
Connector, and remove the Ballast Connector.
3. Remove the four screws (C.B.P-TITE SCREW, 3X10, F/ZB-3C) that secure the PS Ballast
Assy.
Figure 4-26.
4. Disconnect the AC Cable Connector from the PS Ballast Assy, and remove the PS Ballast
Assy.
Figure 4-27.
C.B.P-TITE SCREW, 3X10, F/ZB-3C
Screws that secure the Ballast Connector
Screw that secures the Safety Switch
PS Ballast Assy.
AC Cable Connector
 Loading...