EPSON PowerLite 5000 Service Manual
3-24
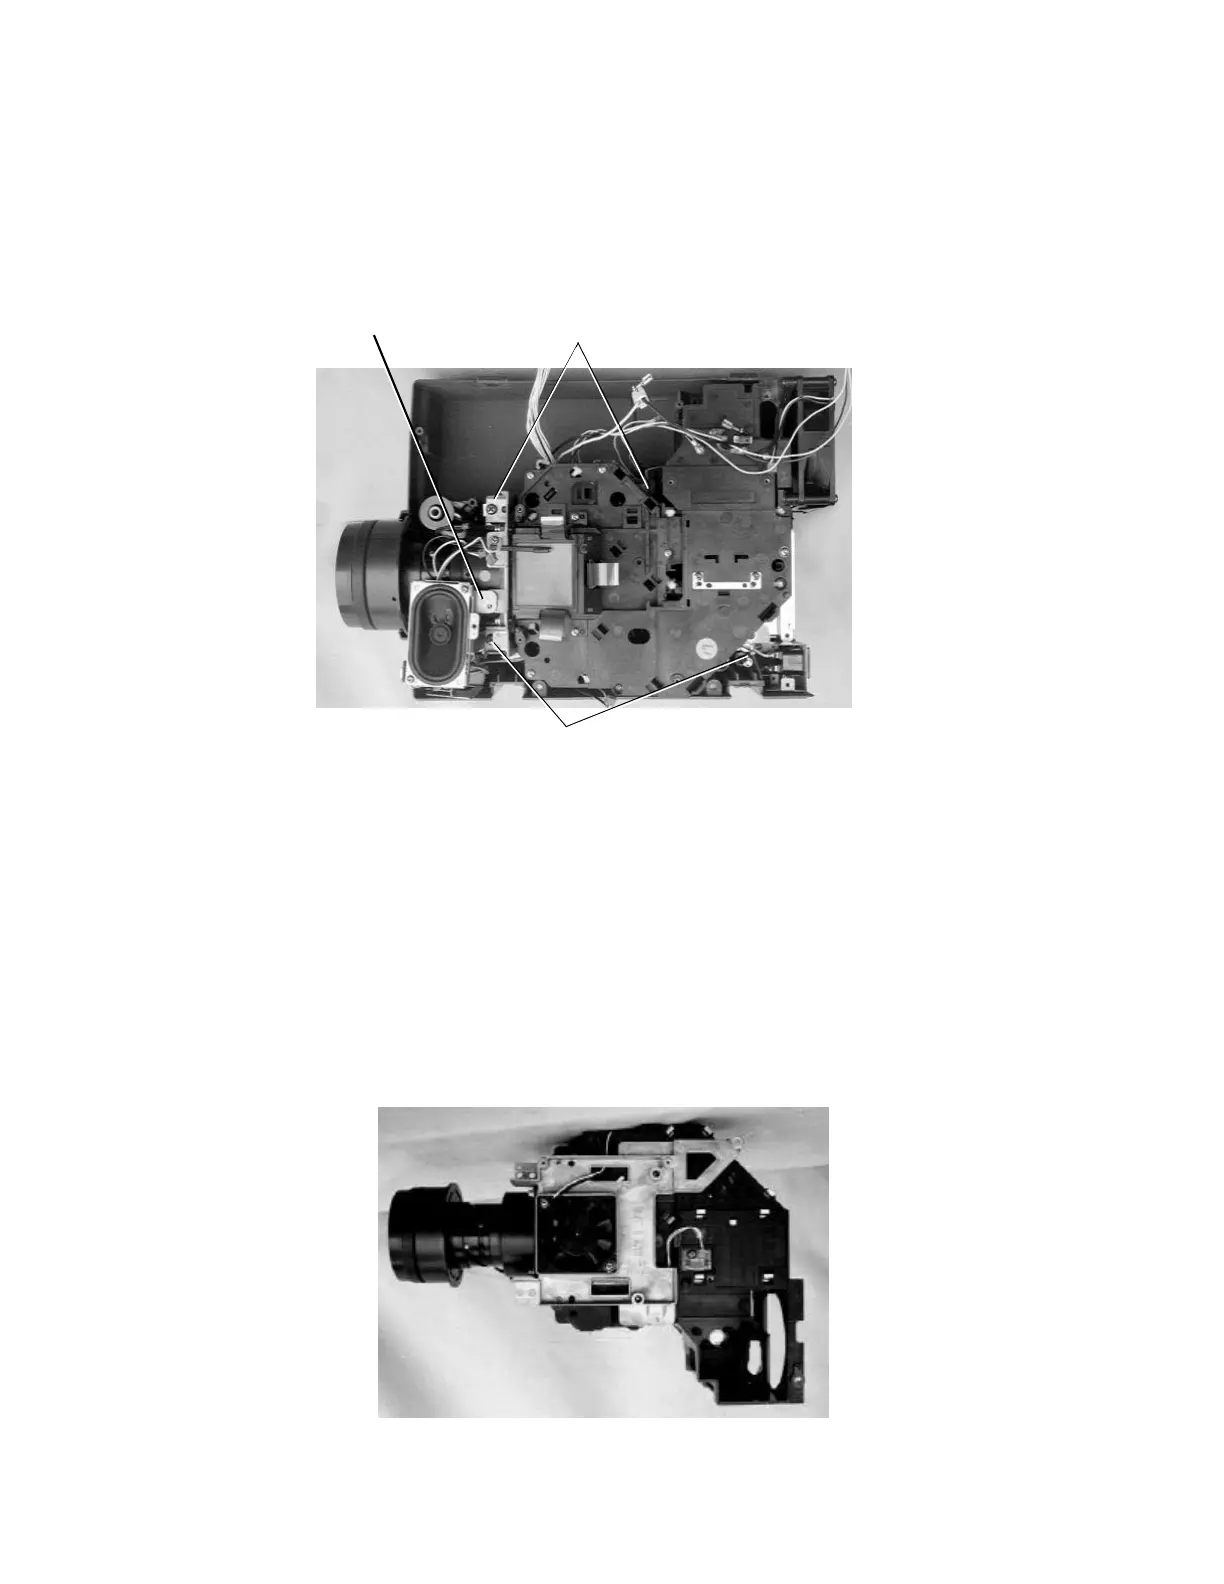
3.2.17 Removing the Optical Engine
Prerequisite conditions: 3.2.3/3.2.4/3.2.8/3.2.13/3.2.7 (left)
Figure 3-30
1. Remove the screw mounting the speaker bracket to the optical head chassis.
Screw: +M3×4 F/ZN: P/N 1021795
(mounting torque: 4.0 kg. cm = 3.5 lb. inch)
2. Remove the 4 optical block-mounting screws.
(One of the screws is located on the front side of the speaker bracket.)
Screws: +M5×10 F/ZN Bind: P/N 1033704
(mounting torque: 6.0 kg. cm = 5.2 lb. inch)
3. Pull out the speaker bracket.
4. Pull the optical engine straight up from the lower case.
Optical Block (Except Exhaust Fan)
ScrewsScrew (Speaker Bracket)
Screws
Figure 3-31