4. Select Job Arranger Lite on the Main tab.
5. Click OK to close the printer driver window.
6.
Click Print.
e Job Arranger Lite window is displayed and the print job is added to the Print Project.
7. With the Job Arranger Lite window opened, open the le that you want to combine with the current le, and
then repeat steps 3 to 6.
Note:
If you close the Job Arranger Lite window, the unsaved Print Project is deleted. To print later, select Save from the File
menu.
8. Select the Layout and Edit menus in Job Arranger Lite to edit the Print Project as necessary.
9. Select Print from the File menu.
Related Information
&
“Loading Paper in the Paper Cassette” on page 27
& “Printing Basics - Windows” on page 36
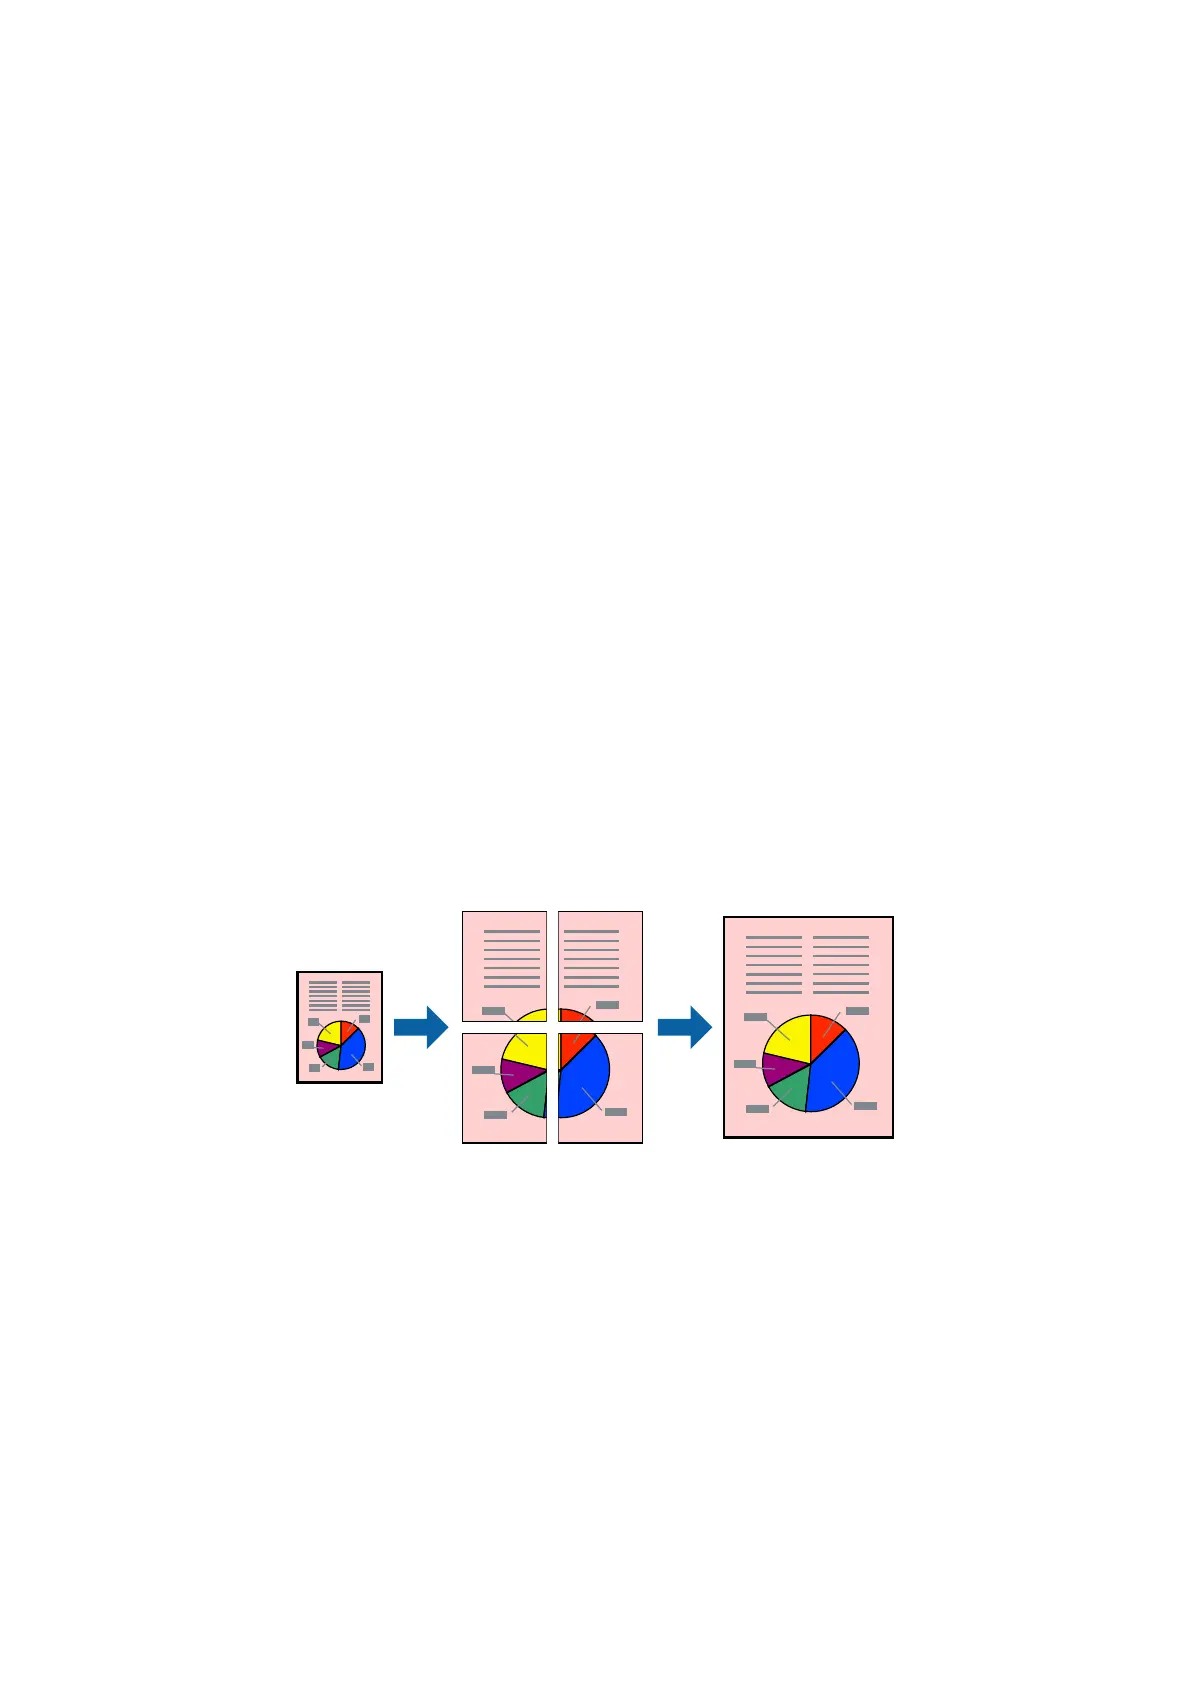
Enlarged Printing and Making Posters (for Windows Only)
You can print one image on multiple sheets of paper to create a larger poster. You can print alignment marks that
help you stick the sheets together.
Note:
is feature is not available for borderless printing.
1. Load paper in the printer.
2. Open the le you want to print.
3. Access the printer driver window.
4. Select 2x1 Poster, 2x2 Poster, 3x3 Poster, or 4x4 Poster from Multi-Page on the Main tab.
5. Click Settings, make the appropriate settings, and then click OK.
6. Set the other items on the Main and More Options tabs as necessary, and then click OK.
User's Guide
Printing
44