Press the Enter key, then use the cursor keys or wheel to navigate among the pop-up menu of
options. Available choices include:
Expression Pedal
2 Expression Pedals
1 Expression Pedal + 1 Aux Switch
1 Aux switch + 1 Expression Pedal
2 button Aux Switch
3 button Aux Switch
Ater you have selected the mode appropriate for your connected switch/pedal, press the Enter key to
save your selection.
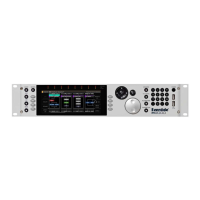
2.1.7.2. Calibrating Your Attached Pedals and Switches
Once you have selected your desired type of pedal/switch, the H9000 will populate the rest of the
display with relevant calibration tools.
Use the cursor button and the Enter key to navigate to and engage the “Calibrate” eld.
If you have attached an on/o type pedal, physically press each switch and make sure that you
see the appropriate “SW” circle illuminates. There are separate SW circles for 1, 2 or 3 button
pedals. 3 SW circles are shown for 1, 2, or 3 button pedals because even a single aux switch may
not be sent out as SW1 but may instead be sent out as SW2.
If you have attached a continuous foot pedal, navigate to the “Calibrate Pedal” eld, then sweep
the pedal back and forth with your foot. You should see the Calibrate Pedal eld display a range
between 0-100% on the calibration meter.
When you’ve nished calibrating, disengage the “Calibrate” button using the Enter key.
•
◦
◦
◦
◦
◦
◦
•
•
•
•
2. Setup
Copyright © 2021, Eventide Inc.