Maintenance
196 OX1
Replacing the Click-Out Optical Connector (Pro Units Only)
2. Remove the dust cap protecting the optical connector (which should
be pointing downwards), being careful not to touch the optical
connector.
3. Inspect the optical connector (from which you have just removed the
dust cap), and clean it if necessary.
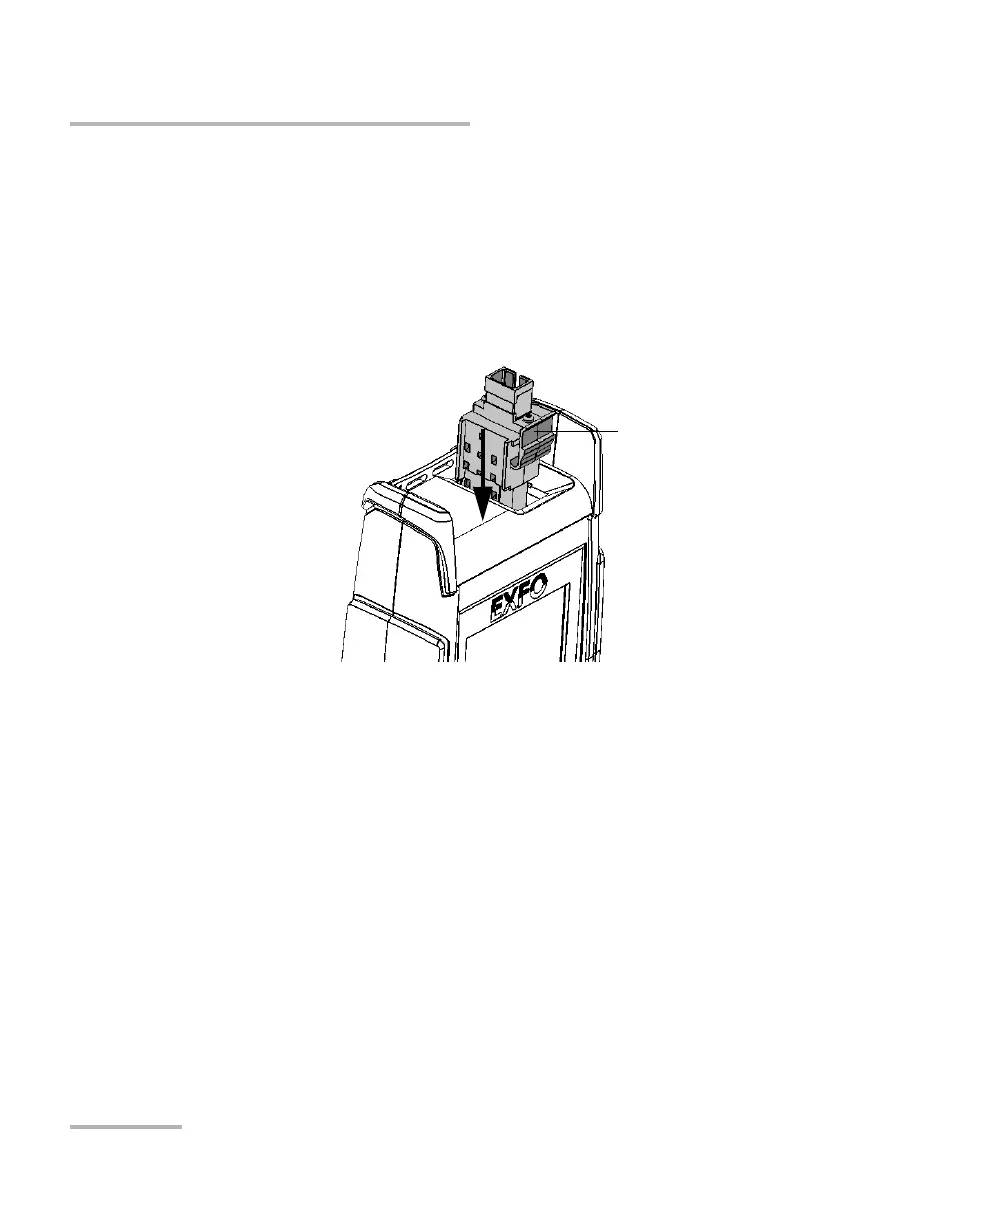
4. Slide the Click-Out connector into the unit until it clicks into place.
There should be no gap between the edges of the Click-Out connector
and its bay when it is inserted properly.
5. Inspect and clean the optical port if necessary.
6. Turn on the unit.
7. Perform an optical output verification to ensure that the new Click-Out
connector is installed properly and that the unit takes into account the
right connector type (see Verifying the Optical Output of Your Unit on
page 187).
Note: If the optical output verification detects issues, see the step about how to
clean the internal connector in Determining the Condition of the Click-Out
Optical Connector (Pro Units Only) on page 191.
Your unit is ready to use.
Click-Out connector’s
release tab