Safety Considerations for Installing Switches
Read the information in this chapter thoroughly before you attempt to install or
remove an Extreme Networks switch.
Ensure that proper ESD (electrostatic discharge) controls are in use before switch
maintenance is performed. This includes but is not limited to wrist straps that are
grounded to the switch housing and earth grounds.
Warning
Connect the chassis ground wire before you connect any DC power cables.
Disconnect the ground wire after you disconnect all DC power cables.
Take care to load the equipment rack so that it is not top-heavy. Start installing
equipment at the bottom of the rack and work up.
Do not cover vents that would restrict airow.
Note
See Safety and Regulatory Information on page 113 for additional safety
information.
What You Will Need for the Installation
Ensure that you have followed the guidance in "Preparing to Install," and ensure that
you have the appropriate people and tools on hand.
Installing Extreme Networks switches is easiest when there are two people to
maneuver the switch and attach mounting hardware.
Provide enough space in front of and behind the switch so that you can service it easily.
Allow a minimum of 122 cm (48 in) in front of the rack and 76 cm (30 in) behind the
rack.
If your switch has internal power supplies, make sure they have the same airow
direction as the fans in the switch.
Check
Quick Reference Guide
for your switch model to see what hardware is provided
in the switch packaging. Most Extreme Networks switches come with the following
hardware:
• Two rack mounting brackets (ears) adaptable for either a front-mount or mid-mount
installation.
• Two long mounting brackets (rails) or slider kits for mounting in a four-post
installation.
• Screws for attaching mounting hardware to the switch housing.
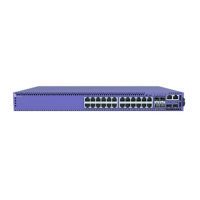
Safety Considerations for Installing Switches Installing Your Switch
74 ExtremeSwitching 5420 Series Hardware Installation Guide
 Loading...

