You need the following additional tools and equipment. These are not provided with
your switch.
• Rack mounting screws: eight for a four-post installation; four for other installations.
The size of the screws will vary based on the rack system you are using.
• Screwdriver for securing the rack mounting screws.
• #2 Phillips screwdriver to attach bracket screws that are provided with the switch.
Use a magnetic screwdriver.
• AC power cord. For switches with removable AC power supplies, a separate
power cord is needed for each installed power supply. The cord must meet the
requirements listed in Power Cord Requirements for AC-Powered Switches and AC
Power Supplies on page 110.
•
ESD-preventive wrist strap for installing optional ports at the back of the switch.
Attach the Switch to a Rack or Cabinet
To attach a switch to a four-post rack or a cabinet, follow these steps.
Take care to load the rack so that it is not top-heavy. Start installing equipment at the
bottom and work up.
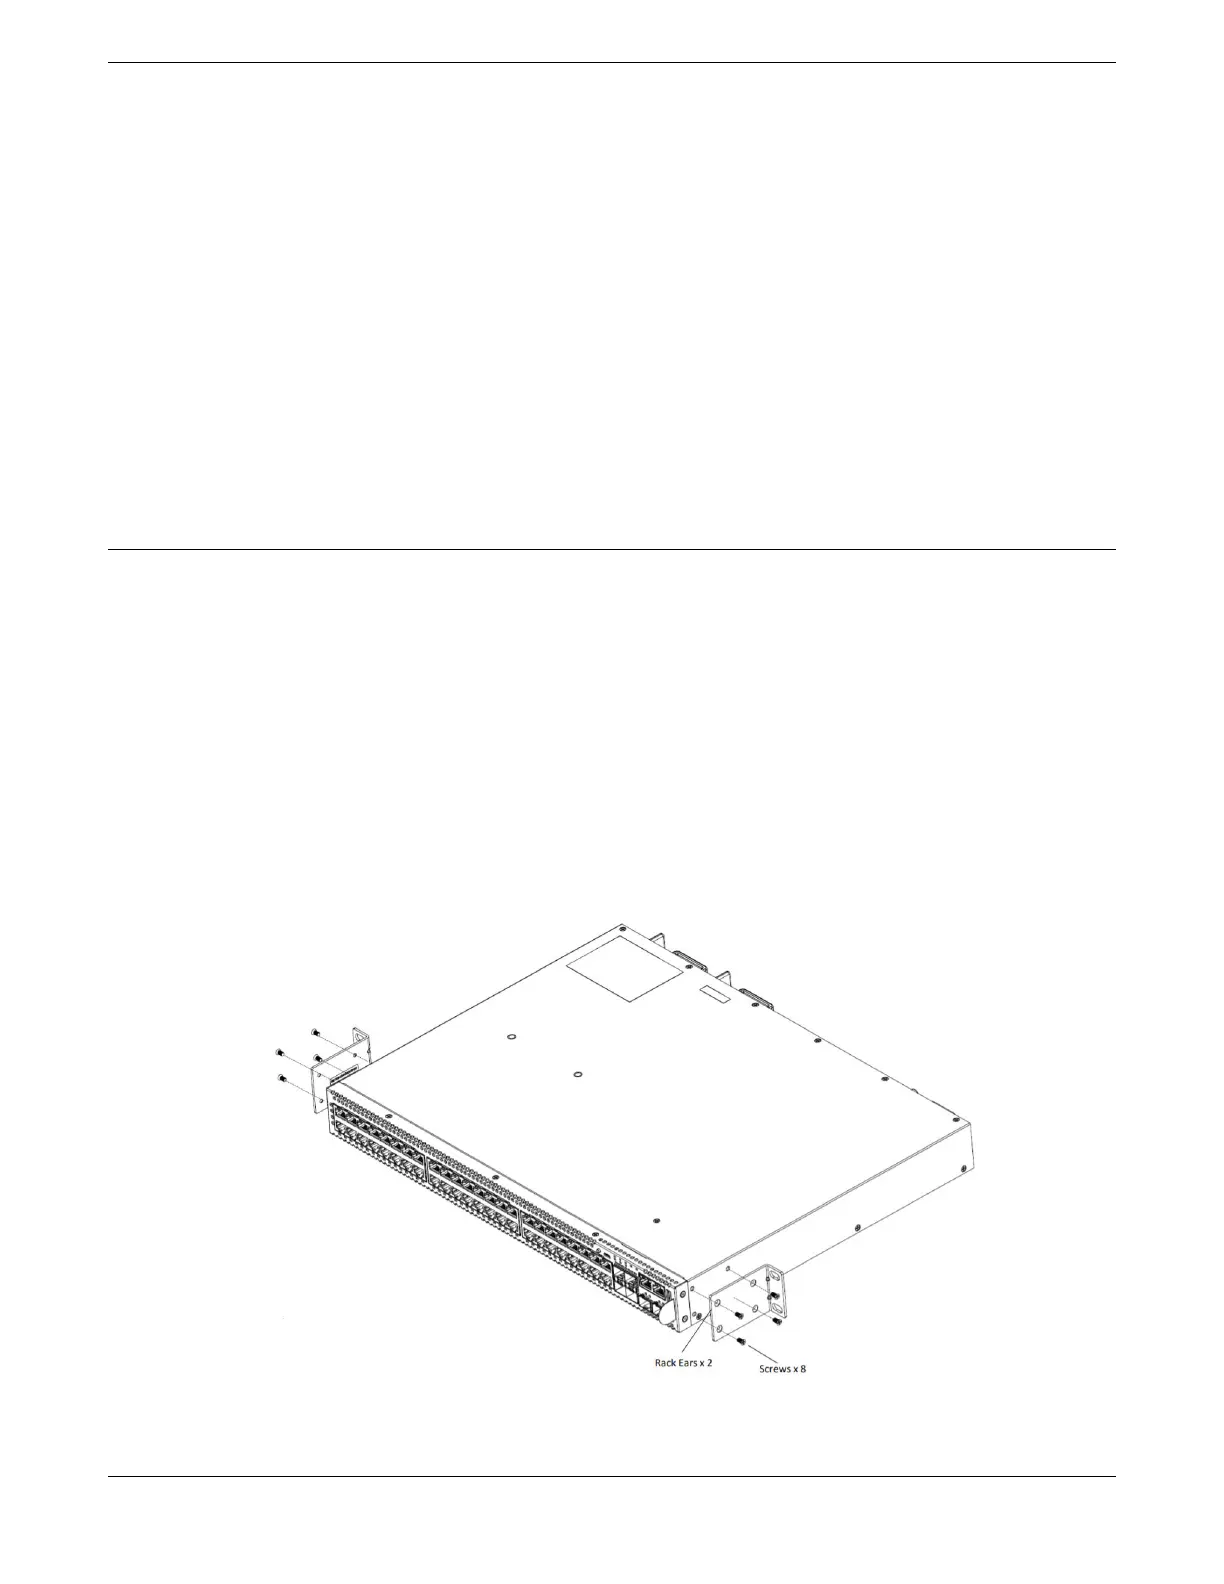
1. On one side of the switch, set a mounting bracket against the switch housing.
Set the ange even with the front panel of the switch – or, if you are mid-mounting
the switch, set the ange toward the back of the switch.
The following gures illustrate how to attach the brackets for two common
mounting options.
• Figure 43 shows a mid-mount conguration using a short mounting bracket.
• Figure 44 shows a front-mount conguration using a short mounting bracket.
Figure 43: Mid-Mount: Attaching Short Mounting Brackets
Installing Your Switch Attach the Switch to a Rack or Cabinet
ExtremeSwitching 5420 Series Hardware Installation Guide 75
 Loading...

