Menu System System Operation
FCP-75 Manual — P/N:LS10147-003FK-E:A 3/17/2021 101
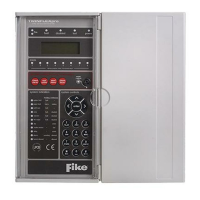
10.3 Menu System
The Control Panel is easy to operate from the Main Menu. To view the Main Menu, press ENTER or press the right arrow key on the control
panel or remote annunciator. The Main Menu will appear as shown in Section 10.3.1. Select the desired option and enter your Access Code
if prompted.
The Control Panel supports up to 20 Access Codes. The profile for each Access Code (or user) can be modified through the programming
Menu option (see Section 6.2.5 for Access Code programming).
10.3.1 Main Menu Overview
The chart below is a brief overview of the Main Menu. These options are described in greater detail throughout this section of the manual.
10.3.2 Using the Menus
10.4 Basic Operation
10.4.1 Setting Time and Date
1. Select 4 for Set Date & Time.
2. Make changes in the fields on the screen. Use right arrow to move through the fields. Use the up or down arrow key to select options in
the fields.
3. When the date and time are correct, press ENTER.
10.4.2 Disable / Enable a Point
1. Select 2 for Point Functions.
2. Select 1 for Disable/Enable Point.
Disable / Enable NACs by Template
1. Press 1 for Disable NACs by Template, press 2 to Enable NACs by Template.
2. Use the up or down arrow key to move through the list of templates. Press ENTER to select the current template.
Disable / Enable NACs by Group
1. Press 3 to Disable NACs by Group, or press 4 to Enable NACs by Group.
2. Use the up or down arrow key to move through the list of groups. Press ENTER to select the group highlighted.
Disable / Enable Zone Points
1. Press 5 to Disable Zone Points, or press 6 to Enable Zone Points.
2. Use the up or down arrow key to move through the list of zones. Press ENTER to select the zone highlighted.
Disable / Enable Point
1. Press 7 to Disable /Enable Point.
2. Choose Module.
3. Use the up or down arrow key to choose Point and press ENTER.
4. Press the right arrow to disable or enable Point.
Inhibit Output Group
Inhibiting an Output Group prevents the group from being used by System Mapping. While inhibited, no event in the system can activate the
Output Group.
1. Press 8 to inhibit the Output Group (OPG).
2. Use the up or down arrow key to select the group to be inhibited.
3. Press the right arrow to inhibit the group.
Main Menu Options Description
1- System Tests Access to Fire Drill, Indicator Test, Walk Tests, Communicator Test, Clear History Buffer, Manual AlarmNet
Registration and Manual Communicator Reset.
2- Point Functions From here you can enable / disable points.
3- Event History Display event history on the LCD. See Section 10.4.4 for more information.
4- Set Time and Date Set time and date for the system.
5- Network Diagnostics Ping Panel and Data Network Status
6- Network Programming Access Learn Network, Edit Network Names, Edit Panel ID, Computer Access, Access Codes, Communicator
Options, Sync Network Options.
7- Panel Programming Brings up a set of Menus for programming the panel. These options are described in detail in Section 9.
8- System Information Menus to view information about the panel such as model, ID, serial number, revision, send or receive
firmware updates and feature registration activation.
To move through the Menus:
Use up and down arrows to move through the options in a Menu. Use the left arrow to move to a
previous Menu.
To select an option:
Enter the number of the option, OR press ENTER if the option appears at the top of the Menu (=
symbol displays after the option number in this case).