150718 PL YFLY rev A_Frame | Aug us t 7, 20 15 5:0 6 P M
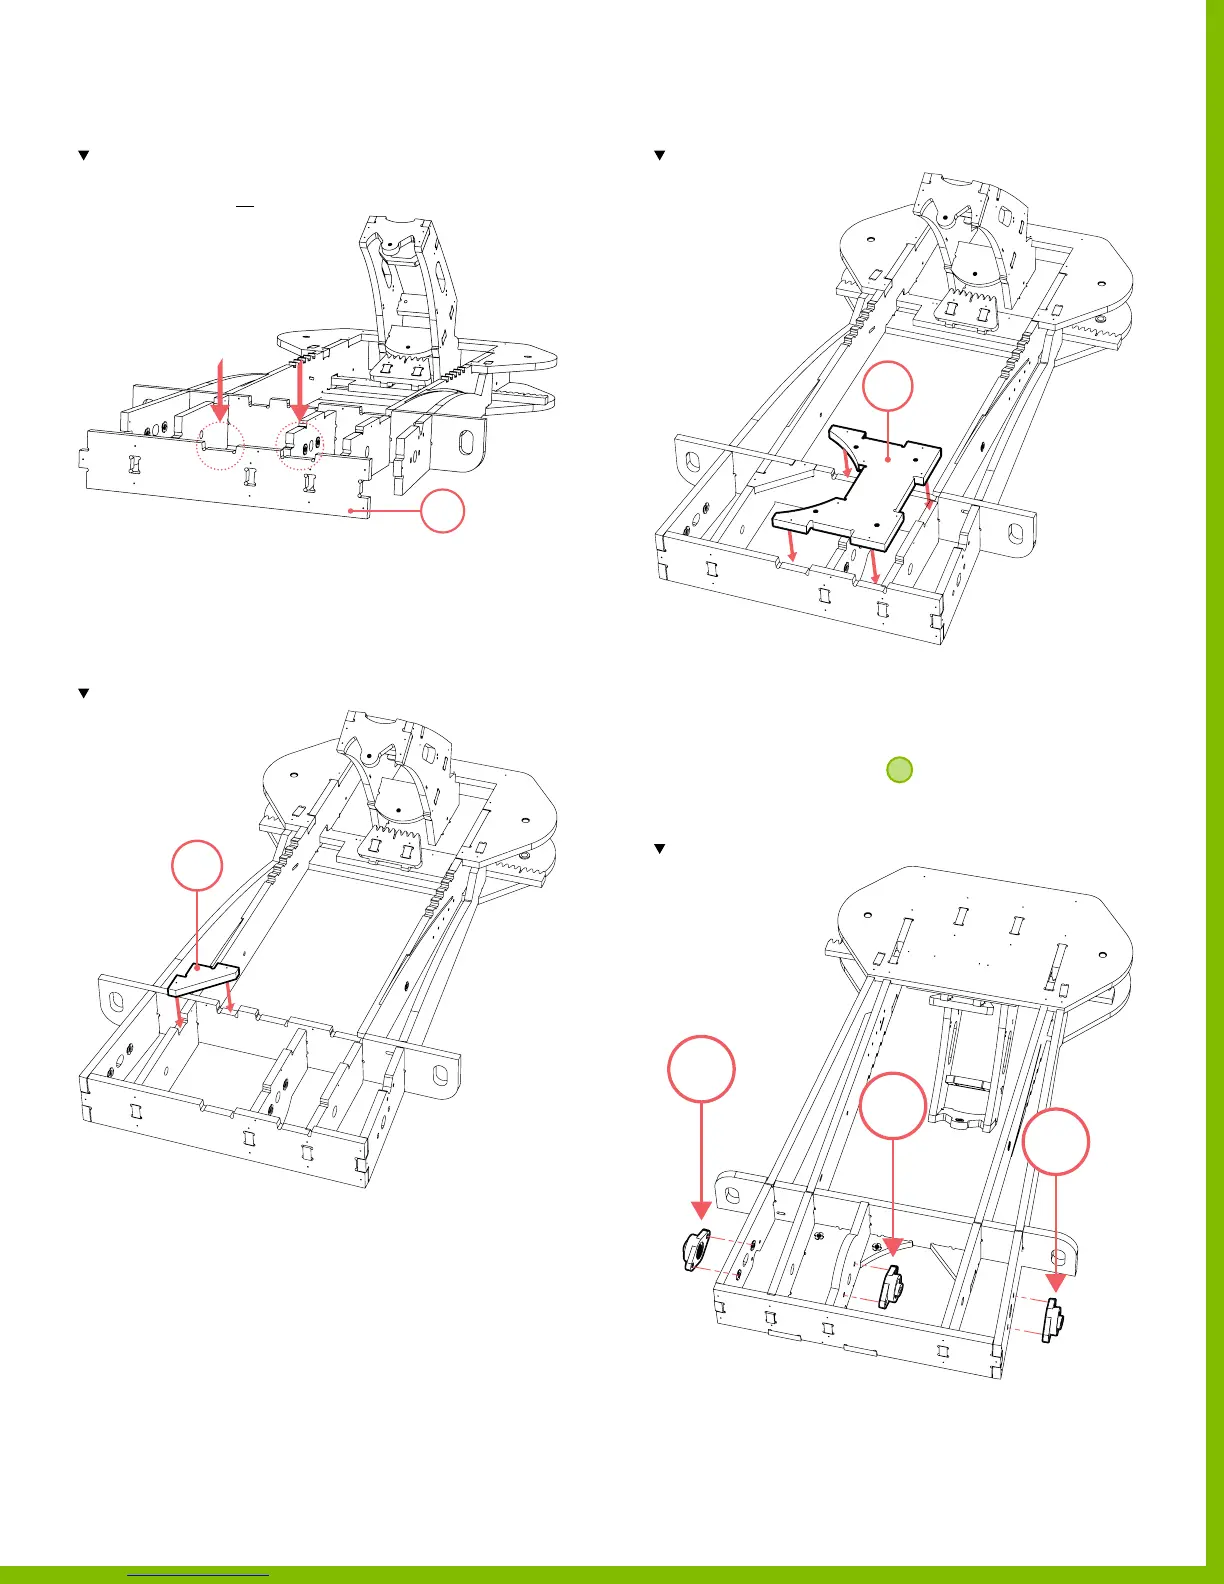
30. Using a mallet, tap part 48 into the 5 connection tabs.
Note the orientation and position of cut-out tabs, it should face upward.
To ensure alignment of all 5 tab connections; prior to using a mallet, tack 1 corner of
part 48 with a screw that is not tightened down all the way.
31. Secure part 48 to the assembly using screws on the
rear face, left and right side faces.
‒ Use 12 screws.
‒ Total of 12 locations.
32. Using a mallet, tap part 52 into place.
Note the orientation and position of part 52.
33. Secure part 52 using screws.
‒ Use 2 screws.
‒ Total of 2 locations.
34. Using a mallet, tap part 49 into place.
Note the orientation and position of part 49.
35. Secure part 49 using screws.
‒ Use 8 screws.
‒ Total of 8 locations.
36. Flip assembly over allowing
2
to hang o table or
saw horses.
37. Install the 3 mounted bearings
Note the orientation, location and position of each mounted bearing.
48
52
49
1
2
3
35
PlyFly Go‑Kart Instruction Guide • 2015 Release