8 Installation of the Transducers FLUXUS F808, F809
UMFLUXUS_F808_8091V1-2-1EN, 2019-08-23 83
Quick release clasp
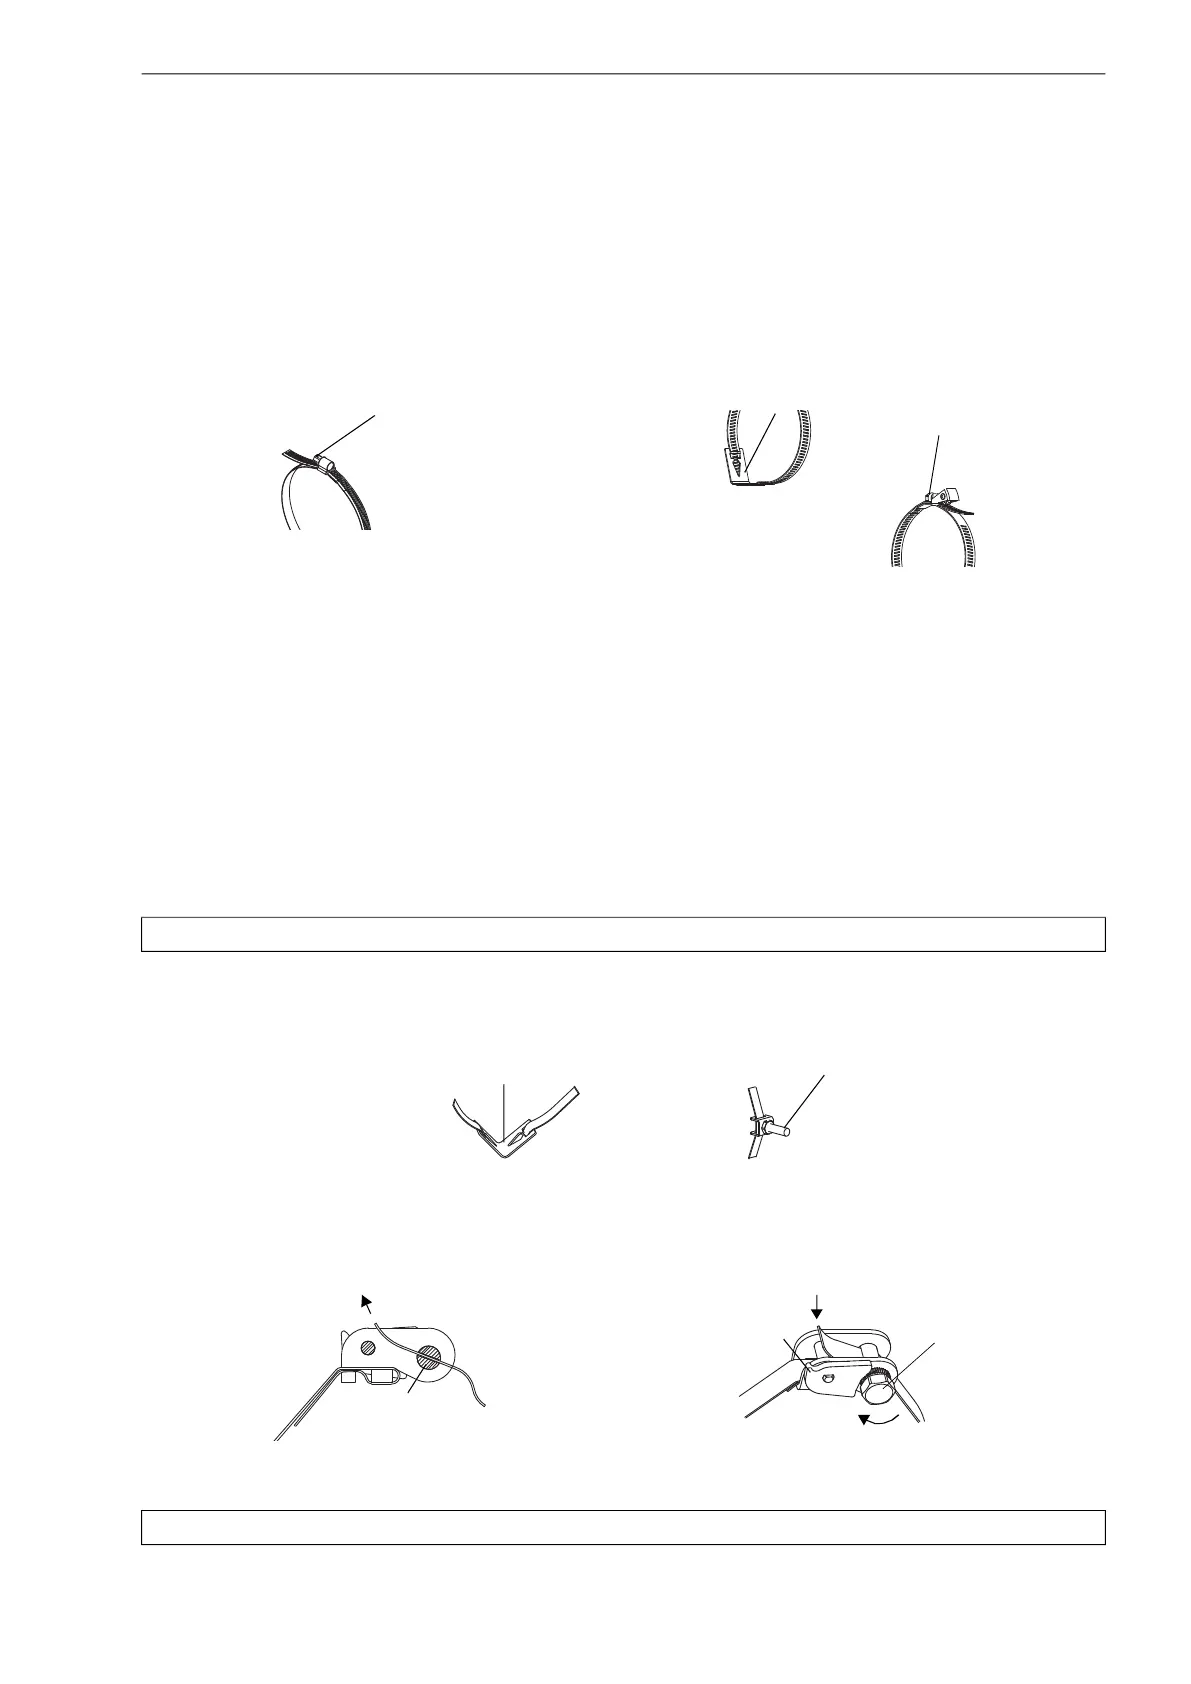
• Insert the tension strap into tension strap clamp 1 and the metal spring (see Fig. 8.20 and Fig. 8.18).
• Place the tension strap around the pipe and insert it into the clasp.
• Place the metal spring on the opposite side of tension strap clamp 1.
• Tighten the tension strap.
• Tighten the screw of the clasp.
• Tighten the nut of tension strap clamp 1, but not too firmly in order not to damage the tension strap (see Fig. 8.18).
Ratchet clasp
• Insert the tension strap into tension strap clamp 1 and the metal spring (see Fig. 8.18 and Fig. 8.21). It is not necessary
to mount the metal spring:
– on steel pipes or
– on pipes with an outer pipe diameter < 80 mm or
– on pipes that are not subjected to significant temperature fluctuations.
• Position the clasp, the metal spring (if necessary) and tension strap clamp 1 on the pipe. Mount the metal spring on the
opposite side of the tension strap clamp.
• Place the tension strap around the pipe and insert it into part 3 of the clasp (see Fig. 8.22).
• Tighten the tension strap.
• Cut off the protruding tension strap (see Fig. 8.22).
• Tighten the screw of the clasp.
• Tighten the nut of tension strap clamp 1, but not too firmly in order not to damage the tension strap (see Fig. 8.18).
Fig. 8.19: Tension strap with band clamp clasp Fig. 8.20: Tension strap with quick release clasp and metal spring
Attention! The edge of the tension strap is very sharp, leading to risk of injury. Debur sharp edges.
Fig. 8.21: Tension strap with metal spring and tension strap clamp
Fig. 8.22: Ratchet clasp with tension strap
Note! To release the screw and the tension strap, press the lever down (see Fig. 8.21).
screw of the clasp
screw of the clasp
metal spring
metal spring
tension strap
3
lever
sense of rotation
cut
screw of the clasp
 Loading...