6 Installation
FLUXUS WD 6.1 Transmitter
29
UMFLUXUS_WDV1-3EN, 2018-07-16
Transmitter with aluminum housing
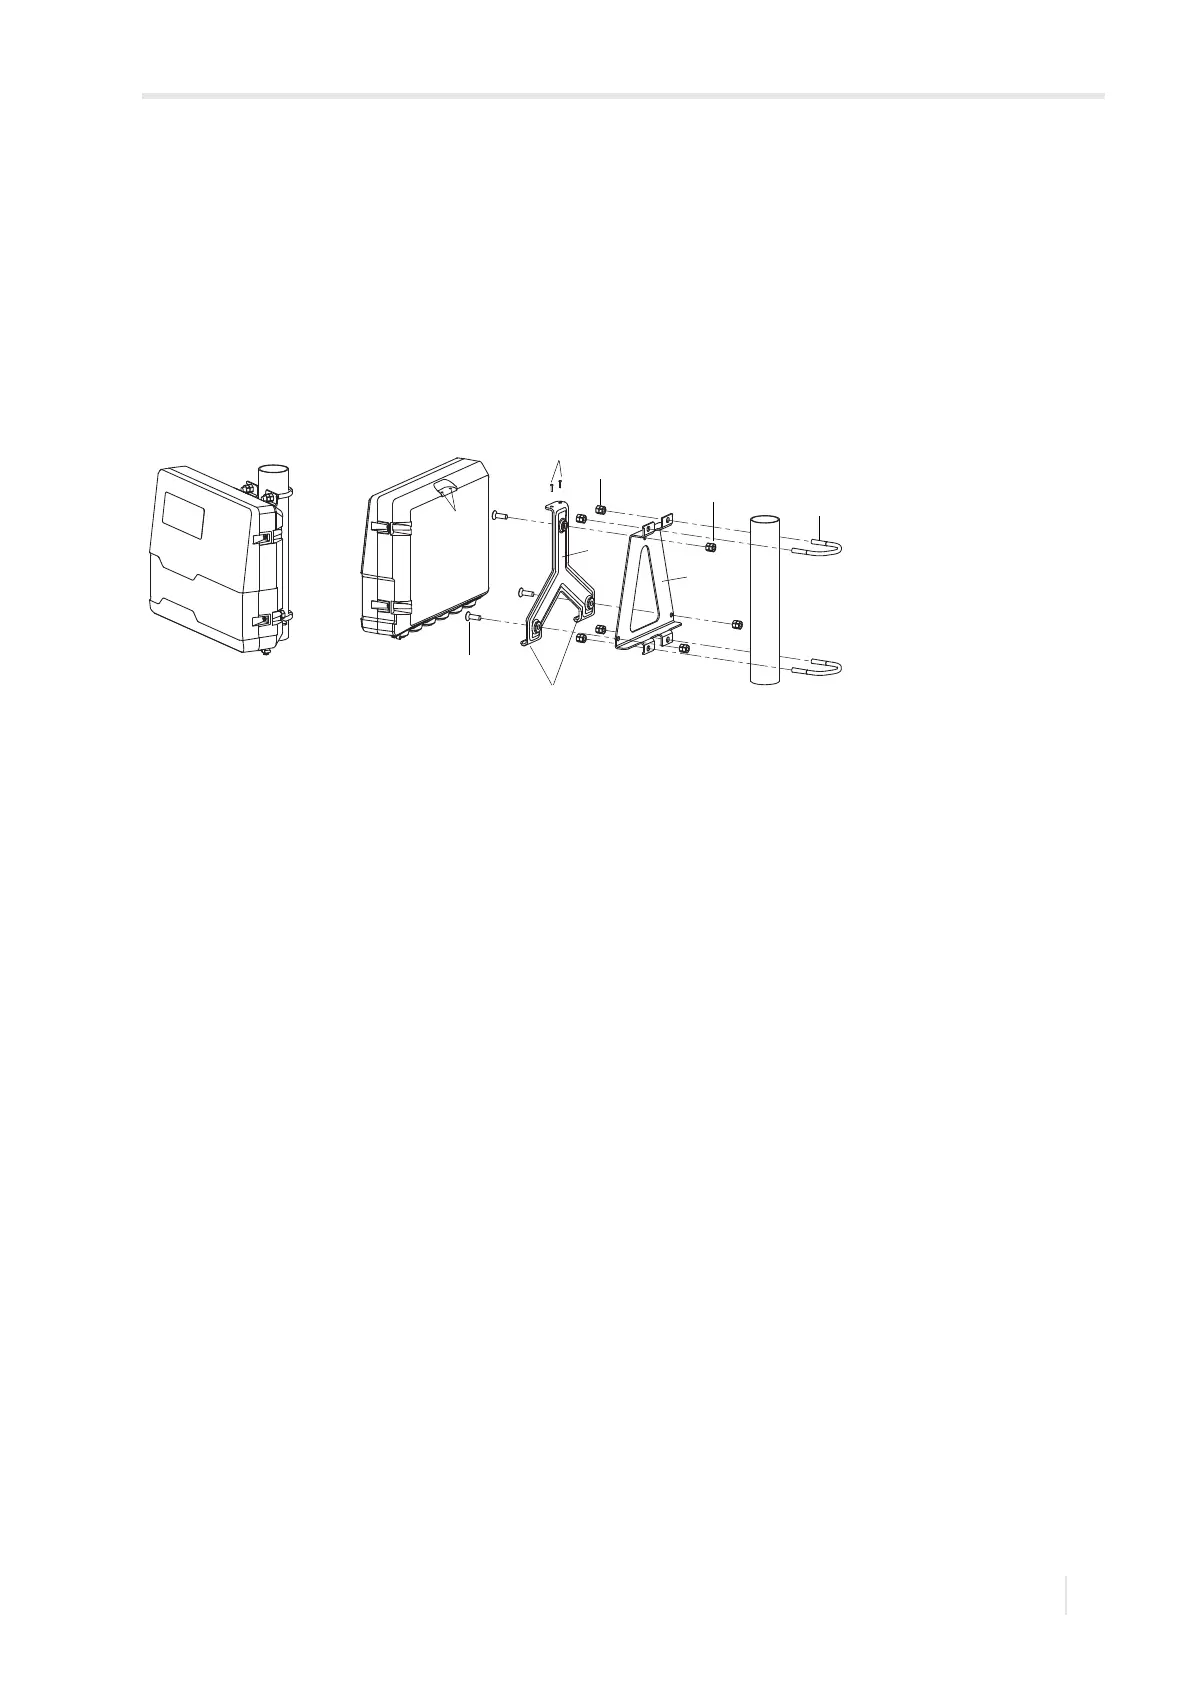
Installation on a 2'' pipe
• Fix the wall mount (1) with 3 countersunk-screws (2) and nuts (3) firmly to the instrument mounting plate (4), see Fig. 6.8.
• Position the instrument mounting plate (4) and the shackles (5) to the pipe.
• Fix the instrument mounting plate with the shackles to the pipe by tightening the nuts (6).
• Attach the transmitter to the lower hooks (7) of the wall mount, see Fig. 6.6.
• Fix the transmitter to wall mount by tightening the 2 screws (8), see Fig. 6.8.
Fig. 6.8: Transmitter with aluminum housing
1 – wall mount
2 – countersunk-head screw
3 – nut of countersunk-head screw
4 – instrument mounting plate
5 – shackle
6 – nut of shackle
7 – hooks
8–screws