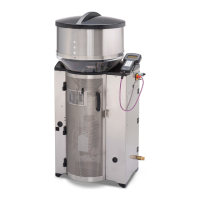
84 Shutdown and recommissioning
1. Start the maximum number of cleaning programs (see Cleaning chapter in the operating
manual for the automatic feeder).
2. Take the cleaning agent lance off the cleaning agent container, flush it out with water and
place it in a bucket full of water
2.1. Navigate via > Diagnostics to switch to the Motors sub-menu.
2.2. Confirm Flushing agent: start? by choosing , to flush remnants of cleaning agent
out of the system.
3. Remove the cleaning agent lance from the bucket and perform points 2.1 and 2.2 again, to
flush liquids out of the system.
4. Collect the liquid separately and tip the bucket out. Dispose of this as recommended by the
cleaning agent manufacturer.
5. Drain the water from the boiler, solenoid valves and the pressure-reducing valve to prevent
the automatic feeder from being damaged by frost.
NOTICE!
Beware of damage to the automatic feeder.
Frozen water expands and can damage automatic feeder components that contain water, such
as the solenoid valves.
5.1. Close the water tap that supplies water to the automatic feeder.
5.2. De-pressurize the hoses by dispensing water into the mixer beaker.
5.3. Press .
5.4. Confirm Bo. water start? by choosing .
5.5. Pour the liquid from the mixer into a container or the drain.
DANGER!
Fatal electric shock
The electrical components of the automatic feeder are live.
► Always switch off the automatic feeder firstly with the Main switch and disconnect the power
plug before continuing.
6. Switch the automatic feeder off using the Main switch and disconnect the mains plug.
6.1. Disconnect the water hose between the solenoid valve for water and the heat ex-
changer.
6.2. Open the vent screw on the cover of the heat exchanger. As soon as air flows in, the
water will drain.
6.3. Let the water drain completely.
6.4. Reattach the water hose and tighten the vent screw.
7. Disconnect the water hose from the water tap that supplies the automatic feeder with water
and from the water connector on the automatic feeder.