GAT Access 6100 Terminal Series
Installation
www.gantner.com
HB_GAT-ACCESS6100--EN_14
25
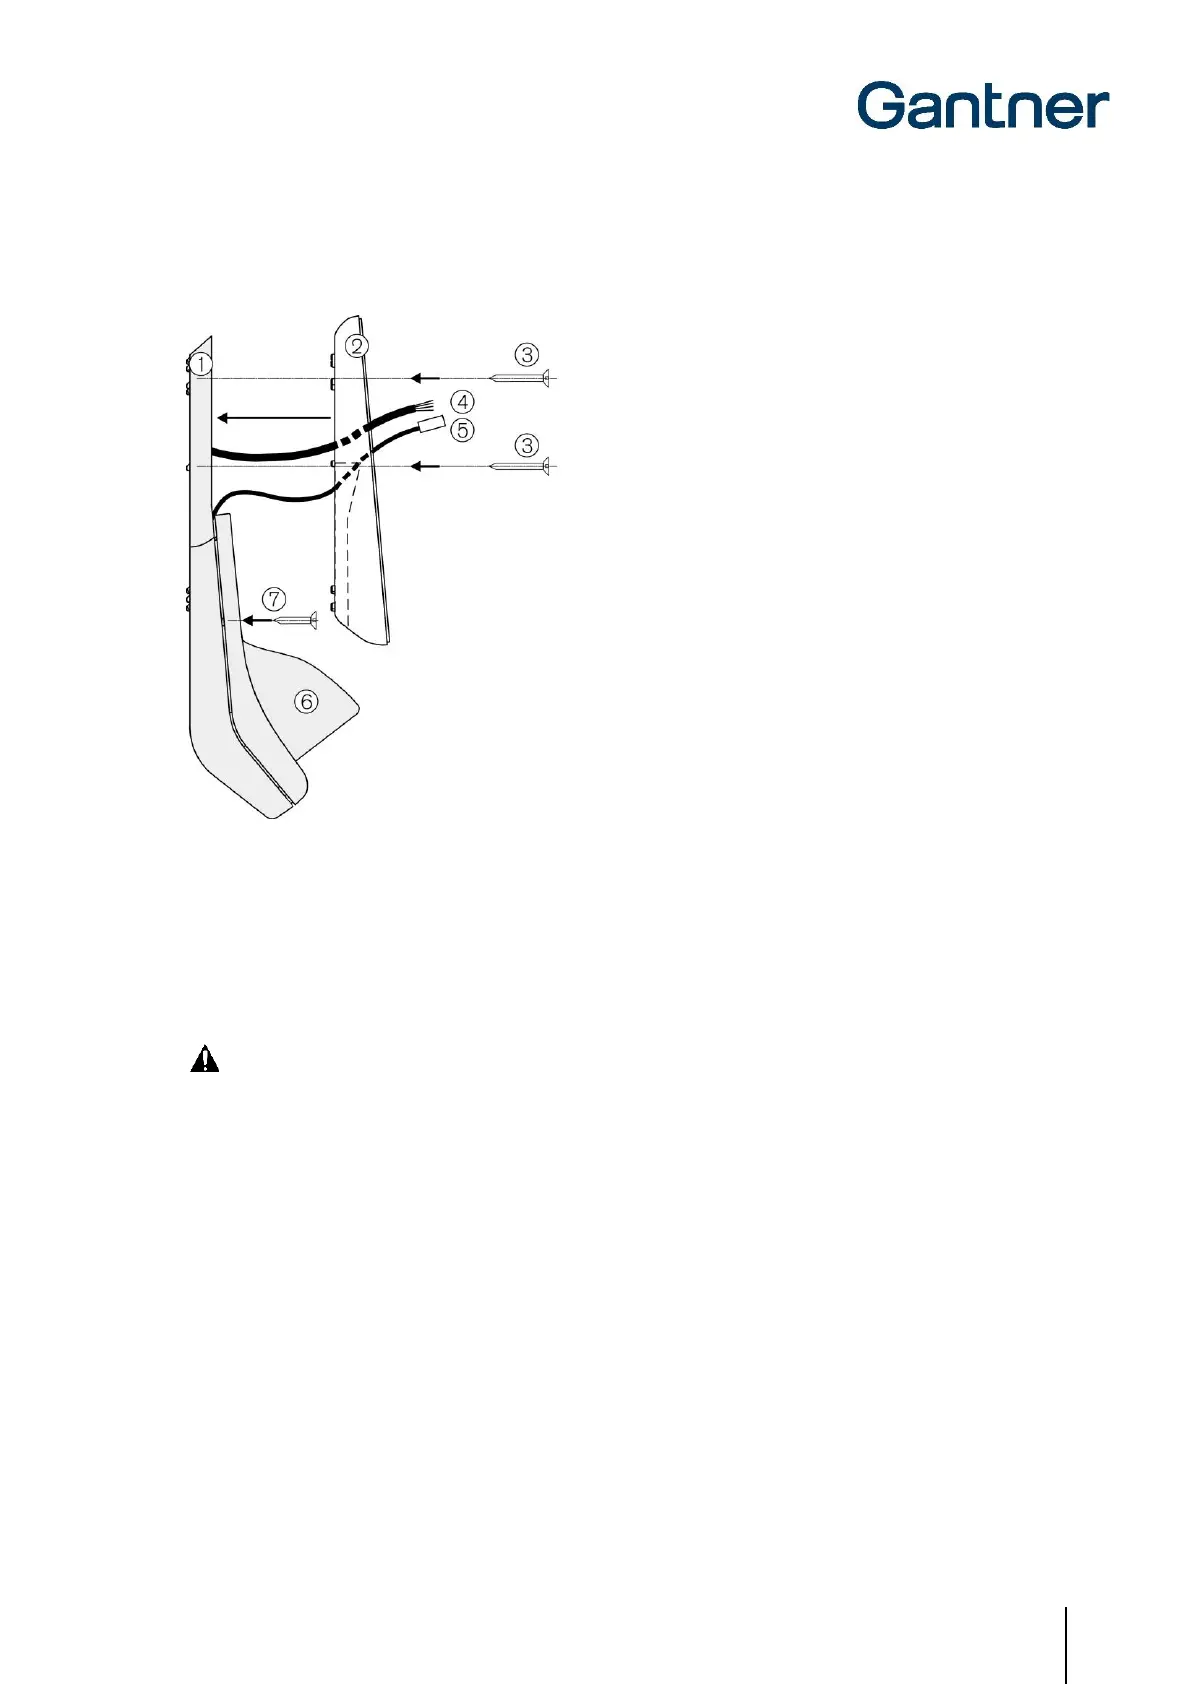
Installing the GAT Access 6100 F Rear Part
1. GAT FR 055
2. Rear part of the GAT Access 6100 F
3. Fastening screws
4. Connection cable
5. GAT FR 055 to GAT Access 6100 F connection cable
6. Weather protection cover (optional)
7. Fastening screws for weather protection cover
Figure 3.9 - Installing the GAT Access 6100 F rear part
Electrical Connection
The connection cables (see Figure 3.9) are connected to the rear part of the GAT Access 6100 F.
CAUTION! The connection of the cabling must always be performed in a powerless state. See chapter "4
ELECTRICAL CONNECTIONS" for more information.
Attaching the GAT Access 6100 F Front Part
1. Check the socket in the device rear part. Any dirt, dust, and moisture must be removed to ensure the secure
connection of the connection cable.
NOTE!
- Only clean the device in a powerless state.
- Do not use any aggressive detergents for cleaning.
- Do not damage the socket contacts.
2. Plug the connection cable of the GAT FR 055 (1) into the front part of the GAT Access 6100 F.
3. Ensure that the orientation is correct and plug the connection cable (2) into the socket on the device rear part.
4. Clip the top of the device front part into the device rear part.
5. Push the device front part forwards (3) until it clicks into place on the rear part.
 Loading...