Field replaceable units: Replace display assembly parts
2000966-542D Dash 3000/4000/5000 7-29
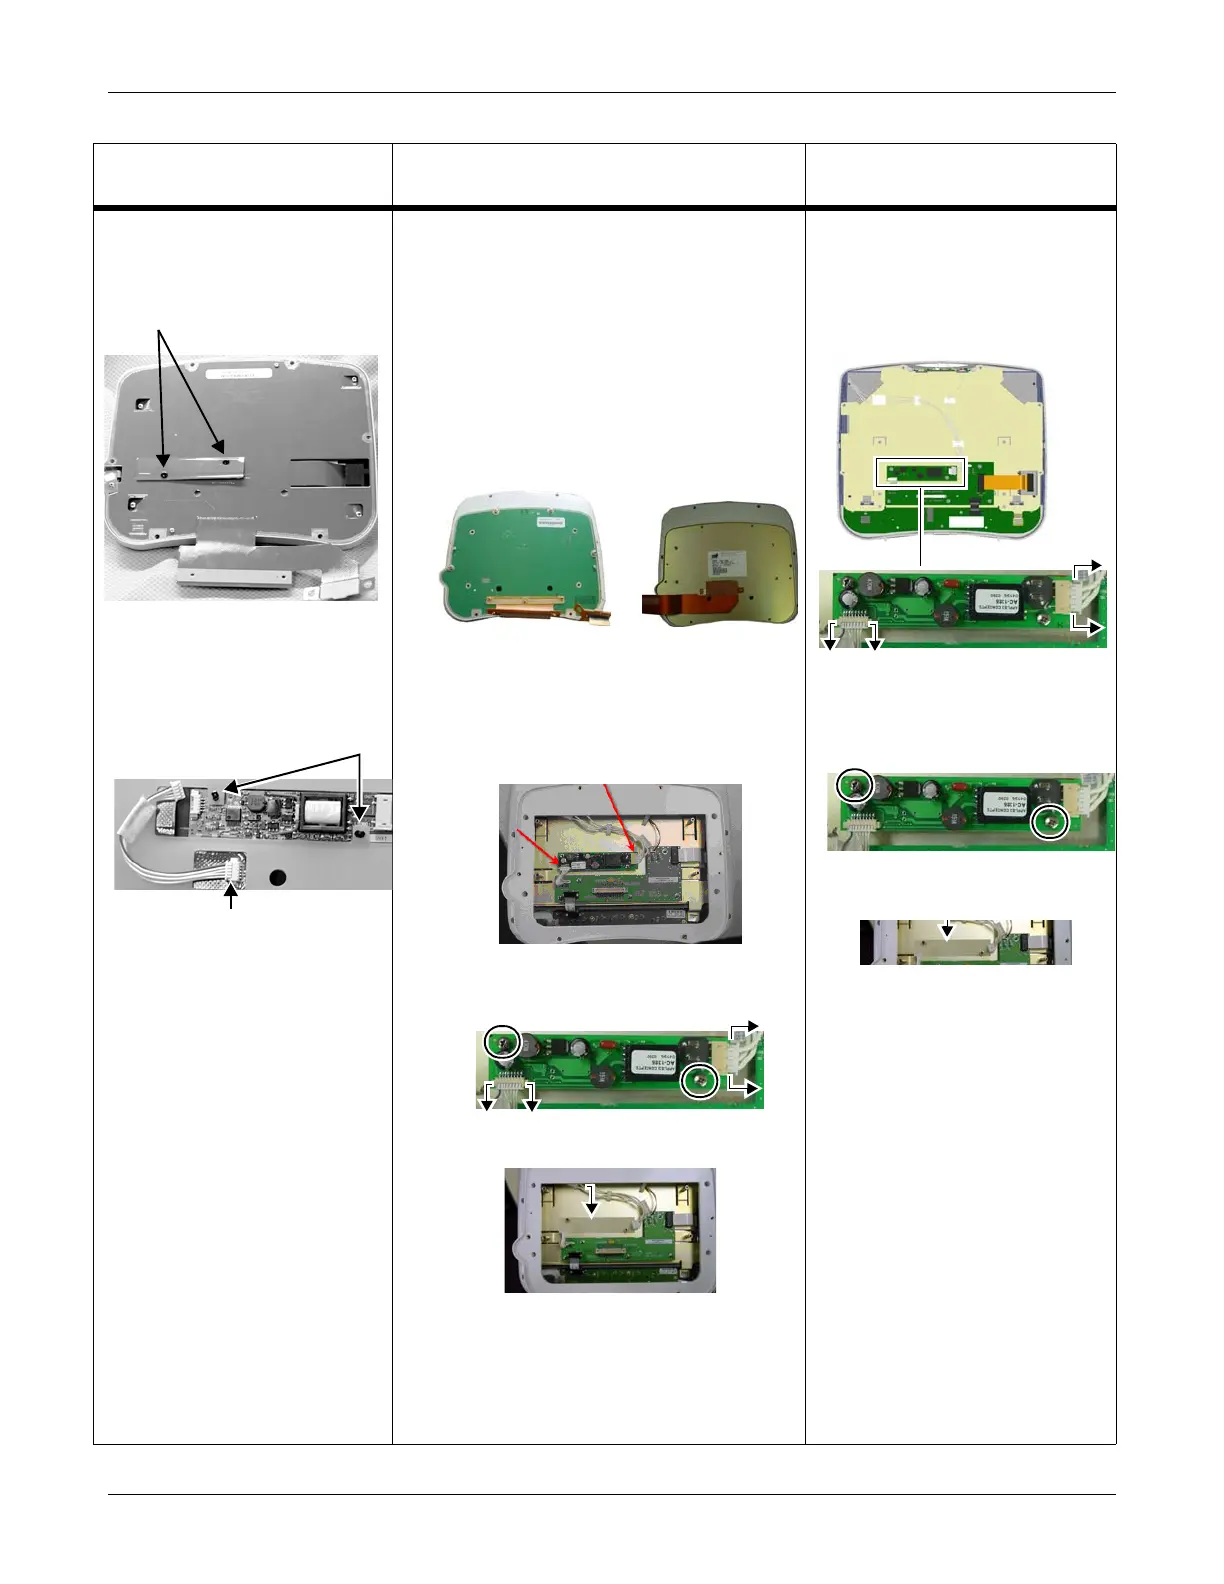
Dash 3000 patient monitor
with display shield flex circuit
Dash 4000 patient monitor Dash 5000 patient monitor
1. Flip over the display shield flex
circuit. Remove the male end of the
two snap rivets.
2. Flip over the display shield flex
circuit. Disconnect the display
shield cable from the backlight
inverter PCB.
3. Use a screw driver to remove the
female end of the two snap rivets.
Do not re-use these rivets.
4. Replace the backlight inverter PCB.
5. Reassemble the display assembly
in reverse order.
6. Complete the procedures in
“Recommended checkout” on
page 7-52.
1. Open the display assembly. Refer to page 7-27.
NOTE
If the display backplate is a PCB with an
integrated flex assembly, refer to the section
Replacing the Backlight Inverter PCB in the
Dash Service Manual shipped with the product
for information on how to replace the inverter.
Dispose of the backplate and mylar insulator
strip included in the new inverter replacement
kit.
2. If the backplate is metal, remove and dispose of the
backplate. Retain the two screws.
3. Disconnect the cables from the backlight inverter
PCB connectors.
4. Remove and retain the two screws that fasten the
backlight inverter PCB to the display mounting
plate.
5. Install the mylar insulator over the inverter
standoffs.
6. Install the new inverter using the two retained
screws, and reconnect the inverter cables.
7. Install the new metal backplate using the two
retained screws.
8. Reassemble the display assembly in reverse order.
9. Complete “Recommended checkout” on page 7-52.
1. Open the display assembly. Refer to
page 7-27.
2. Disconnect the cable connectors
from the backlight inverter PCB
connectors.
3. Remove and retain the two screws
that fasten the backlight inverter PCB
to the display mounting sub-plate.
4. Install the mylar insulator over the
inverter standoffs.
5. Install the new inverter using the two
retained screws, and reconnect the
inverter cables.
6. Reassemble the display assembly in
reverse order.
7. Complete “Recommended checkout”
on page 7-52.
plastic snap rivets (male end)
500A
display shield cable
plastic snap rivets (female end)
503A
896A, 879A
Backplate, PCB with
integrated flex assy
Backplate, metal