Configuration: Service Mode settings
4-14 Dash 3000/4000/5000 2000966-542D
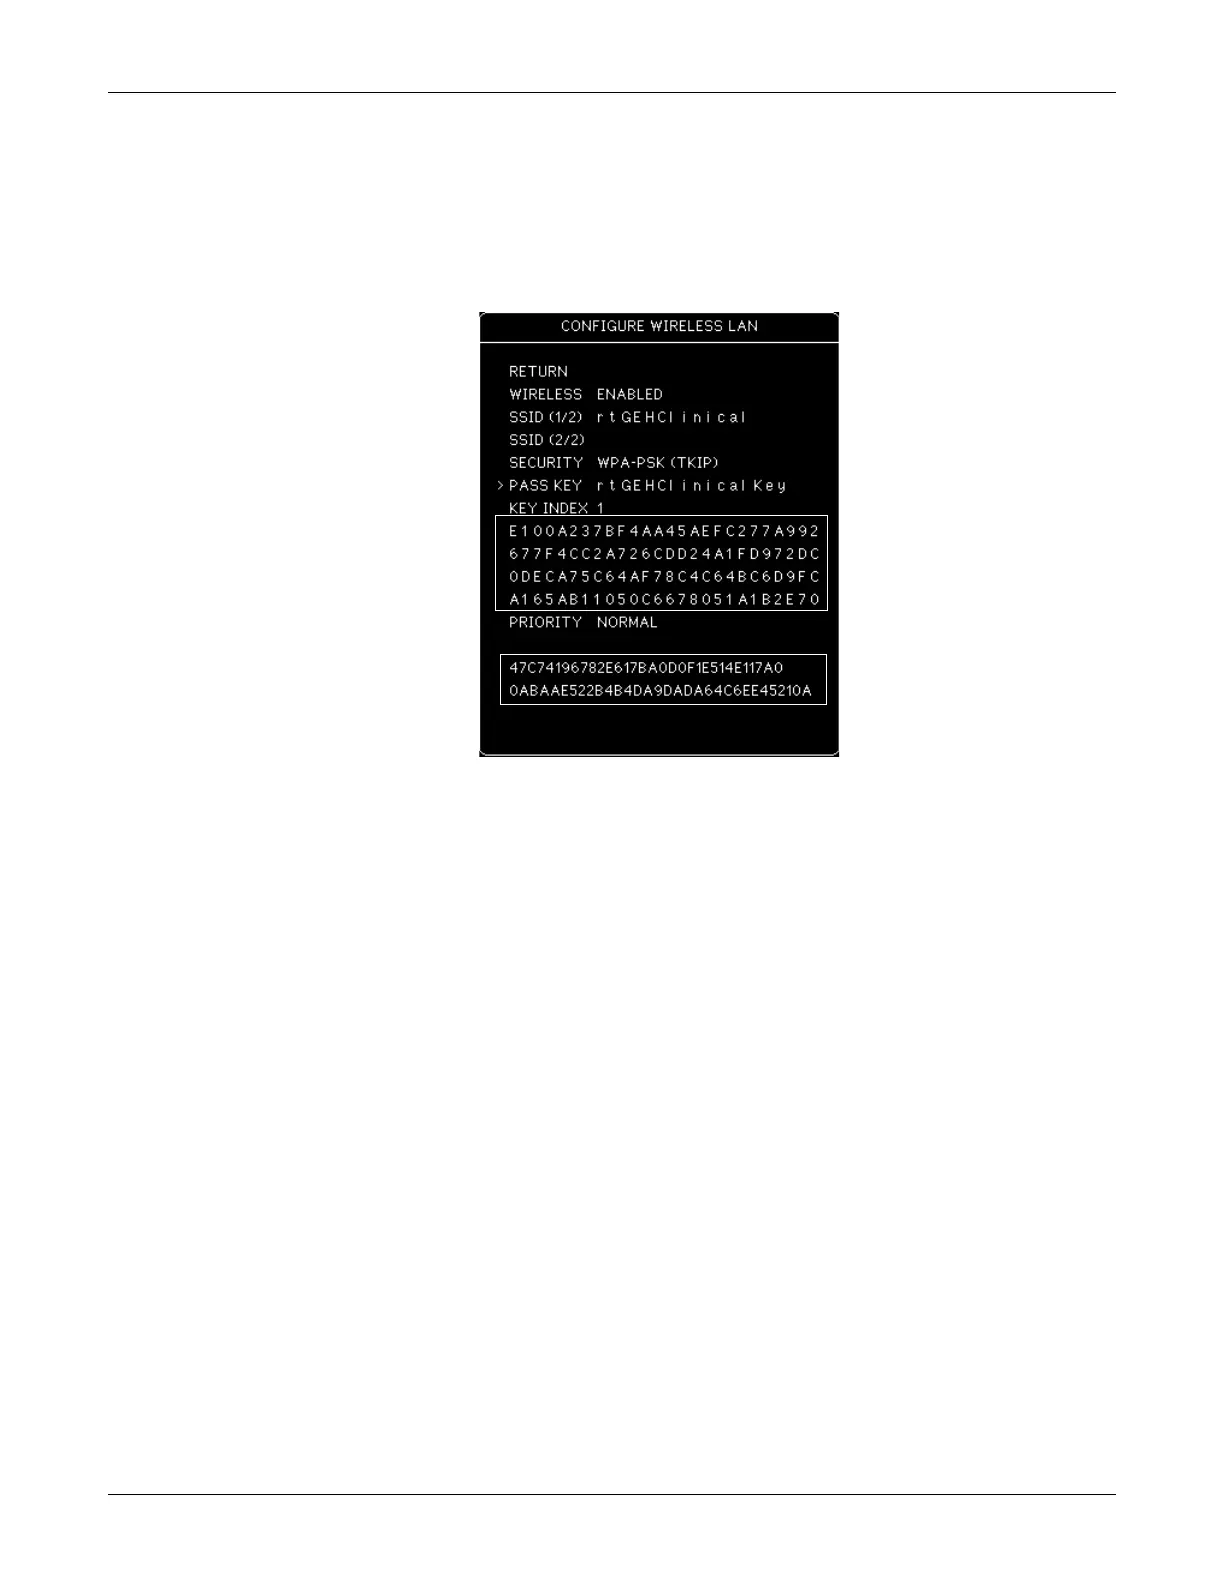
Confirm or configure wireless LAN
Confirm or configure the optional wireless LAN as follows.
1. Enter Service Mode (See “Service Mode settings” on page 4-11) and
select MONITOR SETTINGS > CONFIGURE WIRELESS LAN.
2. Select WIRELESS and set to ENABLED.
3. Select SSID (1/2) and enter the SSID. If you change the SSID for
TKIP or AES-CCMP, you must enter the PASS KEY (even if it didn’t
change) to recalculate the PMK.
4. For all standard installations, the SSID (1/2) should be
rtGEHClinical.
5. Select and enter SECURITY.
6. If WEP, enter PASS KEY or hex key and KEY INDEX to match the
configuration on the access point. (See the definitions table on the
following page.)
If TKIP or AES-CCMP, enter PASS KEY. PMK is calculated and
displayed below the hex keys. Hex keys display although not used by
TKIP or AES-CCMP.
NOTE
Entering a WEP hex key clears out the pass key.
The Hospital IT or a group that is responsible for the hospital's
wireless network can obtain the SSID and security settings
(type, pass key and key index) for the 802.11a/b/g wireless Dash.
PMK calculation,
if TKIP
943A
hex key index #1
hex key index #2
hex key index #3
hex key index #4