Functional and electrical safety checks: Functional Checkout procedures
2000966-542D Dash 3000/4000/5000 8-21
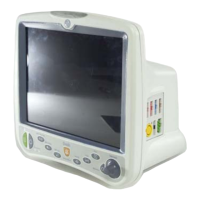
Patient monitor power-up tests
NOTE
When the patient monitor is connected to a docking station, use the
docking station’s power cable instead of the patient monitor’s power
cable.
1. Remove the batteries and unplug the patient monitor (or the docking
station) from AC power to turn the patient monitor off.
2. Restore the batteries to the patient monitor and plug the patient
monitor (or the docking station) into AC power to turn the patient
monitor on.
3. Verify all of the front panel indicators illuminate on power up.
4. Verify the AC indicator on the patient monitor stays illuminated.
NOTE
If the AC indicator stays on, but the screen is blank, the patient
monitor is likely in “standby mode” (battery charging). Press the
POWER button to enter the normal mode.
If the AC indicator is on, continue with the tests.
Optional: If either of the CHARGING STATUS indicators is
yellow, wait for the battery(ies) to fully charge and the indicators
to illuminate green. The batteries may take up to four hours to
charge.
If the battery “fuel gauge” displays the word “ERROR,” the
battery may be asleep. Refer to “Error messages” on page 6-5.
5. Verify the optional alarm indicator lights both red and amber on
power up.
6. Verify an audio “beep” sounds at the end of boot up.
7. Test all of the front panel keys and the Trim Knob control. Verify
that an audio “beep” sounds after each key press.
8. Optional: Check battery power for both batteries.
Unplug the patient monitor (or the docking station) from AC
power and open the battery door. Verify one LED in the battery
compartment is on (batteries must have more than 10% charge).
Pull that battery out and verify the other LED lights, thus
indicating the unit is powered by the other battery.
Reinstall battery and plug in patient monitor (or the docking
station).
 Loading...


