3-64 L90 LINE CURRENT DIFFERENTIAL SYSTEM – INSTRUCTION MANUAL
CONNECT TO THE L90 CHAPTER 3: INSTALLATION
3
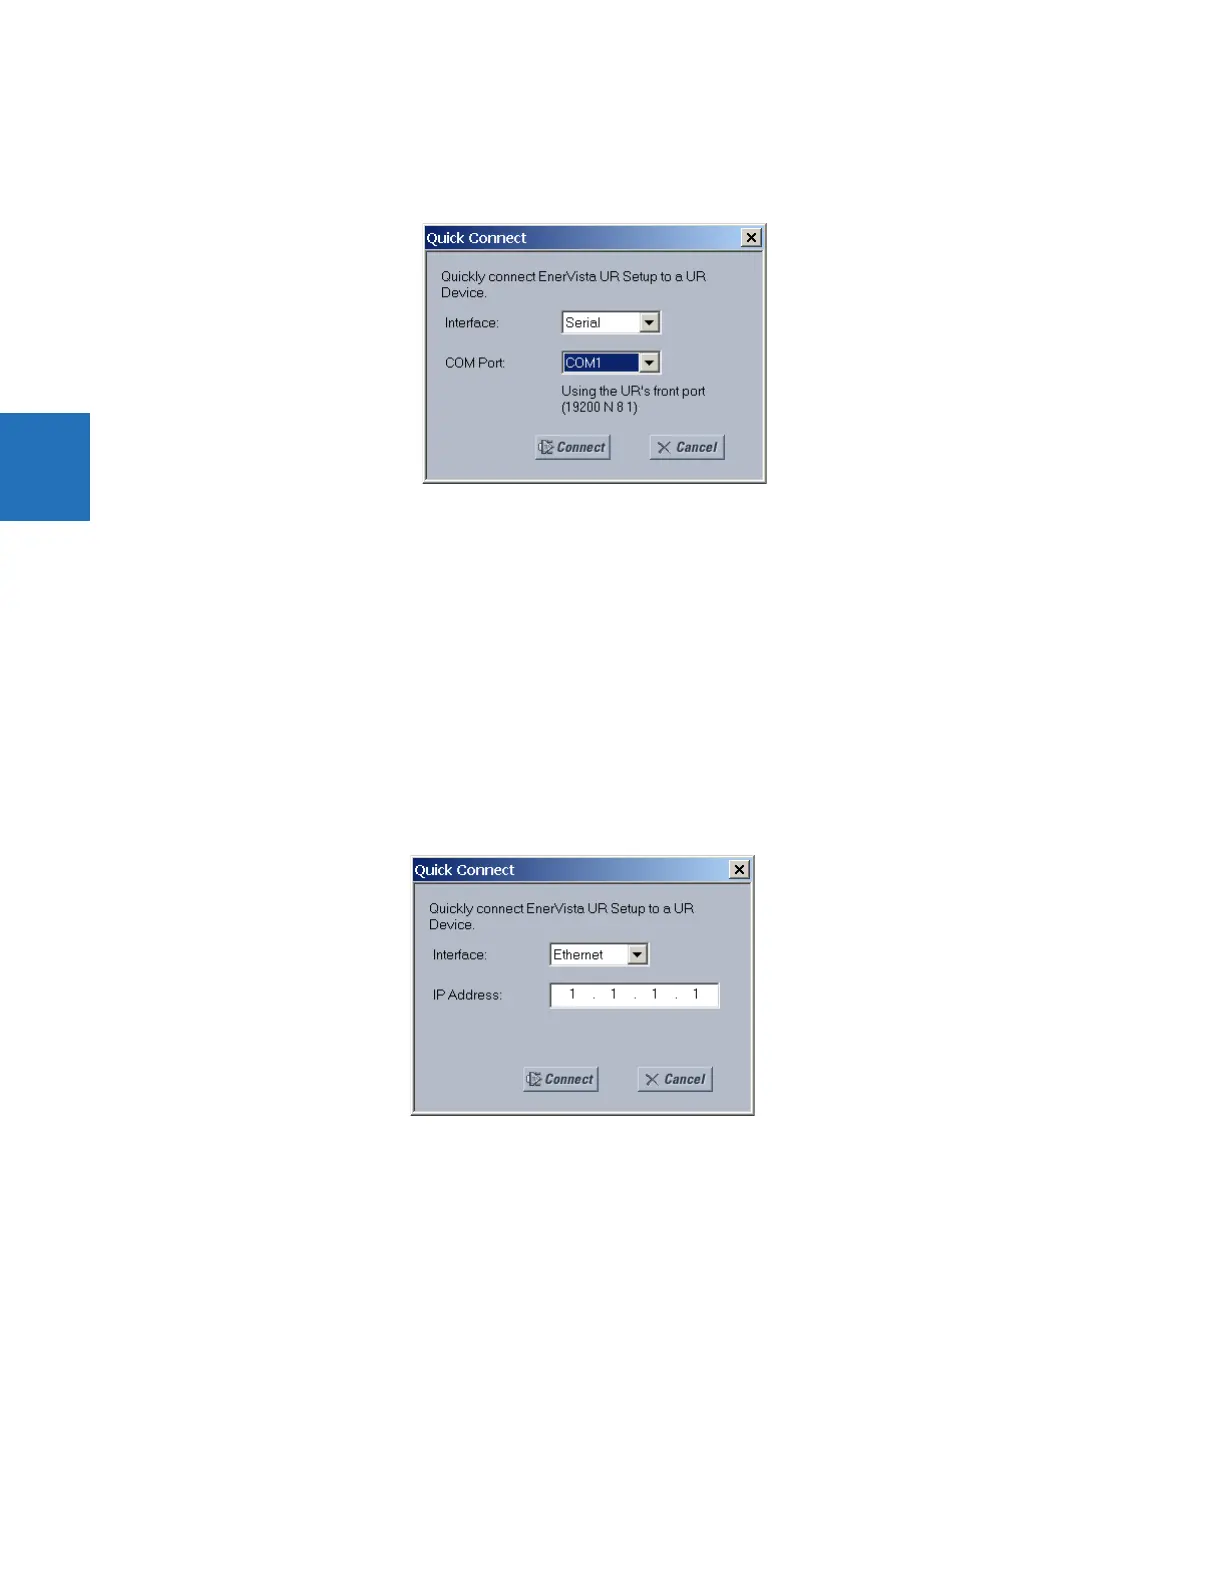
4. Click the Quick Connect button to open the window.
Figure 3-64: Quick Connect window to access a device
5. Select the serial Interface and the communications port (COM Port) from the drop-down lists, then click Connect. The
COM Port is that of the computer.
6. The EnerVista software creates a site named “Quick Connect” with a corresponding device also named “Quick
Connect” and displays them in the Online Window. Expand the sections to view data directly from the UR device. Use
the Device Setup button to change the site name.
Each time that the EnerVista UR Setup software is initialized, click the Quick Connect button to establish direct
communications to the L90. This ensures that configuration of the EnerVista UR Setup software matches the L90 model
number.
3.8.3 Use Quick Connect via a rear Ethernet port
To connect to a UR using an Ethernet cable:
1. In the EnerVista software, click the Quick Connect button. The window opens.
2. Select the Ethernet interface and enter the IP address assigned to the L90, then click the Connect button. The
EnerVista UR Setup software creates a site named “Quick Connect” with a corresponding device also named "Quick
Connect" and displays them in the Online Window.
3. Expand the sections to view data directly from the L90 device. Use the Device Setup button to change the site name.
Each time that the EnerVista software is initialized, click the Quick Connect button to establish direct communications to
the L90. This ensures that configuration of the EnerVista UR Setup software matches the L90 model number.