Docking Cart Setup
11-16 LOGIQ e – Basic Service Manual
5461614-100 English Rev. 6
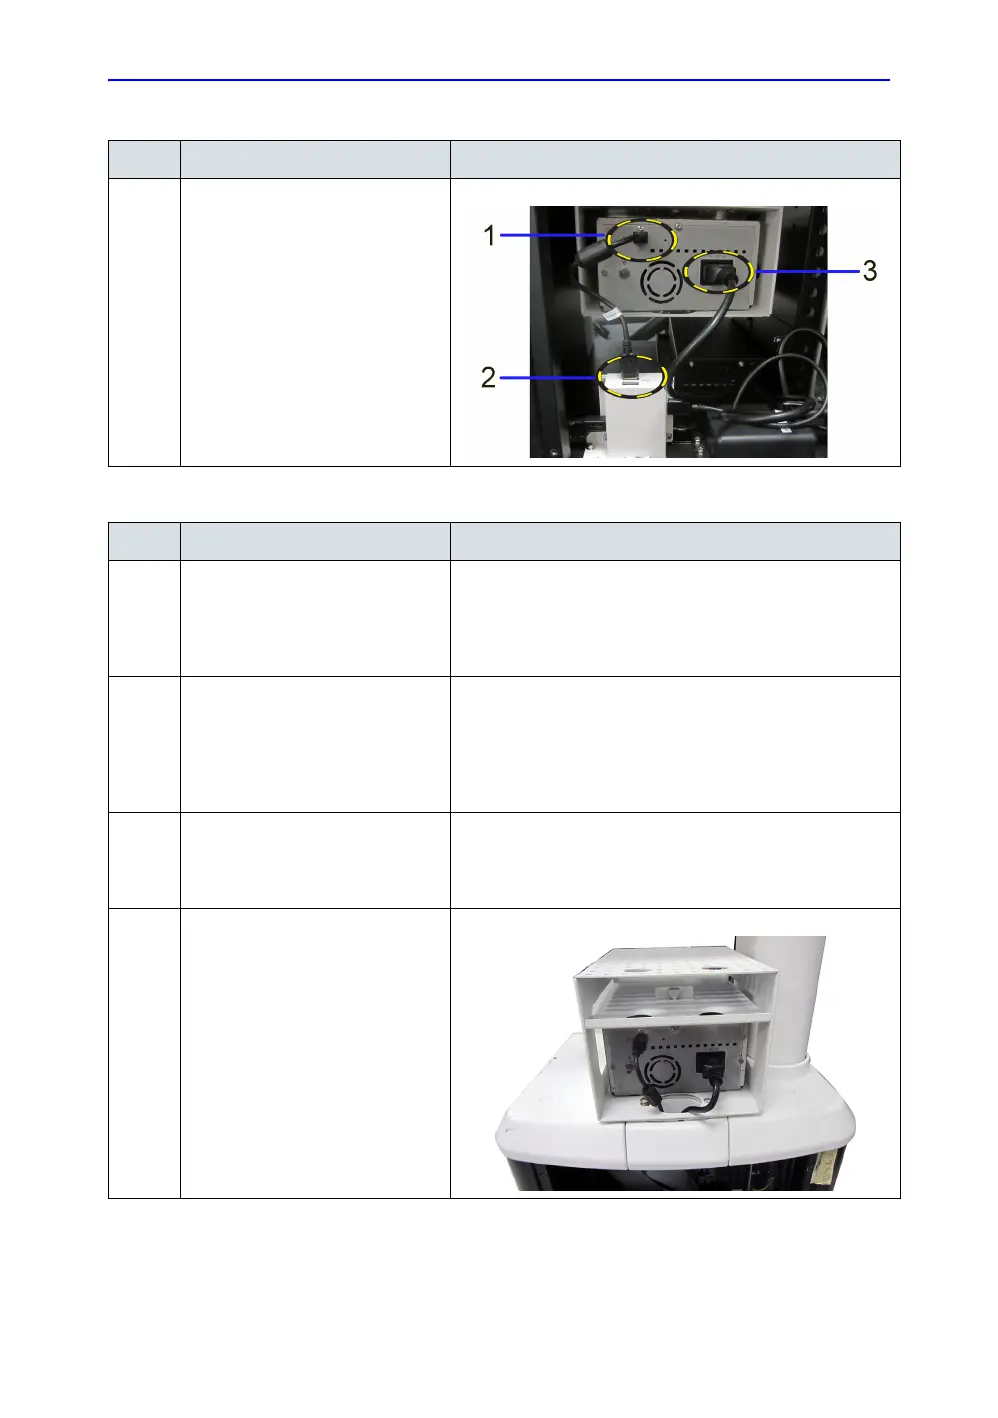
3. Connect the DC/AC cable to the
printer (3). Connect USB cable to
the printer (1) and to the USB HUB
(2). Then install the rear panel of
Docking Cart
.
Table 11-8: Mounting Procedure of B/W USB Printer on Top Support DVD/Print Shelf
No. Step Corresponding Graphic
1. Be sure Top DVD/Print Shelf has
been installed.
See ‘Top Support DVD/Print Shelf
Assy’ on page 11-35 for more
information.
2. Place the DC/AC adapter in the
cabinet of Docking Cart. Let the
cable of DC/AC adapter come out
from the back of Docking Cart.
Refer to Table 11-7 on page 11-15
for this information.
Connect the power cable from the
Docking Cart to the DC/AC
adapter. Refer to Table 11-7 on
page 11-15 for the information
3. Connect USB Cable and Power
Cable of DC/AC adapter to the
printer and let the cables go down
through Monitor Support Space.
Table 11-7: Mounting Procedure of B/W USB Printer
No. Step Corresponding Graphic