CHAPTER 2: GETTING STARTED GETTING STARTED
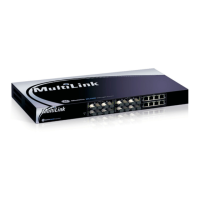
MULTINET4 MULTI-PORT SERIAL SERVER & MANAGED SWITCH – INSTRUCTION MANUAL 2–27
The screen displayed at start-up is the “Virtual Front Panel".
Note
The descriptions of the visual display of the Administrator employ the terms “screen,”
“form,” “table,” and “button.” These terms have the following meanings.
Screen – the whole meaningful content of your browser, not including browser tool bars,
status bars, and the like.
Form – a portion of the screen whose primary purpose is to enable the entering of user-
supplied information. A form contains fields that you can fill with keyboard input, by
selecting from drop-down menus, or by browsing to select a file on your local system. A
form may also contain some read-only information.
Table – a portion of the screen whose primary purpose is to provide the user with
information, such as lists of addresses, installed configurations, status reports, etc. A table
may or may not contain editable fields. A table often includes a checkbox to enable you to
delete the contents of a row in the table.
Buttons – labeled, clickable areas of the screen. Clicking a button performs the action
described in its label. Most screens include buttons labeled Apply Settings, to save any
changes you have made, and Reset Settings, to undo any changes you have made that
have not yet been applied.
Interaction The Interaction area contains an HTML form where you can
configure some aspect of the system. This area can also be
used to display read-only information such as port statistics or
event logs.
Global The Global area contains controls that have a global effect on
the current session.
•Click the Revert button to undo any unsaved changes to
the system's configuration.
•Click the Save button to save the current system
configuration in the active configuration file.
•Click the Save As button to save the current system
configuration in a new configuration file.
•Click the Logout button to end the current session.
This area also displays text identifying the user name of the
current user, the user-configurable system name of the node
being managed, and the IP address of the node.
Table 2–1: The Administrator Interface
Area Name Area Function