V 09/18
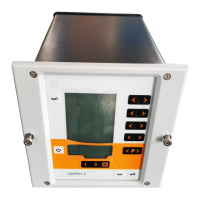
40 • Additional functions OptiStar CG06 Automatic gun control unit
Powder output/powder hose correction
The OptiStar CG06 Automatic gun control unit can be adjusted with cor-
rection values optimal to local conditions (for example the adjustment of
different powder outputs in the plant, caused by different powder hose
lengths and geometry to the guns.)
Carrying out a powder output correction
The settings in the following example are carried out for each gun indi-
vidually.
Powder output corrections are made at the first start-up, after a service
work, after the solution of application problems, or by using different hose
diameters!
It is recommended to create a table with input fields for each gun (see
"Example table for powder output/powder hose correction"), so that, if a
possible system reset takes place, to these data can be fallen back.
The guide values can be extracted from the following table:
Corr.-
value
Description Range
Default value (man-
ual/automatic)
C0 Powder output (dm³/h) 5-30
1.8 (Automatic device)
1.0 (Manual device)
C1
Powder hose correction
value
40-100 100
C2 Daily correction value 50-150 100
Procedure (powder output correction)
1. Set the total air to 5.0 (Nm³/h) on the A2 display. Set the
powder output to 00 (%) on the A1 display
2. To enter the system parameter mode, press the key T16
longer than 5 seconds. The correction factor number is
shown in the display A2 with a C placed in front
3. Set the correction value for minimum powder output C0 to
1.8 (Nm³/h) on the A4 display with the keys T7/T8. The de-
fault value for manual equipment is 1.0 (powder hose = 6m)
and for automatic equipment 1.8 (powder hose = 20m)
4. Set the correction value for maximum powder output C1 to
100 (%) on the A4 display.
Exit the system parameter mode by pressing the key T16.
For the next steps a measuring bag is necessary, for weighing the pow-
der output. If possible, one bag should be used for each gun. Do not for-
get to note the dead weight of each individual measuring bag.
5. Put the measuring bag over the gun nozzle and fasten it.
Switch on the gun for 60 seconds
6. After this time has elapsed, switch off the gun, remove the
measuring bag and weigh it. The powder output should be
between 10-15 g
 Loading...