PART 4
ENGINE/DC CONTROL
Page 64
Section 4.5
Diagnostic Tests
Procedure
A. Inspect Battery Cables:
1. Visually inspect battery cables and battery posts.
2. If cable clamps or terminals are corroded, clean away all
corrosion.
3. Install battery cables, making sure all cable clamps are
tight. The red battery cable from the starter contactor (SC)
must be securely attached to the positive (+) battery post;
the black cable from the frame ground stud must be tightly
attached to the negative (-) battery post.
4. Disconnect both negative and positive cables.
*Note: Disconnect negative battery cable first.
5. Using a DC Volt meter, measure DC volts on the battery.
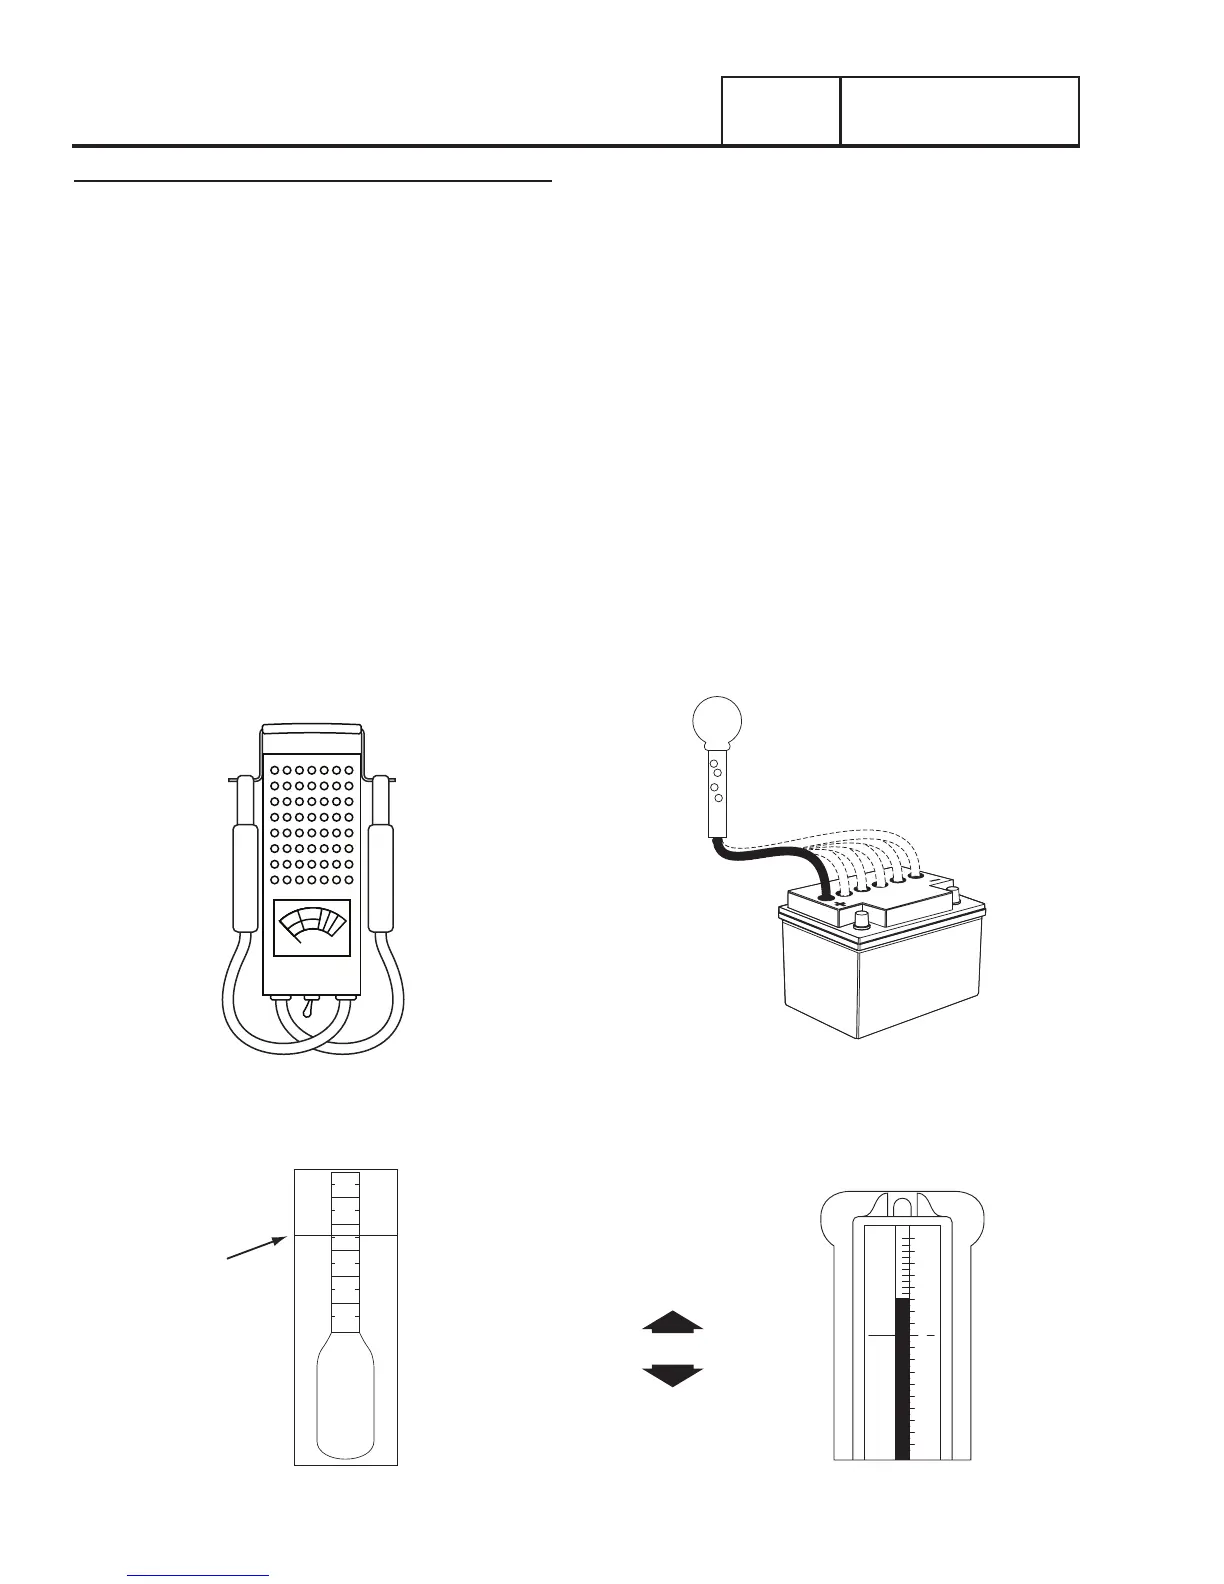
B. Perform a load test on the Battery:
(Maintenance Free Battery)
1. Using a lead acid battery load tester test the load
capability of the battery.
2. Follow the load tester’s manufacturer’s instructions carefully.
Figure 37. A Typical Battery Load Tester
C. Test Battery State of Charge:
(Non-Maintenance Free Battery)
1. Use an automotive type battery hydrometer to test
battery state of charge.
2. Follow the hydrometer manufacturer’s instructions
carefully. Read the specific gravity of the electrolyte fluid
in all battery cells.
3. If cells are low, distilled water can be added to refill cell
compartment.
4. If the hydrometer does not have a “percentage of charge”
scale, compare the reading obtained to the following:
a. An average reading of 1.260 indicates the battery is
100% charged.
b. An average reading of 1.230 means the battery is 75%
charged.
c. An average reading of 1.200 means the battery is 50%
charged.
d. An average reading of 1.170 indicates the battery is
25% charged.
CHECK EACH CELL
AFTER CHARGING
USE A TEMPERATURE
COMPENSATED
HYDROMETER
Figure 38. Using a Battery Hydrometer
LIQUID
LEVEL
1220
1230
1240
1250
1260
1270
80°
0
4
8
12
16
20
24
28
32
4
8
12
16
20
24
28
32
26.6°
Cell # Specific Gravity
1 1.255
2 1.260
3 1.235
4 1.250
5 1.240
6 1.225
HIGH READING
LOW READING
35 POINTS DIFFERENCE
Figure 39. Reading a Battery Hydrometer