ProfiLux 4 Resource Guide
EN 2018-13-11 73
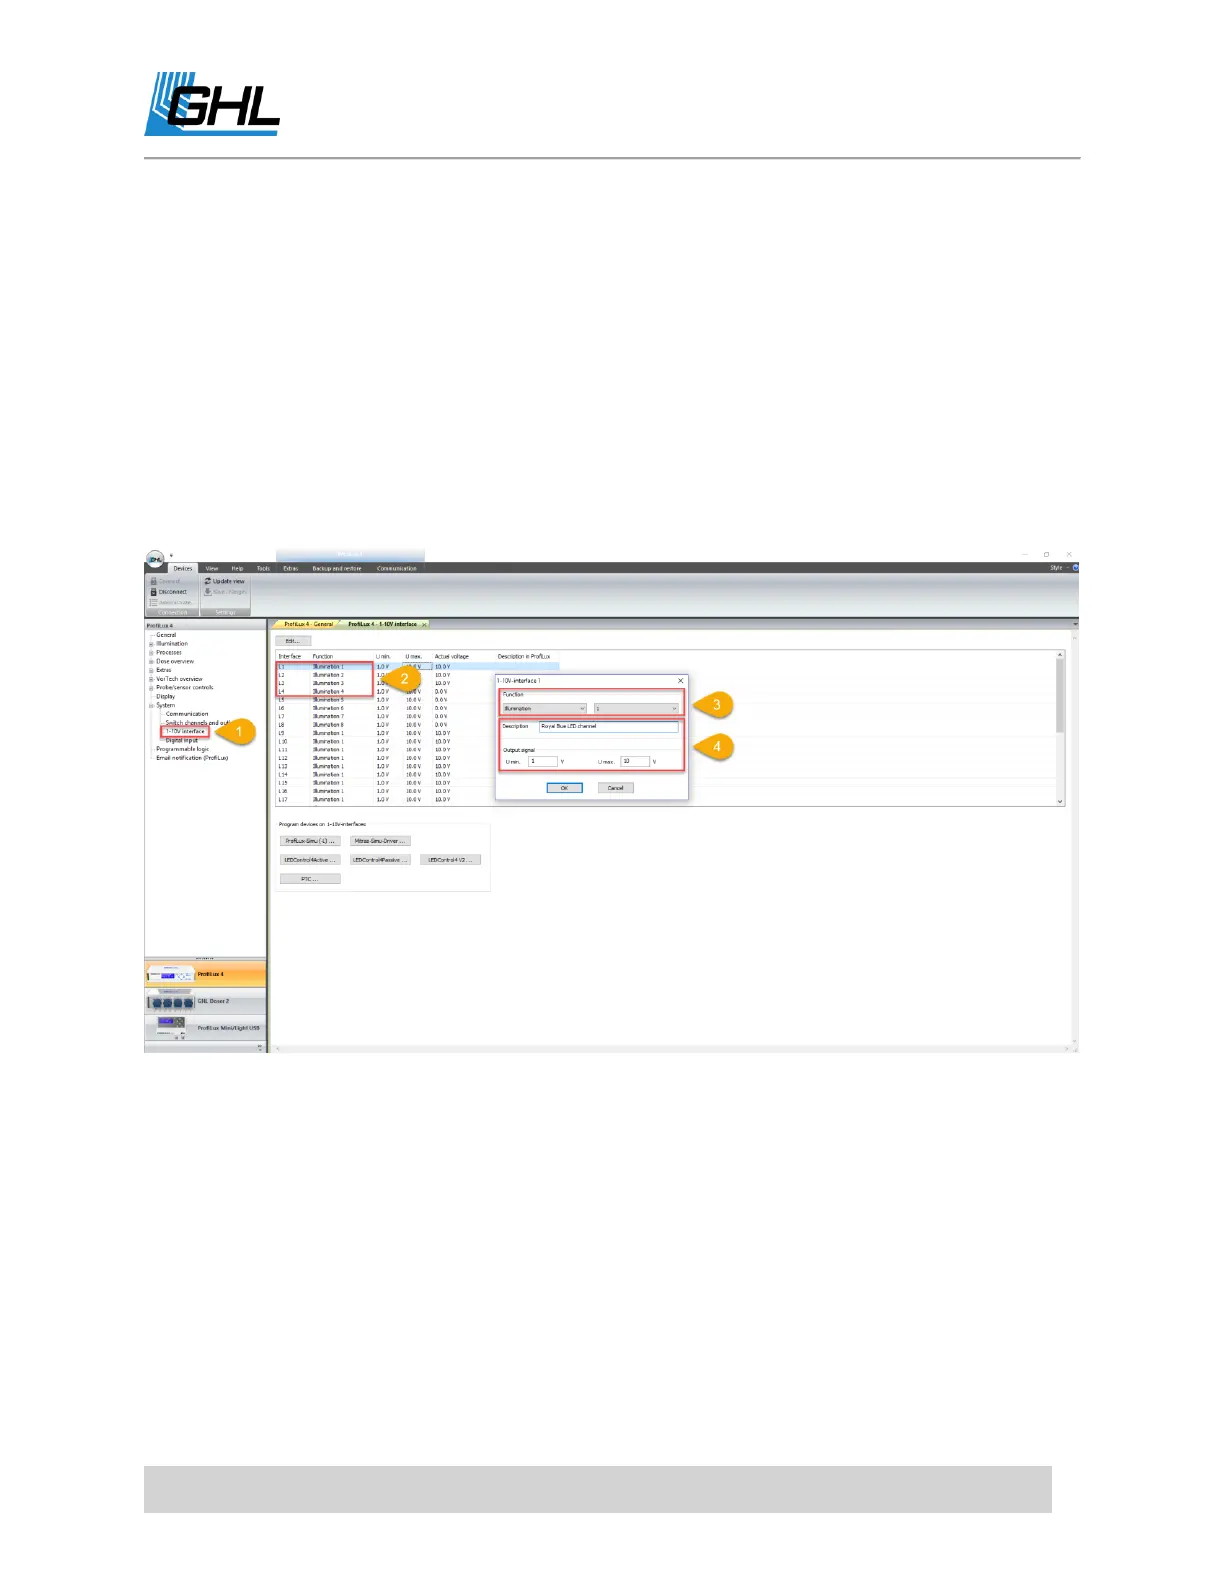
For example, if connected to L1/L2, you can configure L1 and L2 in the 1-10V
interface settings page. If on L3/L4, you can configure L3 and L4.
If you’ll be using 1 channel and not the other, select only 1 channel.
3. Set the function to ILLUMINATION and select the Illumination channel number you’d like
to assign to this lighting channel.
Since most LED fixtures include more than 1 channel, we recommend assigning
each to its own ILLUMINATION channel.
For example, LED fixture Royal Blue channel – Assign to Illumination 1, White
channel – Assign to Illumination 2.
4. Type-in a description, set the output signal to 1-10V, and click OK.
5. Repeat steps 2-4 for each lighting channel that needs to be assigned.
CREATING A DIMMABLE LIGHT SCHEDULE
1. Click on the (+) icon to the left of
Illumination
and select the ILLUMINATION channel
you assigned to an L-channel.
For example, if you assigned the L1-channel to Illumination 1, select Illumination
1. If you assigned L2 to Illumination 4, select Illumination 4.
2. Check the box, DIMMABLE.
3. Give this Illumination channel a name.
For example,
Royal Blue LED channel
.
4. Click NEW to create a time-point. Specify the time and percentage output for this time.
5. Continue creating NEW time-points until you’re satisfied with your schedule.
As you create more time-points, you will see a graph that provides an overview
of your schedule for the selected Illumination channel.
 Loading...
