User Manual
28
Quick Start Guide
• Ensure that the battery is fully charged and the SD memory card is inserted in the camera
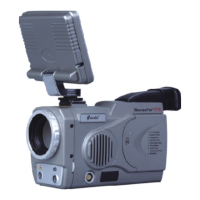
• Insert the VGA LCD screen into the mounting foot and ensure it has locked into place
• Keep button On/ Off depressed for 2 seconds to switch on the camera
• Wait till the boot screen image disappears and uncover lens cap. Non Uniformity
Calibration (NUC) is performed automatically
• Aim the camera at the target
• Press button F4 to automatically focus or move the joystick up or down to manually focus
• Move the dioptre adjuster to get a clear image in the viewfinder
• Press button A for 2 seconds to switch between Auto1, Auto2 and Manual modes
• Press button A and release it instantly and then adjust Tmax, palette, Tmin and filter if
necessary
• Press button F2 to switch to live visual image
• In visual image, rotate the visual focusing gear at the left front of the camera body to
manually focus
• Press button F2 to switch to live thermal image
• Press button S to freeze the live image
• Press button S to store the frozen image into SD memory card or built-in flash memory of
the camera
• Press button C to return to the live thermal image
Using the Camera
Powering on the camera
Keep button On/ Off depressed for 2 seconds to power on the camera.