© Guldmann GB-1394/11/08
51
3. InstallatIon
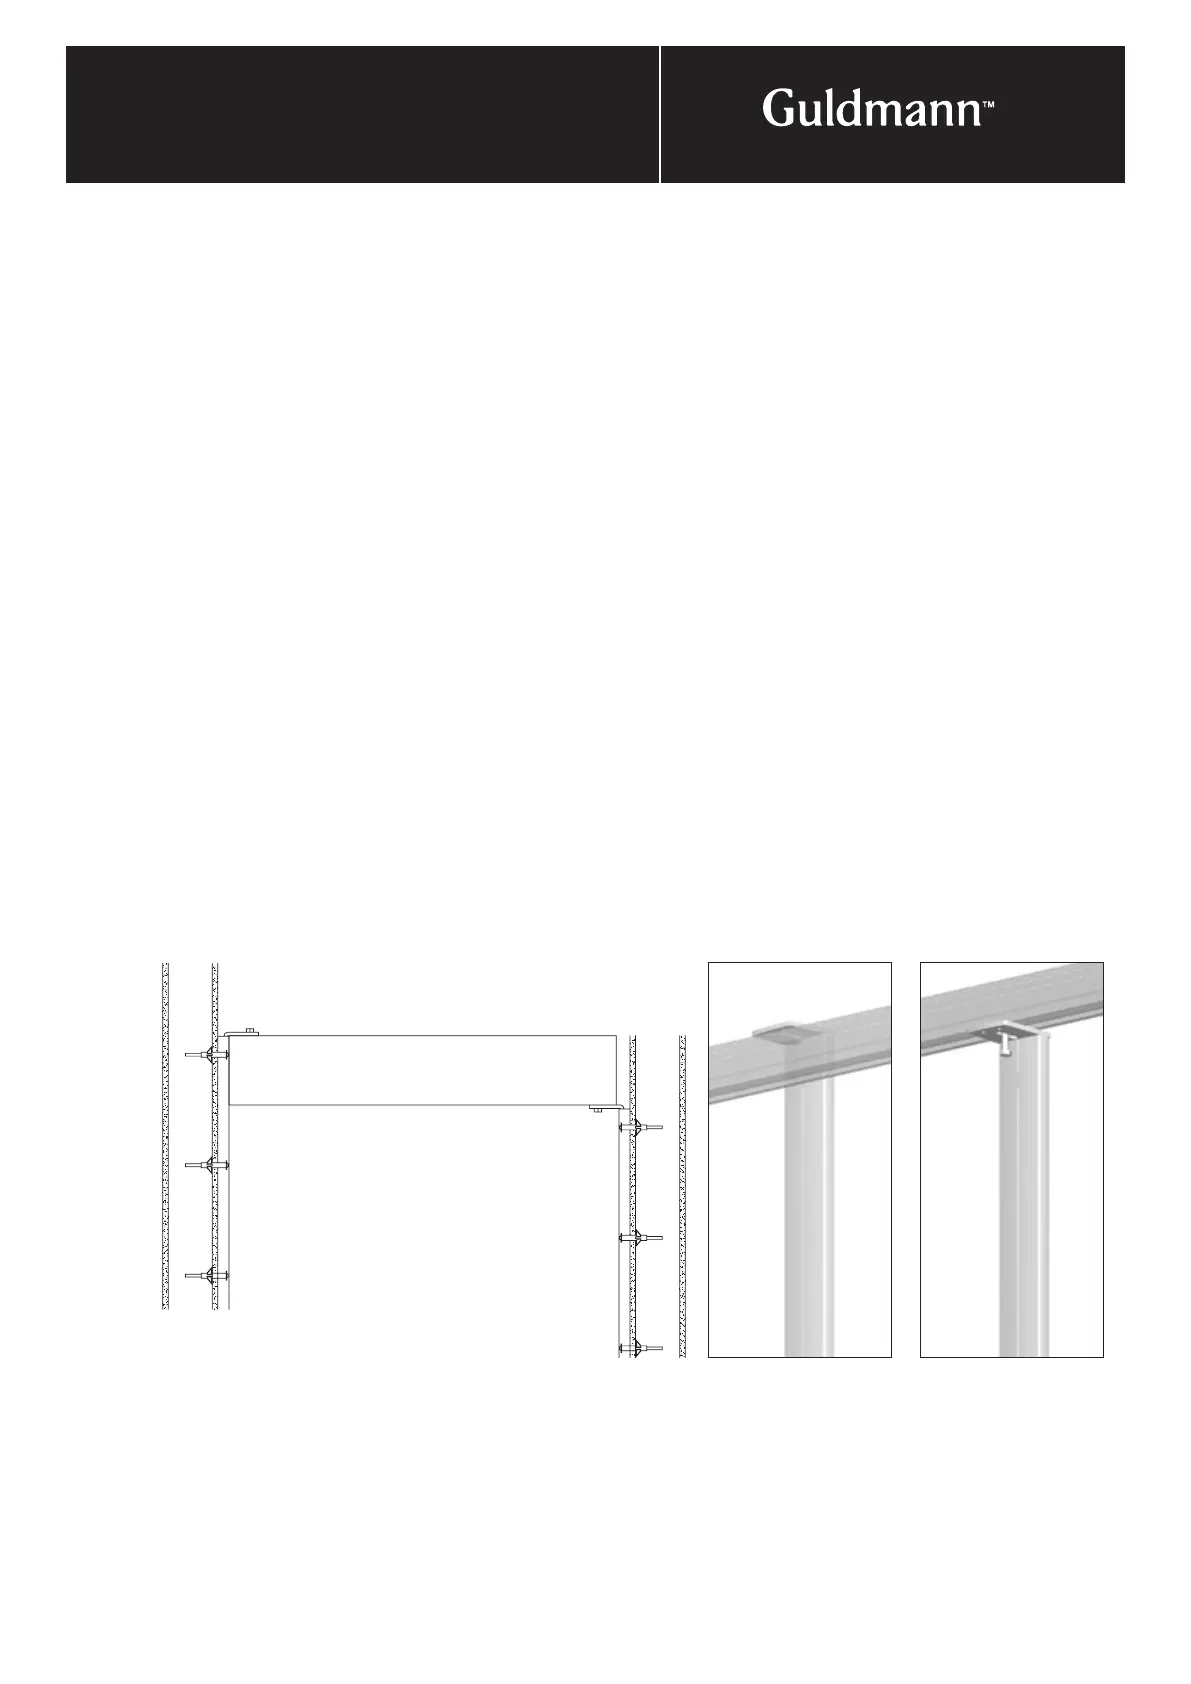
Wall fitting
Wall types: Lightweight walls
Bracket types: GH wall stud brackets
• Examine the make-up of the wall.
• Mark and measure the spots where the wall stud is
to be fitted. Use laser equipment to determine height
placement so that the rail system is completely level.
• GH wall stud brackets are cut to appropriate lengths.
• The adapter around the skirting board is cut to shape
and to accommodate any installation panels.
• Note that wall studs can be used both as end-hung and
as centre supports for rails.
• Wall studs are assembled with base and top brackets
and are fixed to the wall through the pre-drilled holes in
the wall studs.
• A GH wall stud can be fixed with e.g. Fischer 5 x 52 S,
depending on the make-up of the wall.
• Ensure that the wall post is vertical
• The rails are mounted on the top bracket of the wall
stud. A clamp is placed either at the bottom or the top
of the rail.
• the clamp is led through the oval hole at the base/top
of the top fitting, and fit with a facet disc and lock nut
against the top fittings.
• When the rails have been fitted to the top brackets,
tighten the lock nut securely.
• Finish by fitting plastic covers onto bolts and nuts.
Fitting of brackets
Max. 250 kg.
More than 250 kg.