Steps 2: Select the channel for video occlusion.
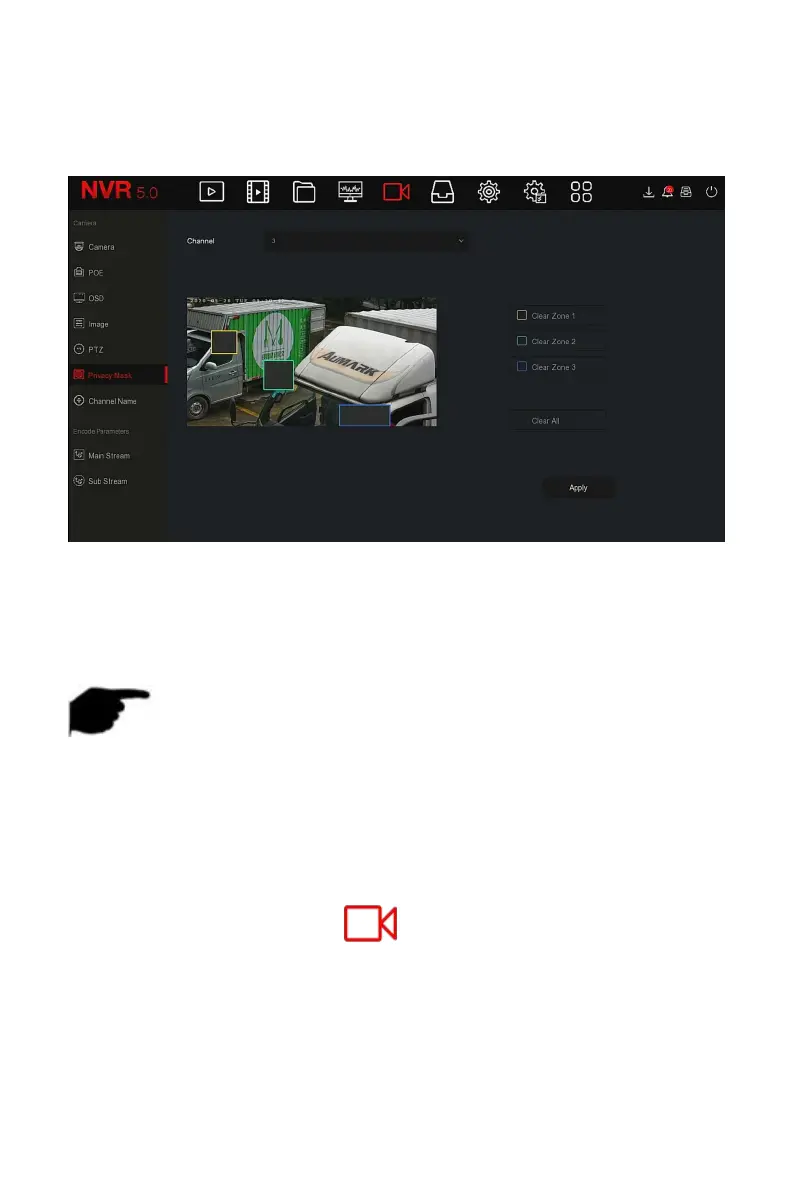
Steps 3: Use the mouse to define the occlusion area in the video, as shown in
Figure 5-35
○
2
below.
Figure 5-35
○
2
Steps 4: Click "Apply" to save the setting.
Channel: Select Set Channel.
Clear All: Clear all selected areas masks.
Clear Zoom1, 2, 3: Clear the selected occlusion area 1, 2, 3.
NOTE
Up to 3 occlusion areas can be set.Click clear area X to delete this area
setting.
5.3.5.7 Channel Name
The specific operation steps are as follows:
Step 1: In the main menu, click " →Channel Name" to enter Channel
Name interface, as shown in Figure 5-36 below.