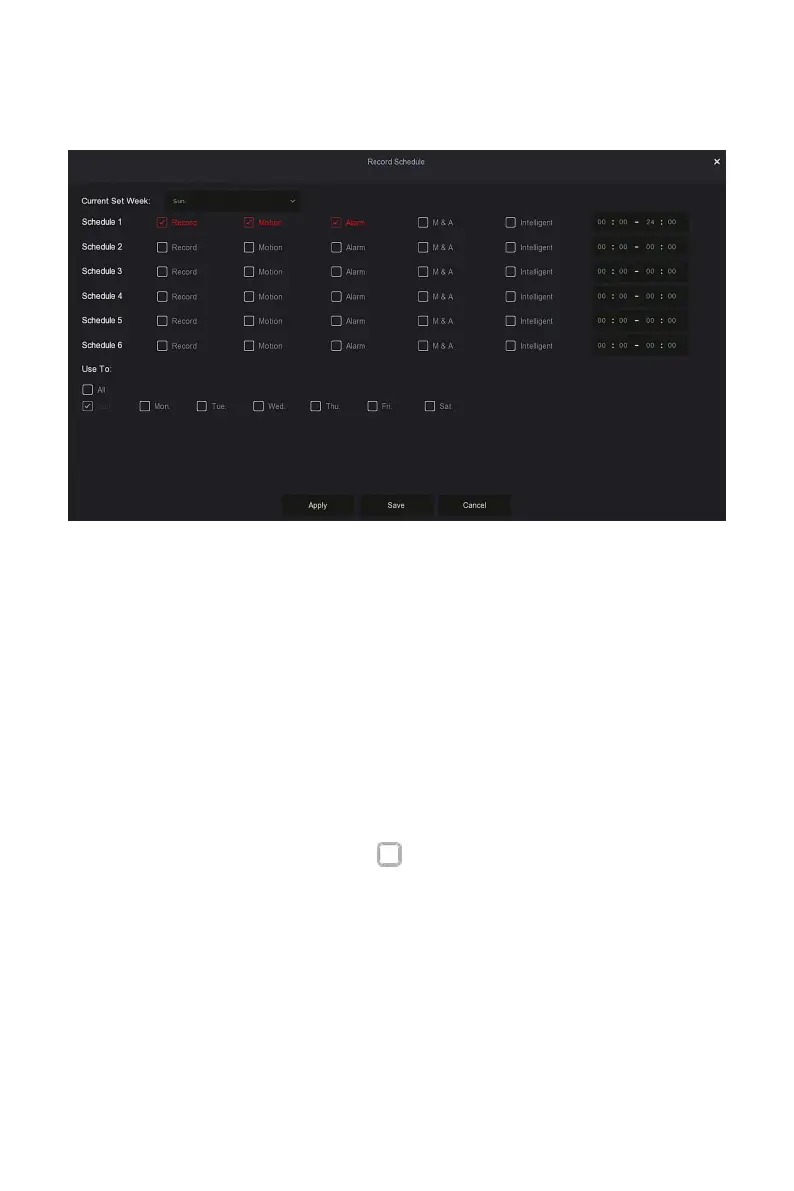
Steps 2: Click "Edit" to enter "Record Schedule" setting interface, as shown in
Figure 5-39
○
4
below.
Figure 5-39
○
4
Steps 3: Select the "recording type" of each time period. There are six time
periods for setting each day. Select the corresponding week in "Apply" to
apply to the corresponding week.
Steps 4: Click "Save" to complete the setting, the system will return to
"Record" interface.
Channel: Please select the channel number first. You can select "all" if
you want to set for the whole channels.
Record Type: Select check the box to select corresponding record type.
There are Normal, Motion, Alarm, M And A, Intelligent.
Week day: Select the week number. If you select "All", it means to the
entire week, or you can select " " in front of the number of days to set
individual days.
More Settings: You can set the prerecord time(s) and post-record(s), as
shown in Figure 5-39
○
5
below.