Note: If any drives were removed earlier to facilitate the removal of the chassis, follow the rest of the
steps to reinstall the drives by following the labeling scheme noted earlier. If not, proceed to the cabling
section.
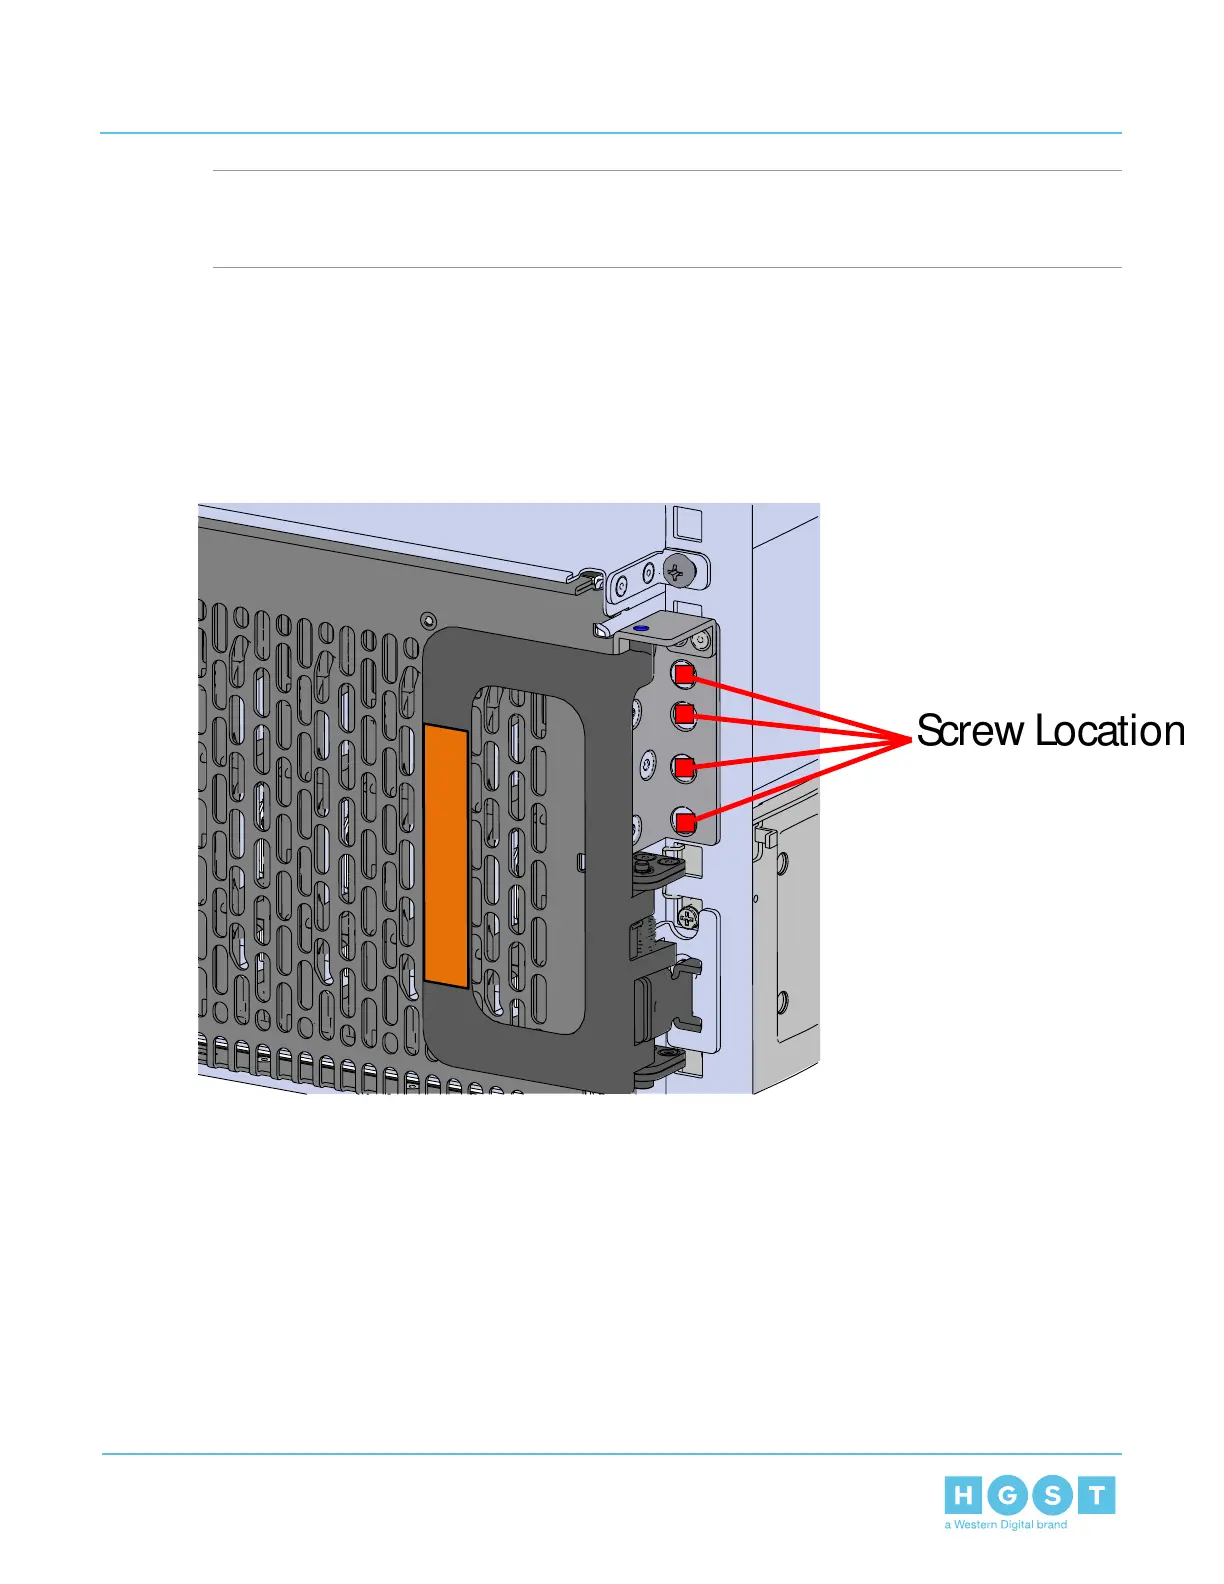
26. If the chassis is being installed into a rack that will be shipped fully assembled, you must install eight
(four per side) of the included M5 x 10mm T15 Torx screws into the two brackets at the front of the chassis
in the following locations. These screws should be tightened to 3.38-3.61 Nm / 30-32 in-lbf using a Long
T15 Torx Screwdriver. If this chassis will not be installed into a rack for shipping purposes, skip this step
and move on to the next one.
Figure 105: Shipping Bracket Screw Locations
27. Install the Drive Assembly.
a) Ensure that the enclosure has been pulled out of the rack until the rail latches engage.
103
4 Part Replacement
User Guide 4.8 Rails Replacement

 Loading...