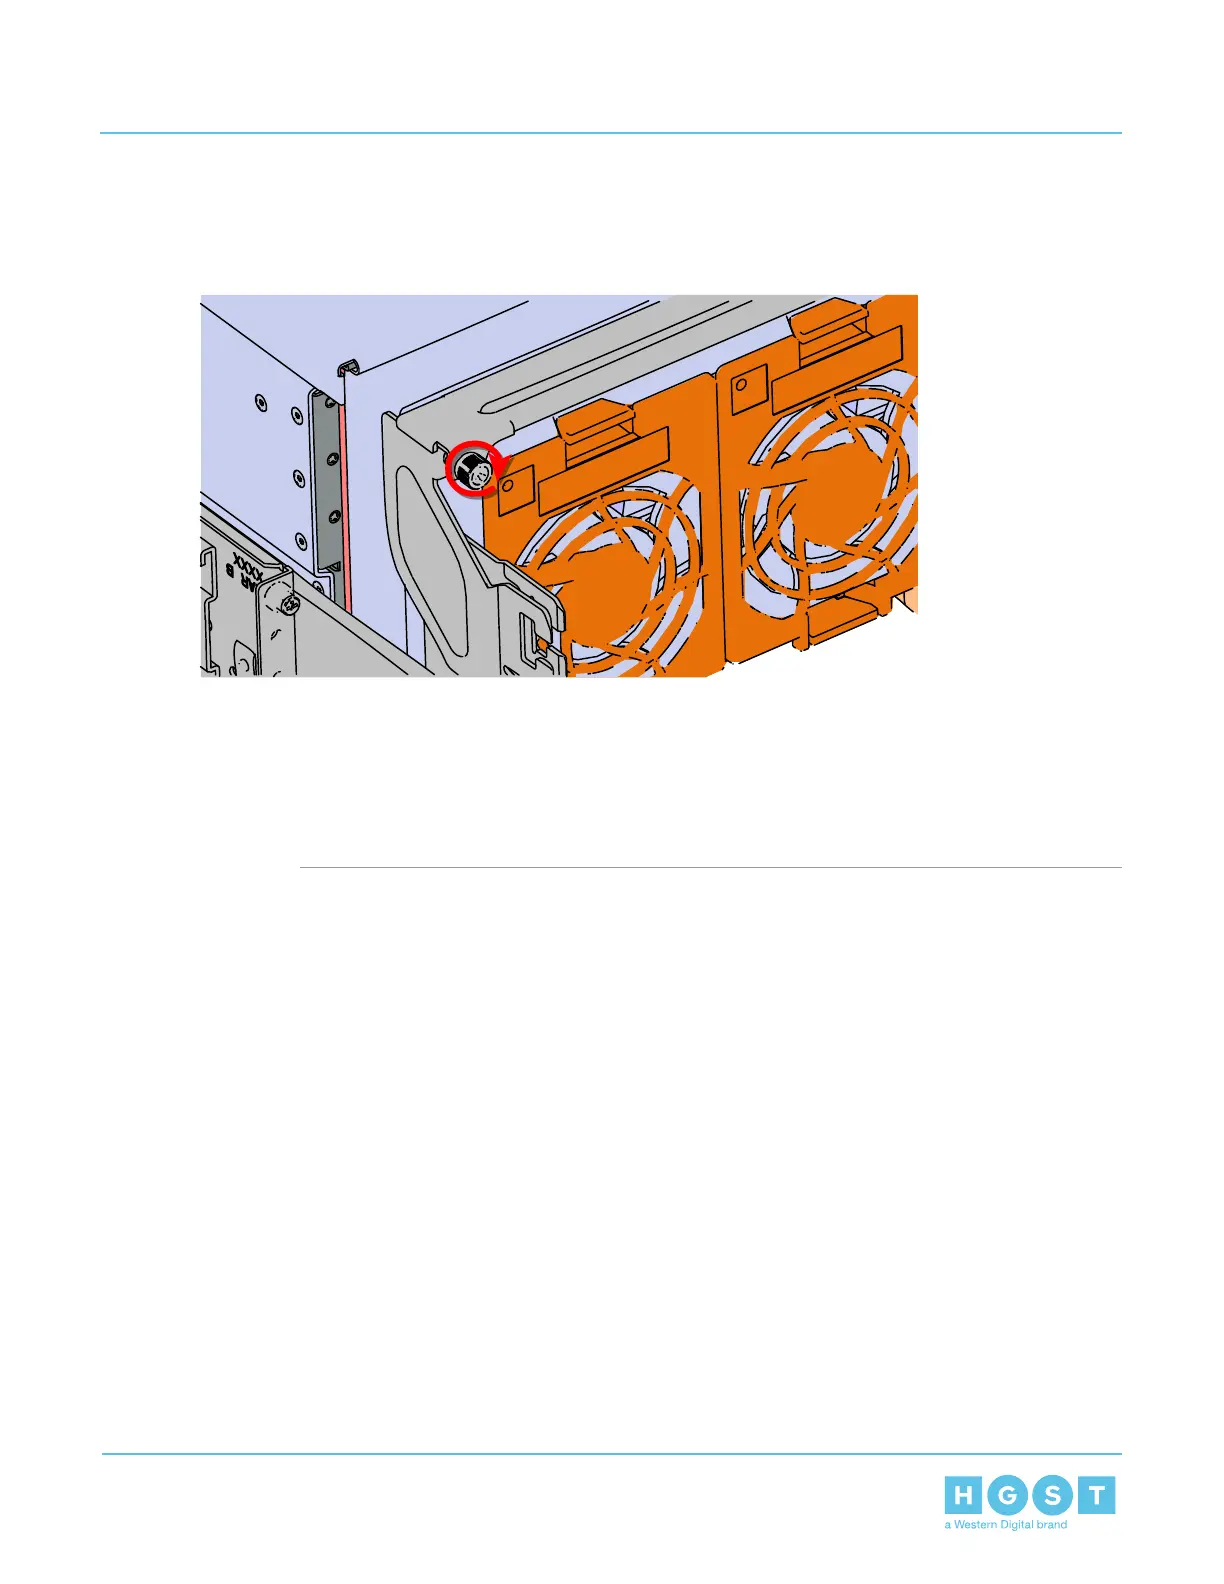
d) Press the crossbar against the CMA mounting bracket and secure the crossbar in place by pressing
and turning the thumbscrew clockwise until snug.
Figure 161: Tightening the Thumbscrew
a) Check that the crossbar is fully secured to the CMA mounting bracket by pulling on the bar to ensure
it does not move.
46. Cable the lower CMA.
a) Unlatch the elbow side of the CMA arm and swing it forward by pressing the blue button that says
“push” to unlatch it.
b) Gather the SAS cables, one power cable, and one Ethernet cable to install in the left hand side.
Note: Before cabling the lower CMA, note the following routing of the cables. For best results,
the cables that are supported by the upper CMA are inserted into IOM B (right hand side looking
at the rear) and the lower CMA cables are routed to IOM A (left hand side looking at the rear)
137
4 Part Replacement
User Guide 4.9 Chassis Replacement

 Loading...