5-6
5.2.2 Ink reservoir replacement procedure
1 Turn the power off.
2 Remove the ink reservoir from the holder.
3 Remove the cap and dispose of ink.
Note:
Since there is a rotor inside the reservoir, pick up rotor using stirring rod
provided before disposing of ink.
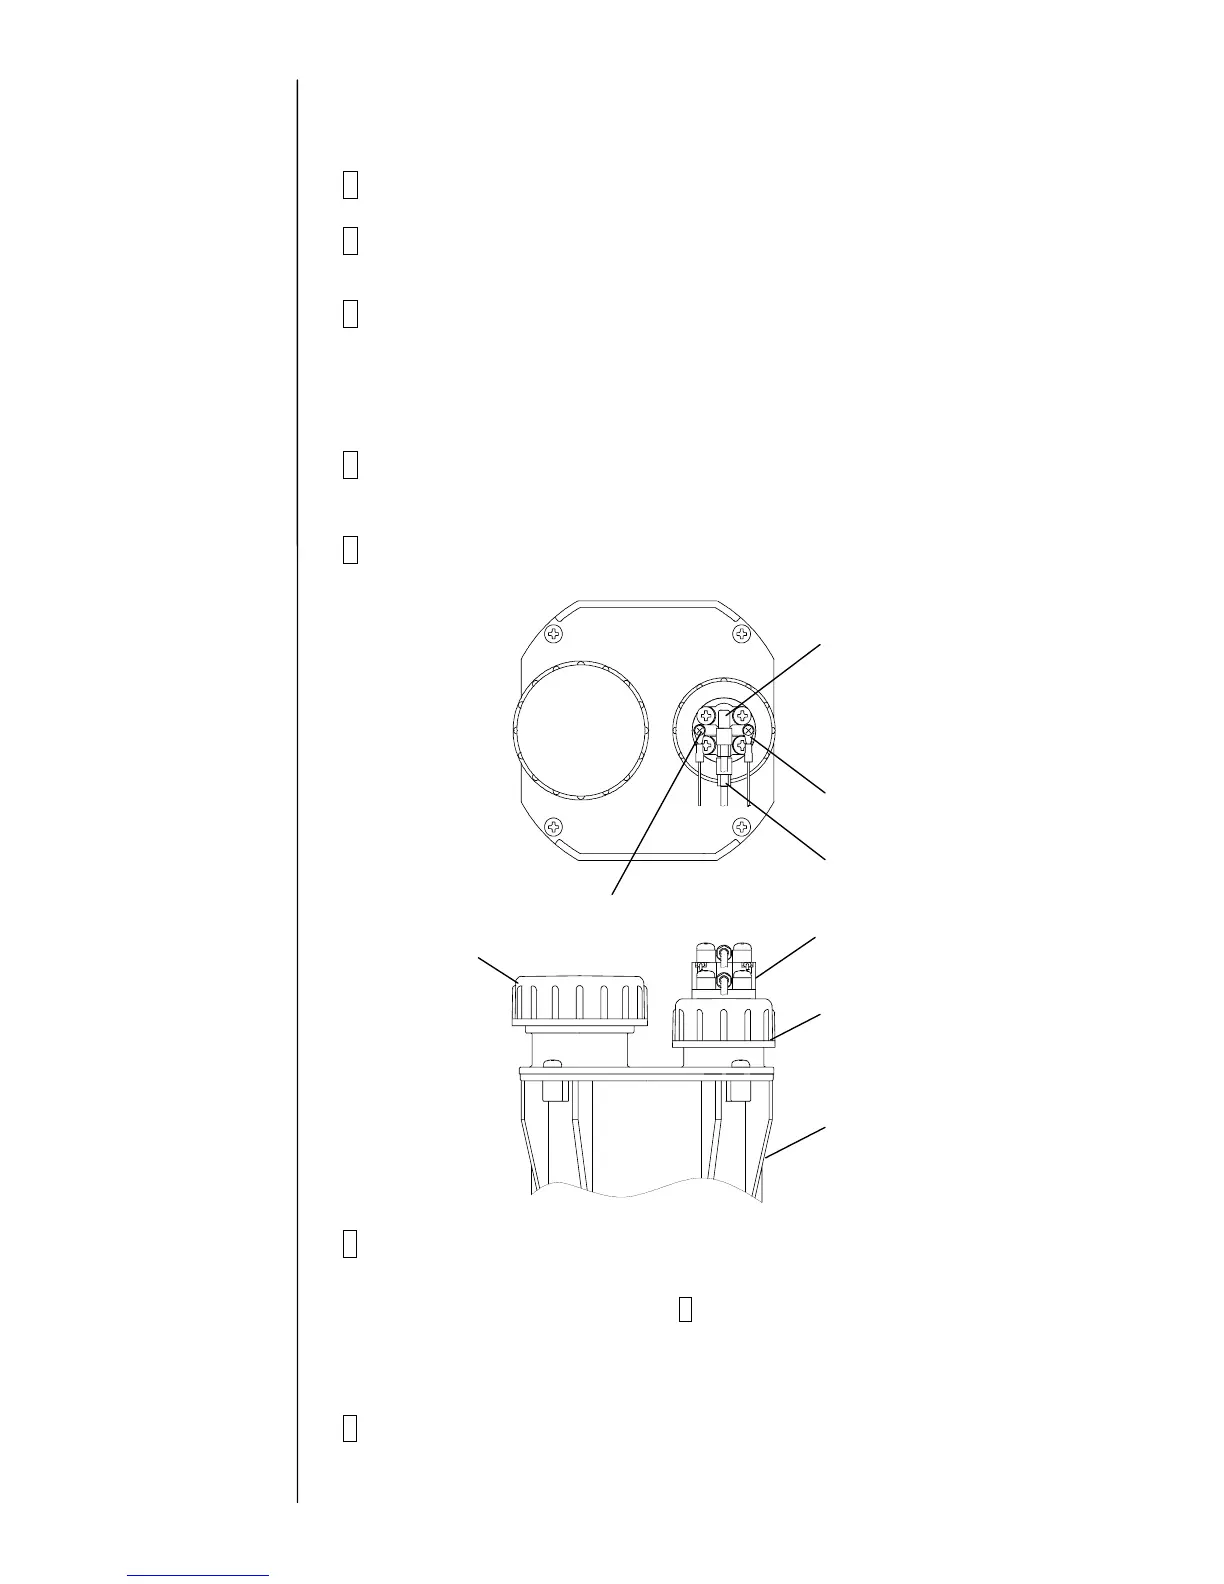
4 Remove the two wire connecting part screws of the liquid level sensor on
the connection block.
5 Remove the four screws fixing ink tubes “M” and “2”.
6 Attach the new ink reservoir by the reverse procedure to above.
<Note>
(1) For rotor removed in step 5, carefully wipe off ink and clean using paper
wiper soaked in solvent, etc. Be sure to replace in the reservoir.
(2) After setting rotor, securely tighten the cap.
7 Replenish ink in the ink reservoir.
Ink tube ”M”
Li

 Loading...


