INTELLIDOX DOCKING MODULE USER MANUAL || PREPARE MODULES FOR USE
HONEYWELL PAGE 34 OF 119
3. Type the user name and password in the text boxes provided, and then click Login. The
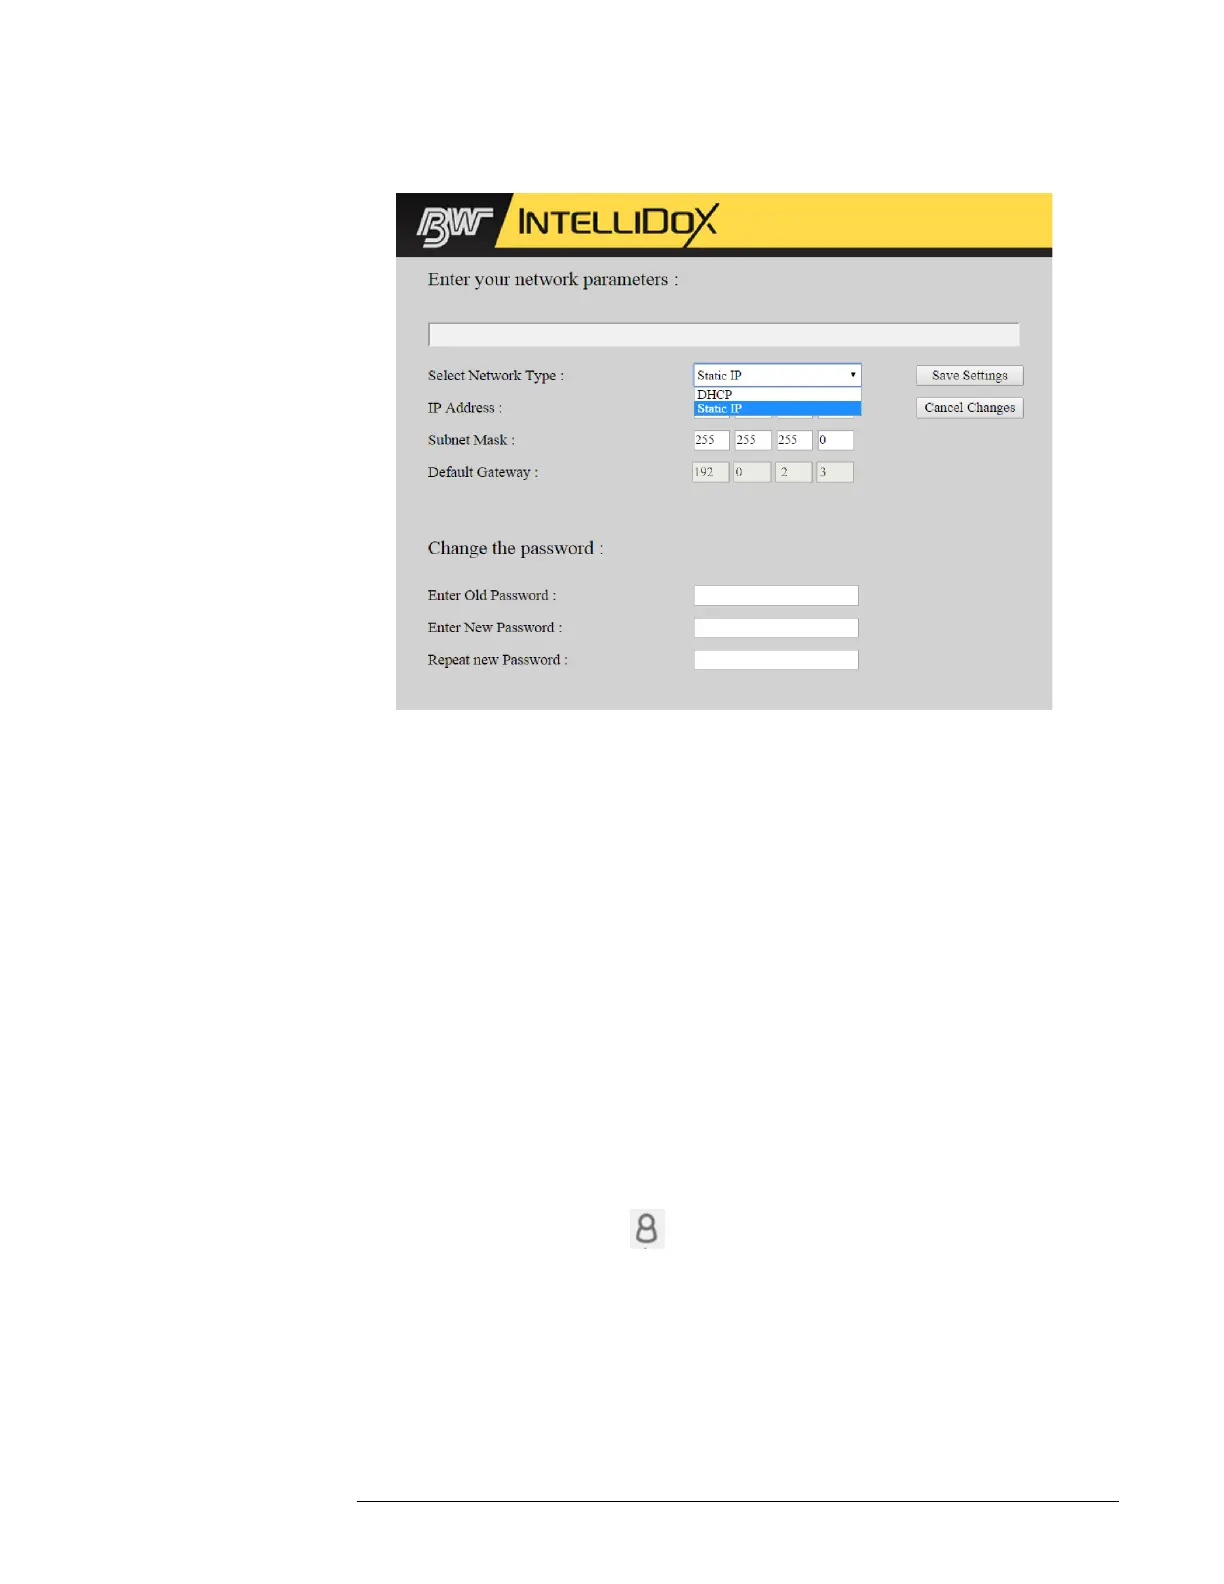
Enter Your Network Parameters webpage is displayed in the browser window.
4. Change the Select Network Type to Static IP, and then type a unique IP address.
Unique IP addresses are usually provided by a network administrator or Help Desk. For
more information, contact your network administrator or Help Desk.
5. To change the password, type the old password. Type a new password, and then type the
new password again. Click Save to save your settings and return to the IntelliDoX Login
webpage, or click Cancel Changes to abandon the changes and return to the IntelliDoX
Login webpage.
6. Close the browser window, or type a different IP address in the browser address bar to
change network settings for another module.
Managing Network Settings through Safety Suite Device Configurator
Software
When you log in to Safety Suite Device Configurator software as an administrative user, you
can change network settings and the administrative password for networked modules. For
more information, refer to the Safety Suite Device Configurator operator manual.
Connect an IntelliDoX to the Safety Suite Device Configurator
The Safety Suite DC requires entering the Network Passcode to add an IntelliDoX. This
process is a onetime only. Safety Suite DC will need to send the IntelliDoX the network
passcode to verify the connection.
1. Click on the User profile icon and select Settings.
2. In the Add IntelliDoX for manual detection field, enter the IP address of the IntelliDoX,
and then click SAVE. Wait until Progress bar is refreshed.
3. Click the Devices Tab, and then verify that the IntelliDoX is added in the list of devices.
 Loading...