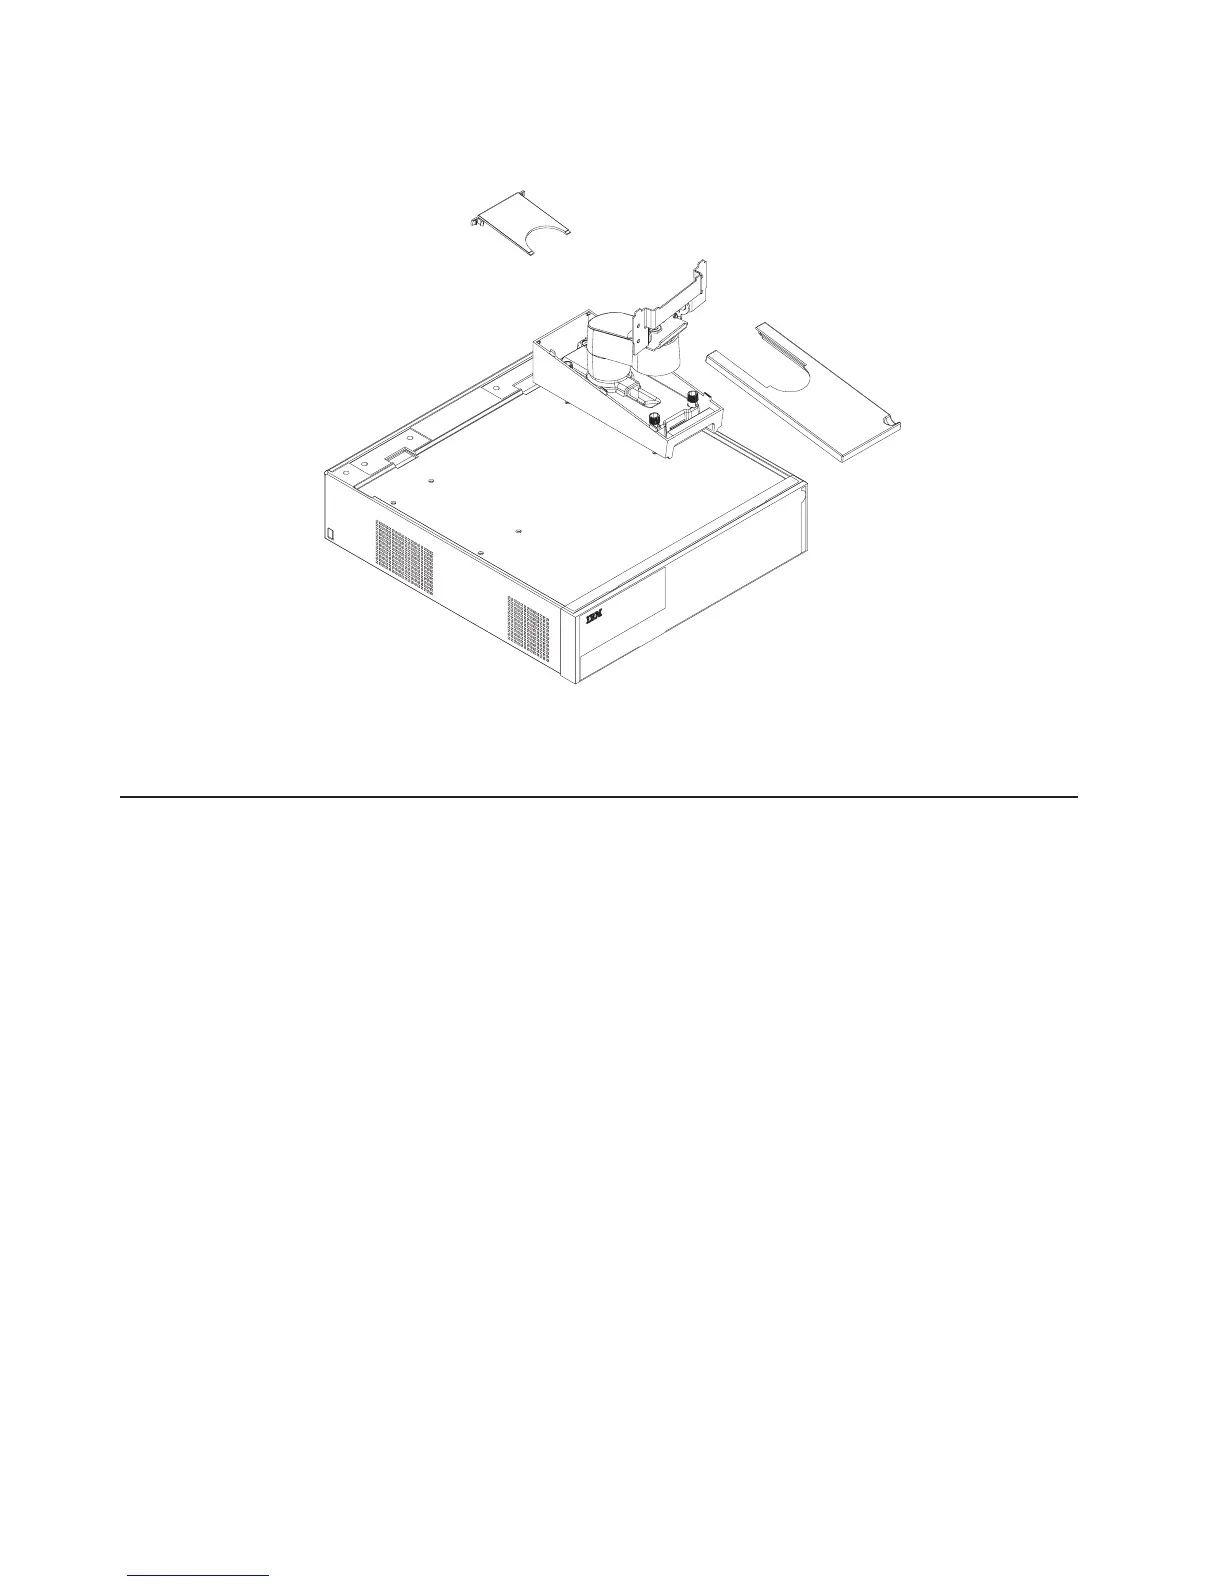
7. Place the filler panel covers on the arm assembly as shown in Figure 41.
8. See “Tailoring your installation” on page 11 and continue with your installation.
Installing the VESA bracket
IBM provides a mounting bracket that complies with the Video Electronic Standards
Association (VESA) FPMPMI (Flat Panel Monitor Physical Mounting Interface). This
standard requires the bracket to have four screw holes on a 75-mm (2.9-in.) square
grid.
Follow these steps to attach the 4820 to the VESA bracket:
1. Connect the cables (keypad/MSR/touch, video, power) to the appropriate ports
on the back of the 4820.
2. Install the options on your 4820. See “Installing options” on page 43
3. Attach the VESA bracket to the 4820 by using four screws.
4. Attach the VESA bracket to a VESA-compliant mounting arm according to the
instructions that are shipped with the product.
5. See “Tailoring your installation” on page 11 and continue with your installation.
Figure 41. Securing the arm assembly to the SurePOS 720, 740, 780
Integrated touch pedestal instructions
Update November 2005
42 4820 Planning, Installation and Service Guide
|
|
|
|
|
|
|