4
BASIC OPERATION
4-4
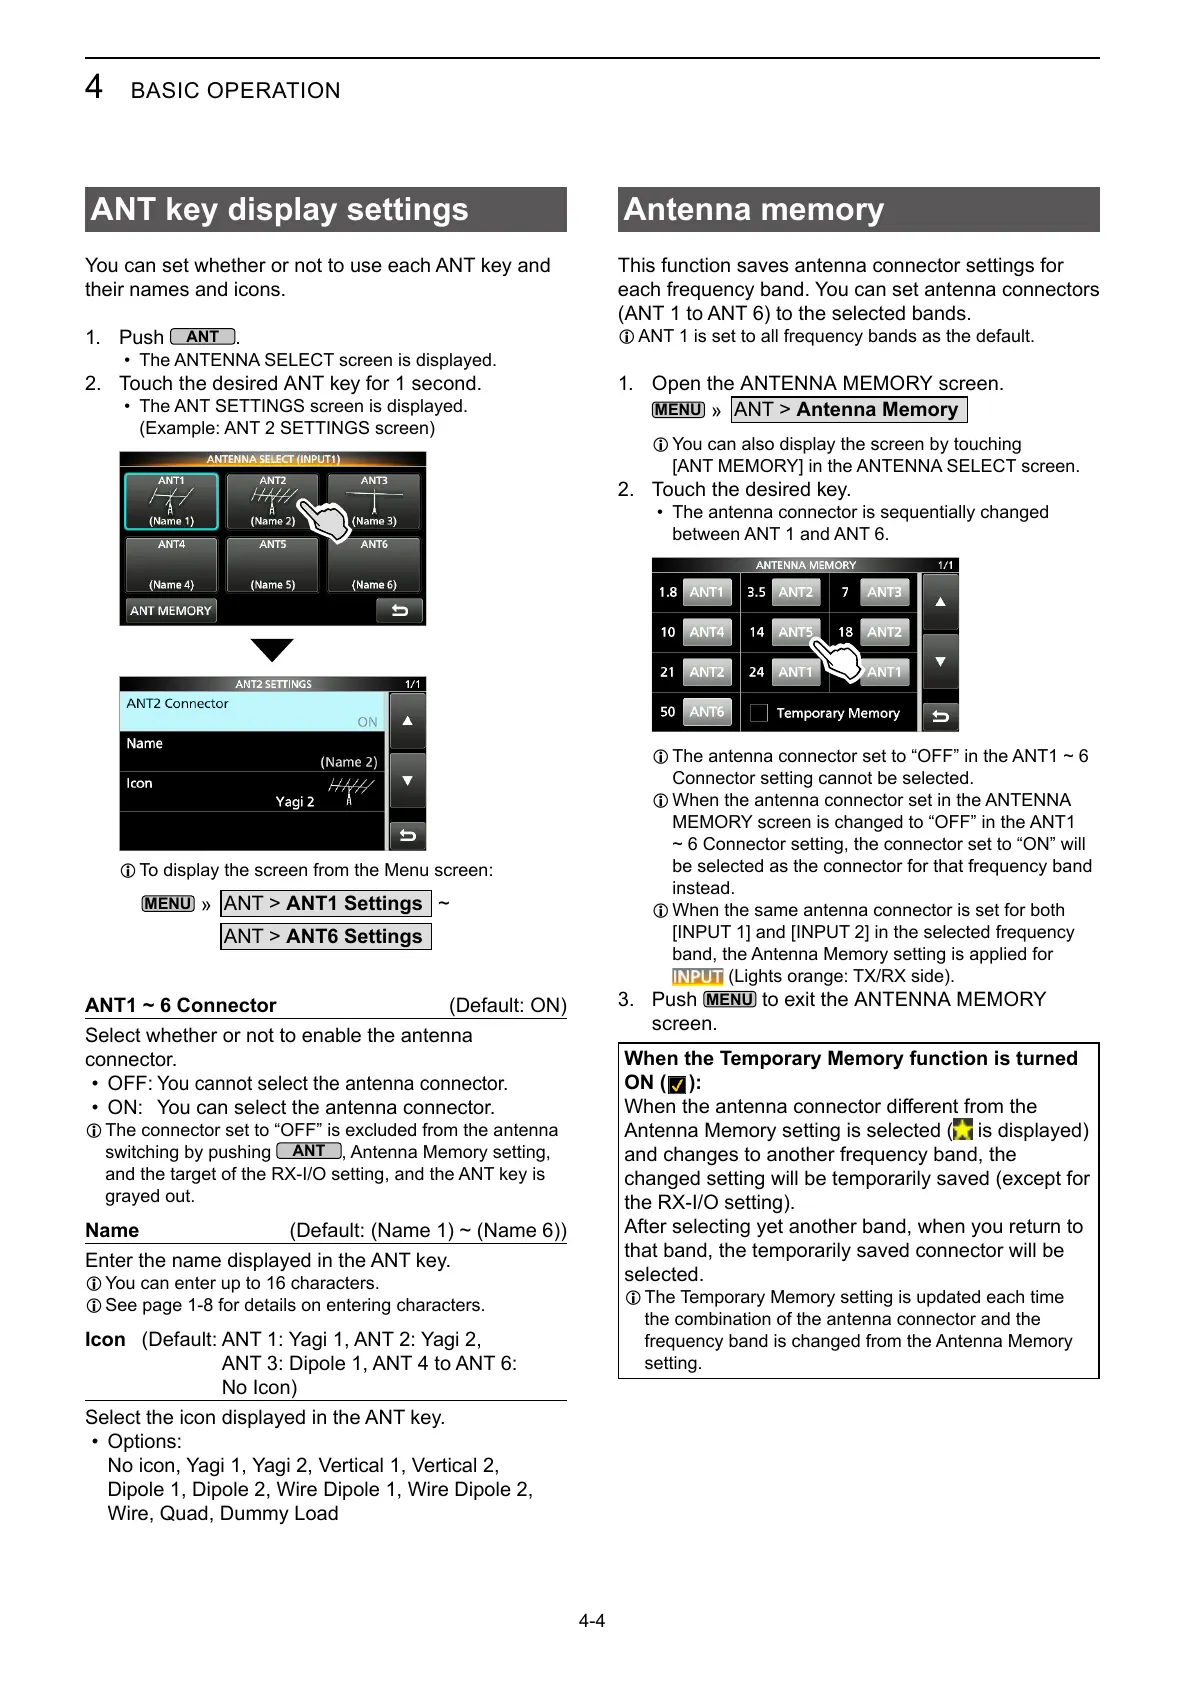
ANT key display settings
You can set whether or not to use each ANT key and
their names and icons.
1. Push
.
• The ANTENNA SELECT screen is displayed.
2. Touch the desired ANT key for 1 second.
• The ANT SETTINGS screen is displayed.
(Example: ANT 2 SETTINGS screen)
L
»
ANT > ANT1 Settings
ANT > ANT6 Settings
~
ANT1 ~ 6 Connector (Default: ON)
Select whether or not to enable the antenna
connector.
• OFF:
You cannot select the antenna connector.
• ON: You can select the antenna connector.
L The connector set to “OFF” is excluded from the antenna
switching by pushing
and the target of the RX-I/O setting, and the ANT key is
grayed out.
Name (Default: (Name 1) ~ (Name 6))
Enter the name displayed in the ANT key.
L You can enter up to 16 characters.
L See page 1-8 for details on entering characters.
Icon (Default: ANT 1: Yagi 1, ANT 2: Yagi 2,
ANT 3: Dipole 1, ANT 4 to ANT 6:
No Icon)
Select the icon displayed in the ANT key.
• Options:
No icon, Yagi 1, Yagi 2, Vertical 1, Vertical 2,
Dipole 1, Dipole 2, Wire Dipole 1, Wire Dipole 2,
Wire, Quad, Dummy Load
Antenna memory
This function saves antenna connector settings for
(ANT 1 to ANT 6) to the selected bands.
L
1.
»
ANT > Antenna Memory
L You can also display the screen by touching
2. Touch the desired key.
•
between ANT 1 and ANT 6.
L The antenna connector set to “OFF” in the ANT1 ~ 6
Connector setting cannot be selected.
L When the antenna connector set in the ANTENNA
~ 6 Connector setting, the connector set to “ON” will
instead.
L When the same antenna connector is set for both
(Lights orange: TX/RX side).
3. Push
screen.
When the Temporary Memory function is turned
ON ( ):
is displayed)
changed setting will be temporarily saved (except for
the RX-I/O setting).
After selecting yet another band, when you return to
that band, the temporarily saved connector will be
selected.
L
the combination of the antenna connector and the
setting.