8
OTHER FUNCTIONS
8-3
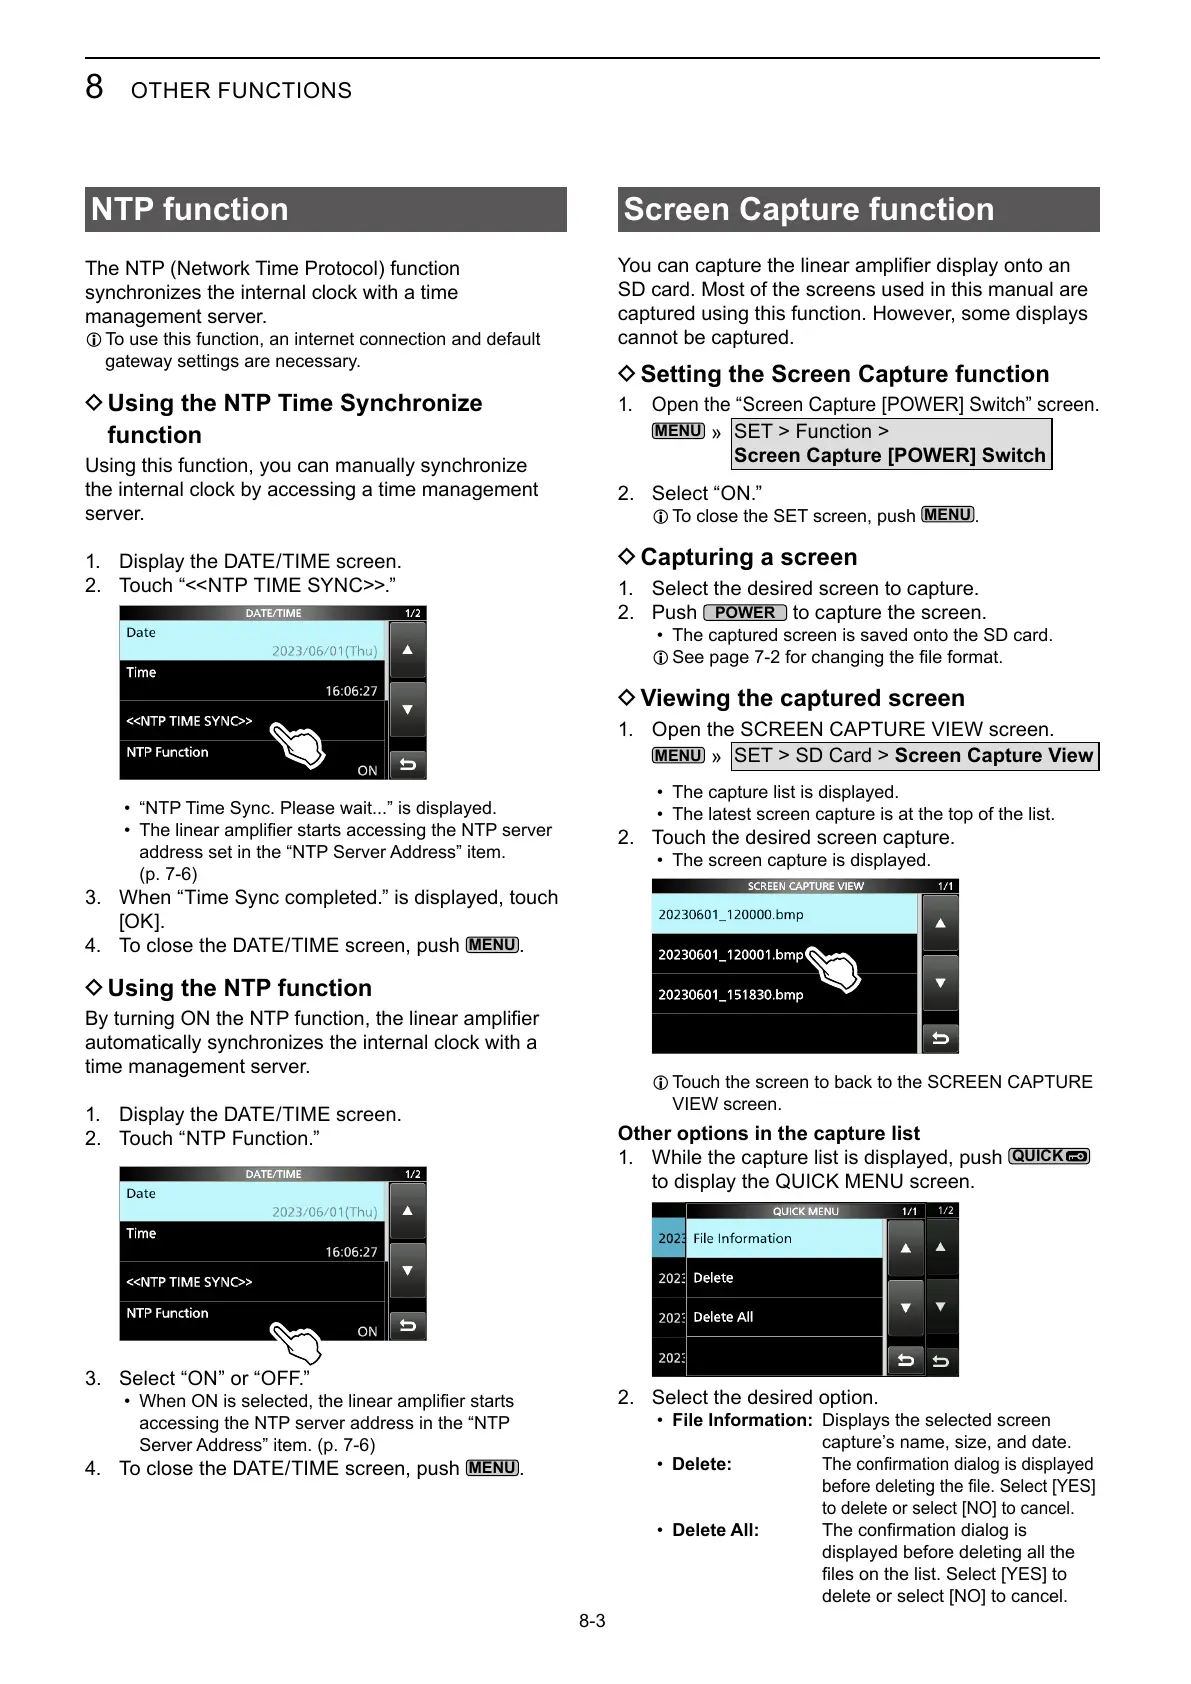
Screen Capture function
SD card. Most of the screens used in this manual are
captured using this function. However, some displays
cannot be captured.
D Setting the Screen Capture function
1. Open the “Screen Capture [POWER] Switch” screen.
»
SET > Function >
Screen Capture [POWER] Switch
2. Select “ON.”
L To close the SET screen, push
.
D Capturing a screen
1. Select the desired screen to capture.
2. Push
to capture the screen.
• The captured screen is saved onto the SD card.
L
D Viewing the captured screen
1.
»
SET > SD Card > Screen Capture View
• The capture list is displayed.
• The latest screen capture is at the top of the list.
2. Touch the desired screen capture.
• The screen capture is displayed.
L Touch the screen to back to the SCREEN CAPTURE
Other options in the capture list
1. While the capture list is displayed, push
to display the QUICK MENU screen.
2. Select the desired option.
• File Information: Displays the selected screen
• Delete:
to delete or select [NO] to cancel.
• Delete All:
displayed before deleting all the
delete or select [NO] to cancel.
The NTP (Network Time Protocol) function
synchronizes the internal clock with a time
management server.
L To use this function, an internet connection and default
gateway settings are necessary.
D Using the NTP Time Synchronize
function
Using this function, you can manually synchronize
the internal clock by accessing a time management
server.
1. Display the DATE/TIME screen.
2. Touch “<<NTP TIME SYNC>>.”
• “NTP Time Sync. Please wait...” is displayed.
•
address set in the “NTP Server Address” item.
3. When “Time Sync completed.” is displayed, touch
[OK].
4. To close the DATE/TIME screen, push
.
D Using the NTP function
automatically synchronizes the internal clock with a
time management server.
1. Display the DATE/TIME screen.
2. Touch “NTP Function.”
3. Select “ON” or “OFF.”
•
accessing the NTP server address in the “NTP
4. To close the DATE/TIME screen, push
.
NTP function