10
2
STARTING INITIAL SETUP
New2001
2
New2001
Make sure the transceiver turns OFF. q
LiftOFFthe[microSD]slotcoveronthesidepanel. w
With the terminals facing the front, insert the card e
into the slot until it locks in place, and makes a ‘click’
sound.
DO NOT touch the terminals.
Completelyclosethe[microSD]slotcover. r
Terminals facing
the front
microSD card
[microSD]slot
■ InsertingthemicroSDcard
Slot cover
NEVER forcibly or in-
versely insert the card.
It will damage the card
and/or the slot.
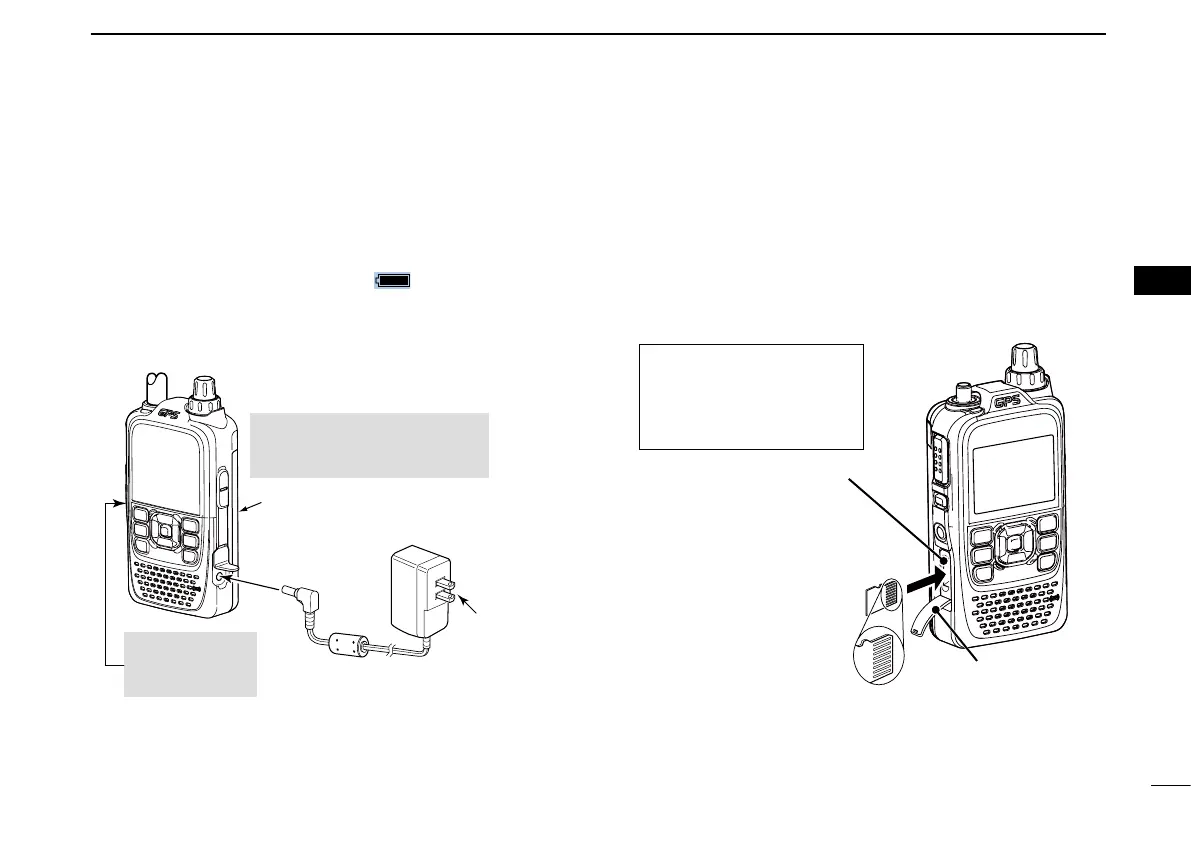
■ Chargingthebatterypack
Prior to using the transceiver for the first time, the battery
pack must be fully charged for optimum life and operation.
•BESURE to turn OFF the power while charging. Other-
wise the attached battery pack cannot be charged.
•Whilecharging,thechargingicon“
” sequentially shows
eleven level steps along with the word “Charging...”.
•Theicondisappearswhenthebatterypackiscompletely
charged.
BC-167S
to an AC outlet
Transceiver
to
[DC IN]
The BC-167SA, BC-167SD and
BC-167SV have different shapes.
BP-271
BE SURE to attach the battery
pack before connecting the
DC cable.
BE SURE to turn
power OFF while
charging.
•Chargingtime: BP-271 approximately 3.0 hours
BP-272 approximately 4.5 hours
STARTING INITIAL SETUP

 Loading...


