37 Image Vault
®
PRO Command
Establish TCP/IP Network communication as follows:
1. Make the necessary physical network connections. For Peer-to-Peer
applications use the crossover network cable provided with the DVR.
For other types of connections (e.g., Ethernet hub) use standard com-
mercially available network cables.
2. Start your PRO-Command Playback application.
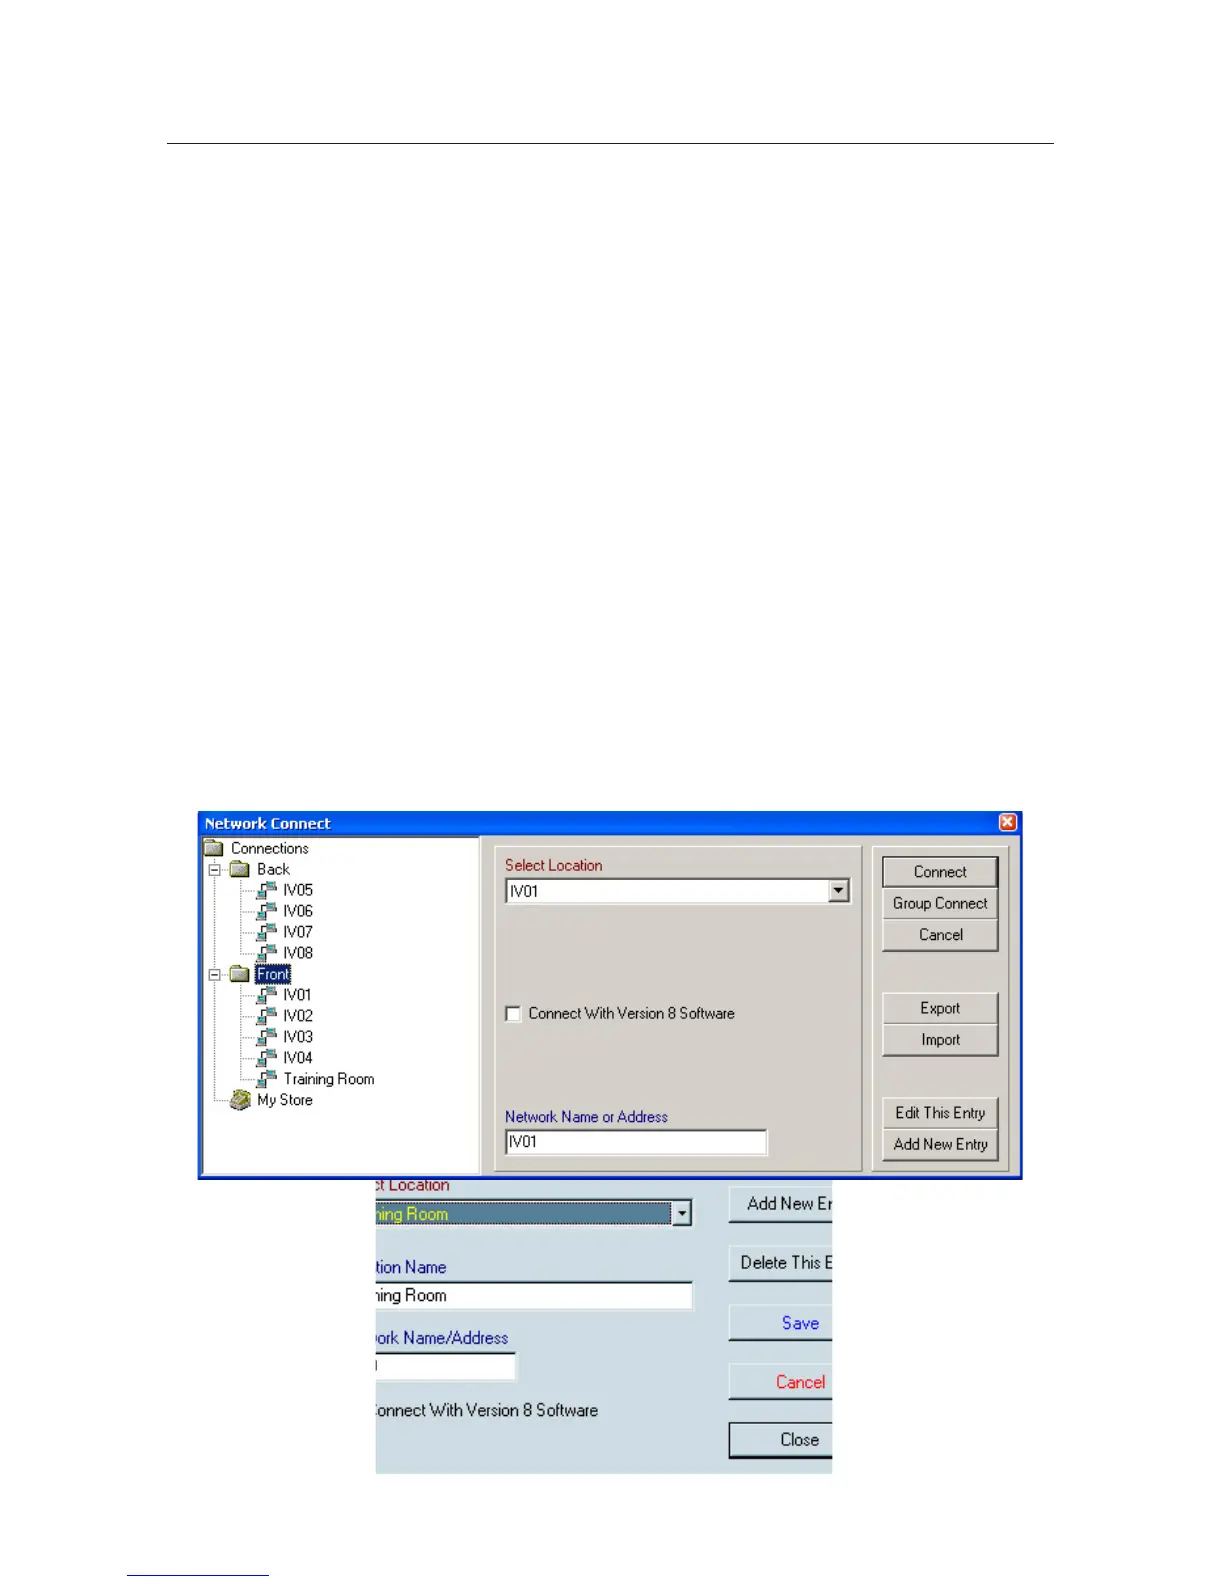
3. Select “Network” and click “Connect.”
4. You have the added option of saving your virtual network address
book to a CSV spreadsheet (Export) or you may create your own ad-
dress book in a common spreadsheet application and import it from
CSV format (Import).
5. Next, select an entry from your network address book. If you have a
big list and the select location drop down box is selected you may type
the name of an entry and the software will search for entries matching
what you typed. If no entries exist (or the recorder you desire is not
listed), click ADD and create an address entry for your destination DVR.
When your entry is complete and saved, verify the network address,
then click “Connect.” If you have multiple entries setup as a group,
click Group Connect to connect to all DVRs in the group.
6. Enter a valid username and password to complete the connection. If
you chose Group Connect, you will connect to all DVRs in the group