MICRO S automatic Cutter motor
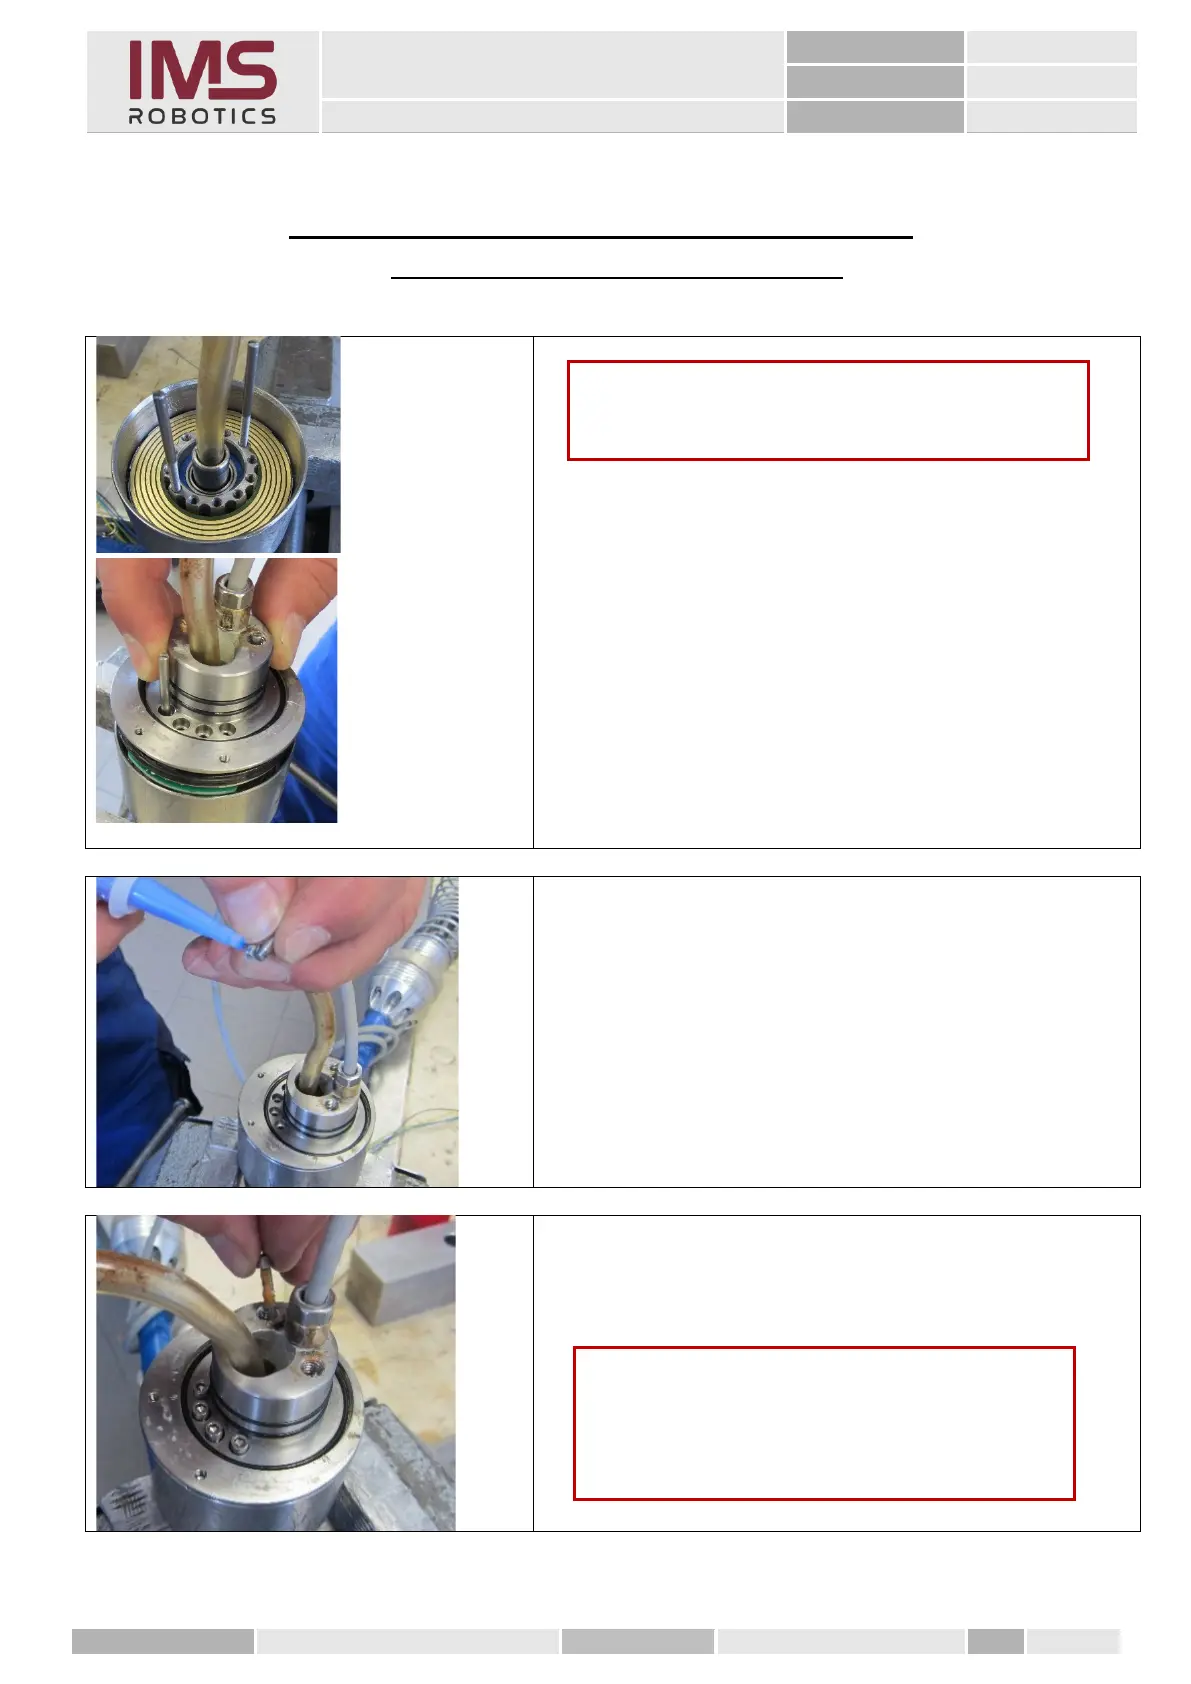
15. Mounting the front rotary unit
(after replacing the camera cable)
1. Remove old grease from the inside of the housing
of the rear rotary unit and the disc grinding ring.
2. Apply Energrease HTG2 roller and plain bearing
grease to the inside of the housing.
3. Apply contact treatment grease to the disc
grinding ring.
4. Mount M3 threaded bolt into the output flange as
assembly tool
5. Now push the front rotary unit straight and
evenly into the housing
6. Gluing the outer 4 M3 cylinder screws using
Loctite "blue
7. Seal the 2 M3 cylinder screws in the threaded
holes of the adapter bracket using Loctite "orange
Caution
Ensure utmost cleanliness when mounting the rotary
unit.
Caution
For further assembly, check all the O-rings for
completeness, intactness and adequate elasticity.
Apply roller and plain bearing grease before re-
using them.