72
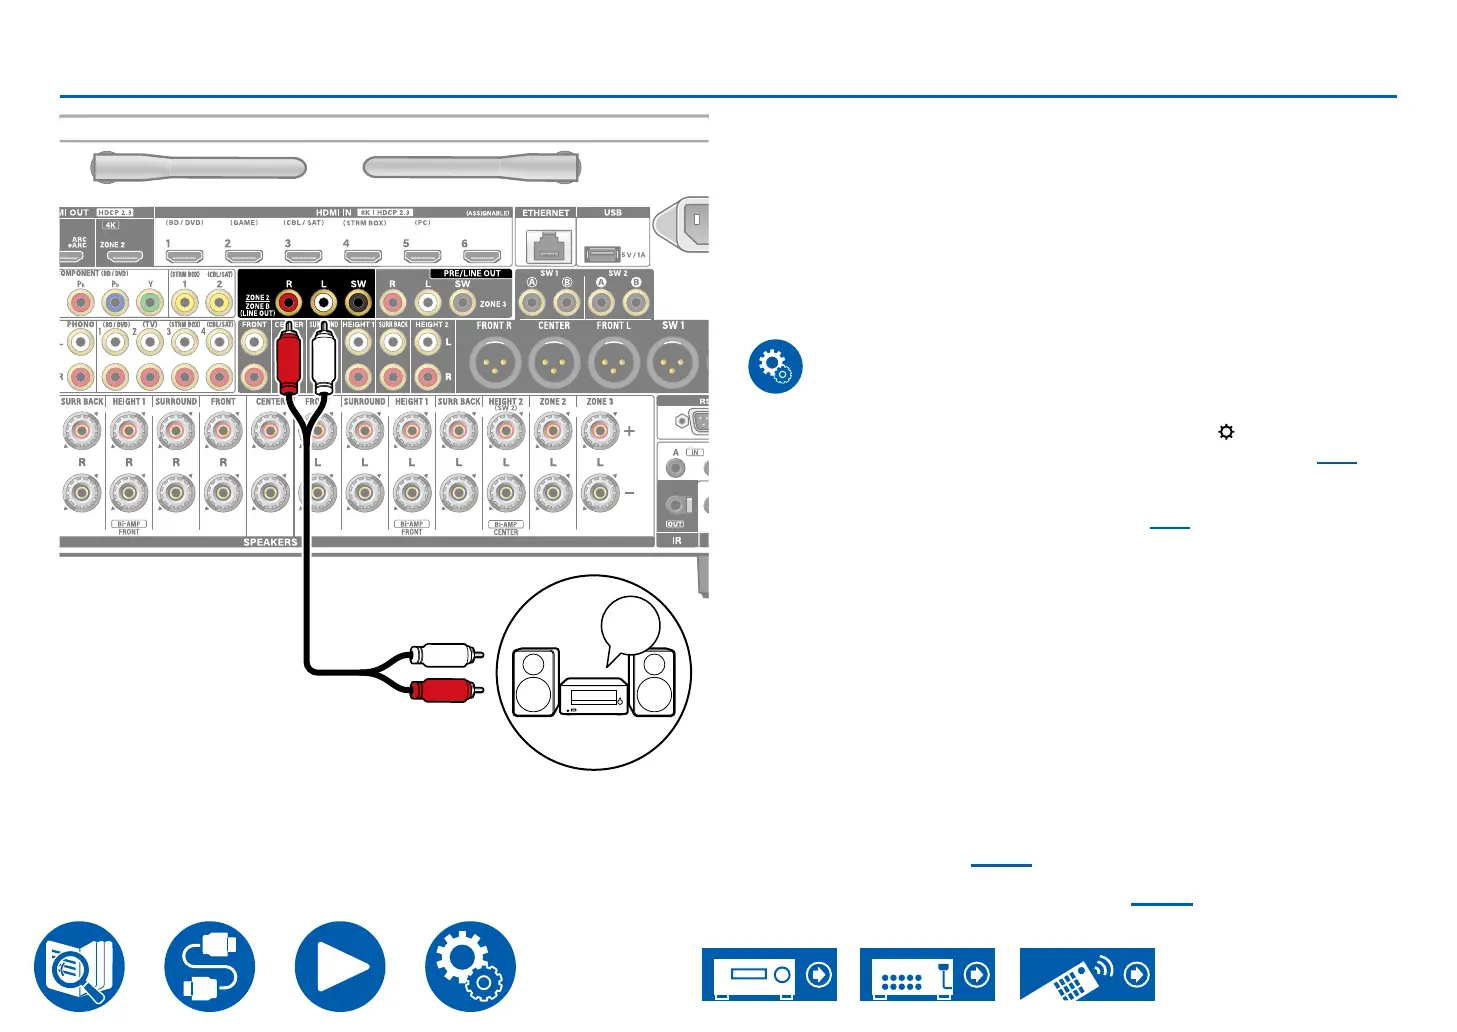
Connections
Connecting an Integrated Amplier (ZONE 2)
You can enjoy 2 ch audio in the separate room (ZONE 2) while performing
playback in the main room (where this unit is located). Use an analog audio
cable to connect the ZONE 2 PRE/LINE OUT jacks on this unit to the input jack
on an integrated amplier in the separate room.
• If the AV component is not equipped with an HDMI jack, use a digital coaxial
cable, digital optical cable or analog audio cable. Also, the audio from
externally connected AV components can be output to ZONE 2 only when the
audio is analog or 2 ch PCM signal. When the AV component is connected to
this unit with a digital coaxial cable or digital optical cable, change the audio
output of the AV component to the PCM output.
Setup
• Settings are required to output audio to ZONE 2. Press on the remote
controller, and set "Speaker" - "Conguration" - "Zone 2 Preout" ( →p136) to
"Zone 2".
• When connecting an integrated amplier that does not have a volume control,
set "Multi Zone" - "Zone 2" - "Output Level" ( →p162) to "Variable" (Default
Value: Fixed) on the Setup menu. If you do not set this, the volume output
will be very loud and there is a danger of damage to the integrated amplier,
speakers, etc. When connecting an integrated amplier that has a volume
control, leave this as "Fixed".
Multi-zone ( →p107)
Playing Back (ZONE 2) ( →p108)
Input
Terminal
a
Integrated
amplier
a Analog audio cable