xGen Lite Installation and Programming Guide 113
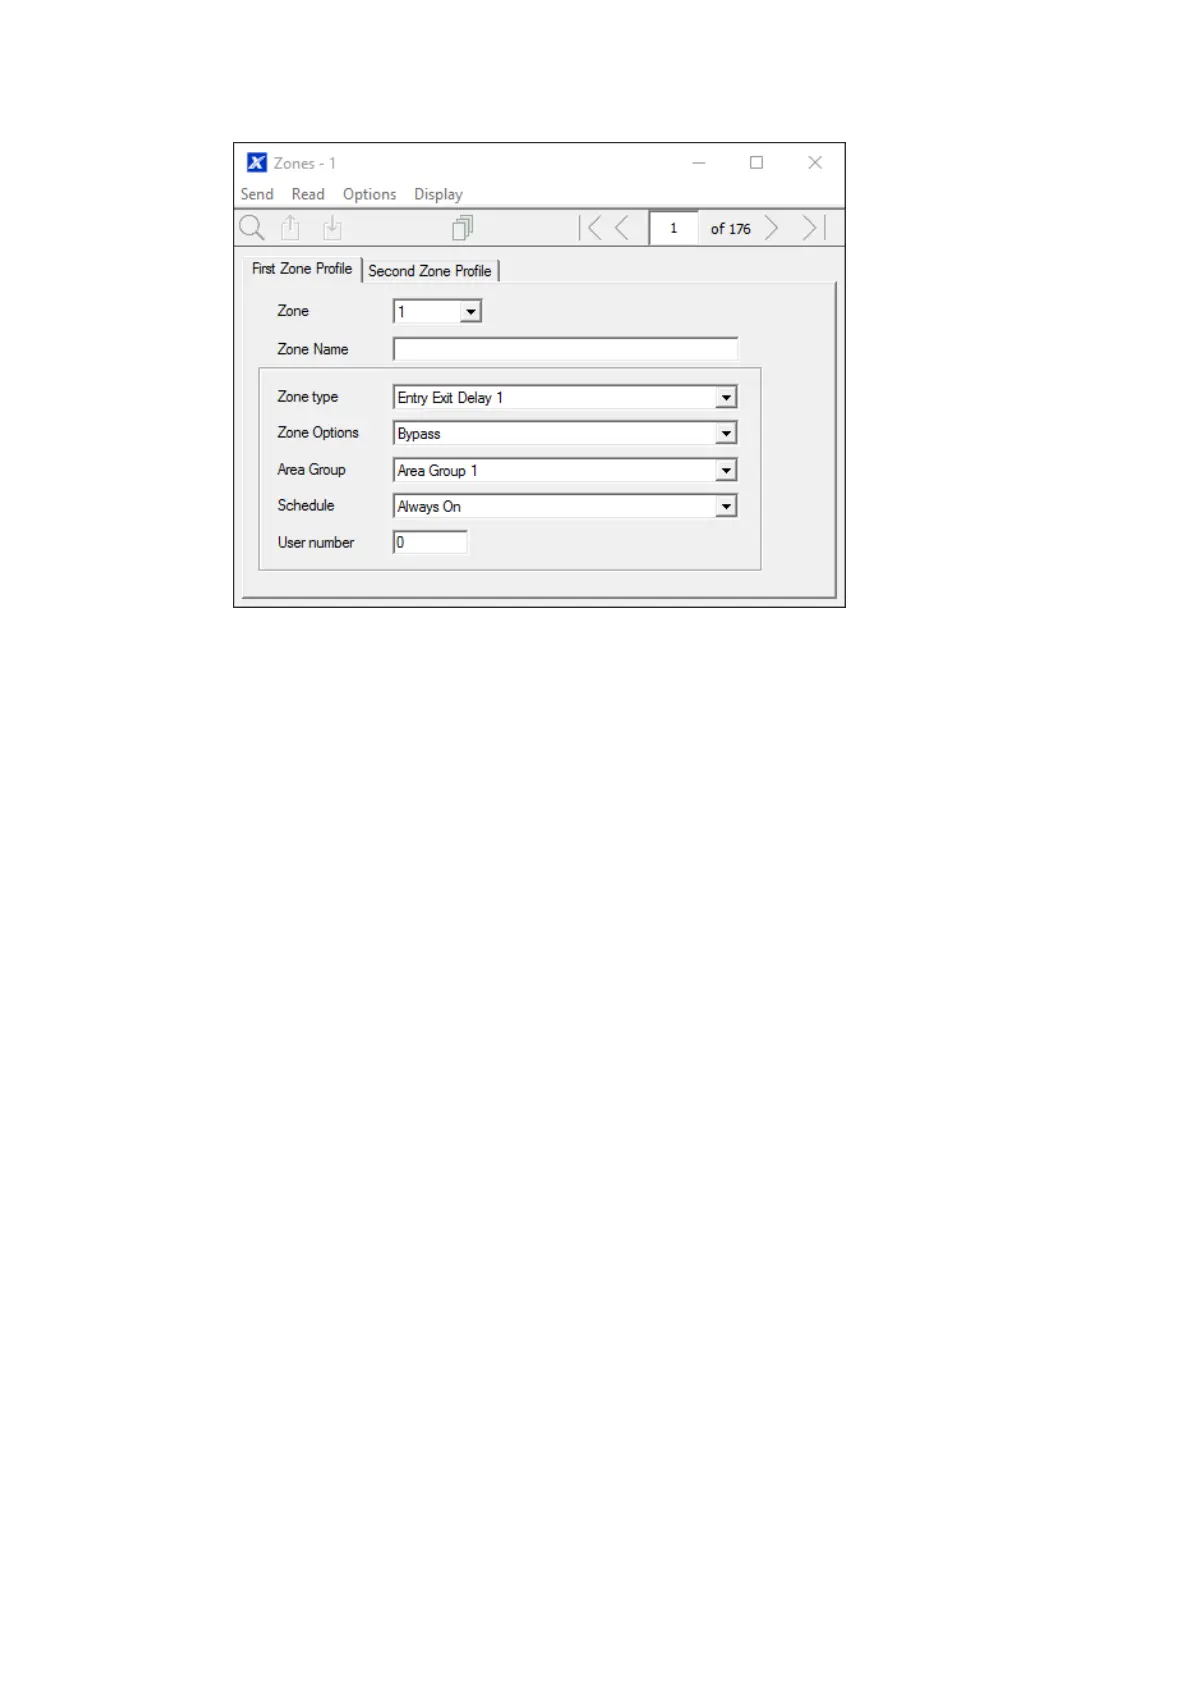
4. Go to Zones.
5. Select a zone number you want to program.
6. Enter a name for the zone.
7. Select the zone type profile you just created.
8. Select the zone options profile you just created.
9. Select an Area Group for the zone. If you want a zone to be in its own Area
then select an Area Group with only one Area. To create a zone in a common
Area, select an Area Group with multiple Areas. Alternatively come back to
this step later.
10. For a standard installation set the schedule to a preset which is 24 hours
every day, holidays should NOT be ticked. For example, “Always On”. This
will enable the first zone profile.
If you want the zone settings to change based on a schedule, then select the
first schedule here.
If no schedule is set in either the first or second zone profile then the zone will
be disabled.
11. If you are setting up a keyswitch zone then the user number field controls
which user profile will be used to arm/disarm. The keyswitch zone will report
as default User 99.
 Loading...