54 xGen Lite Installation and Programming Guide
This is achieved using the Scenes feature.
Note: Ensure you can view the Live Stream from the camera before continuing.
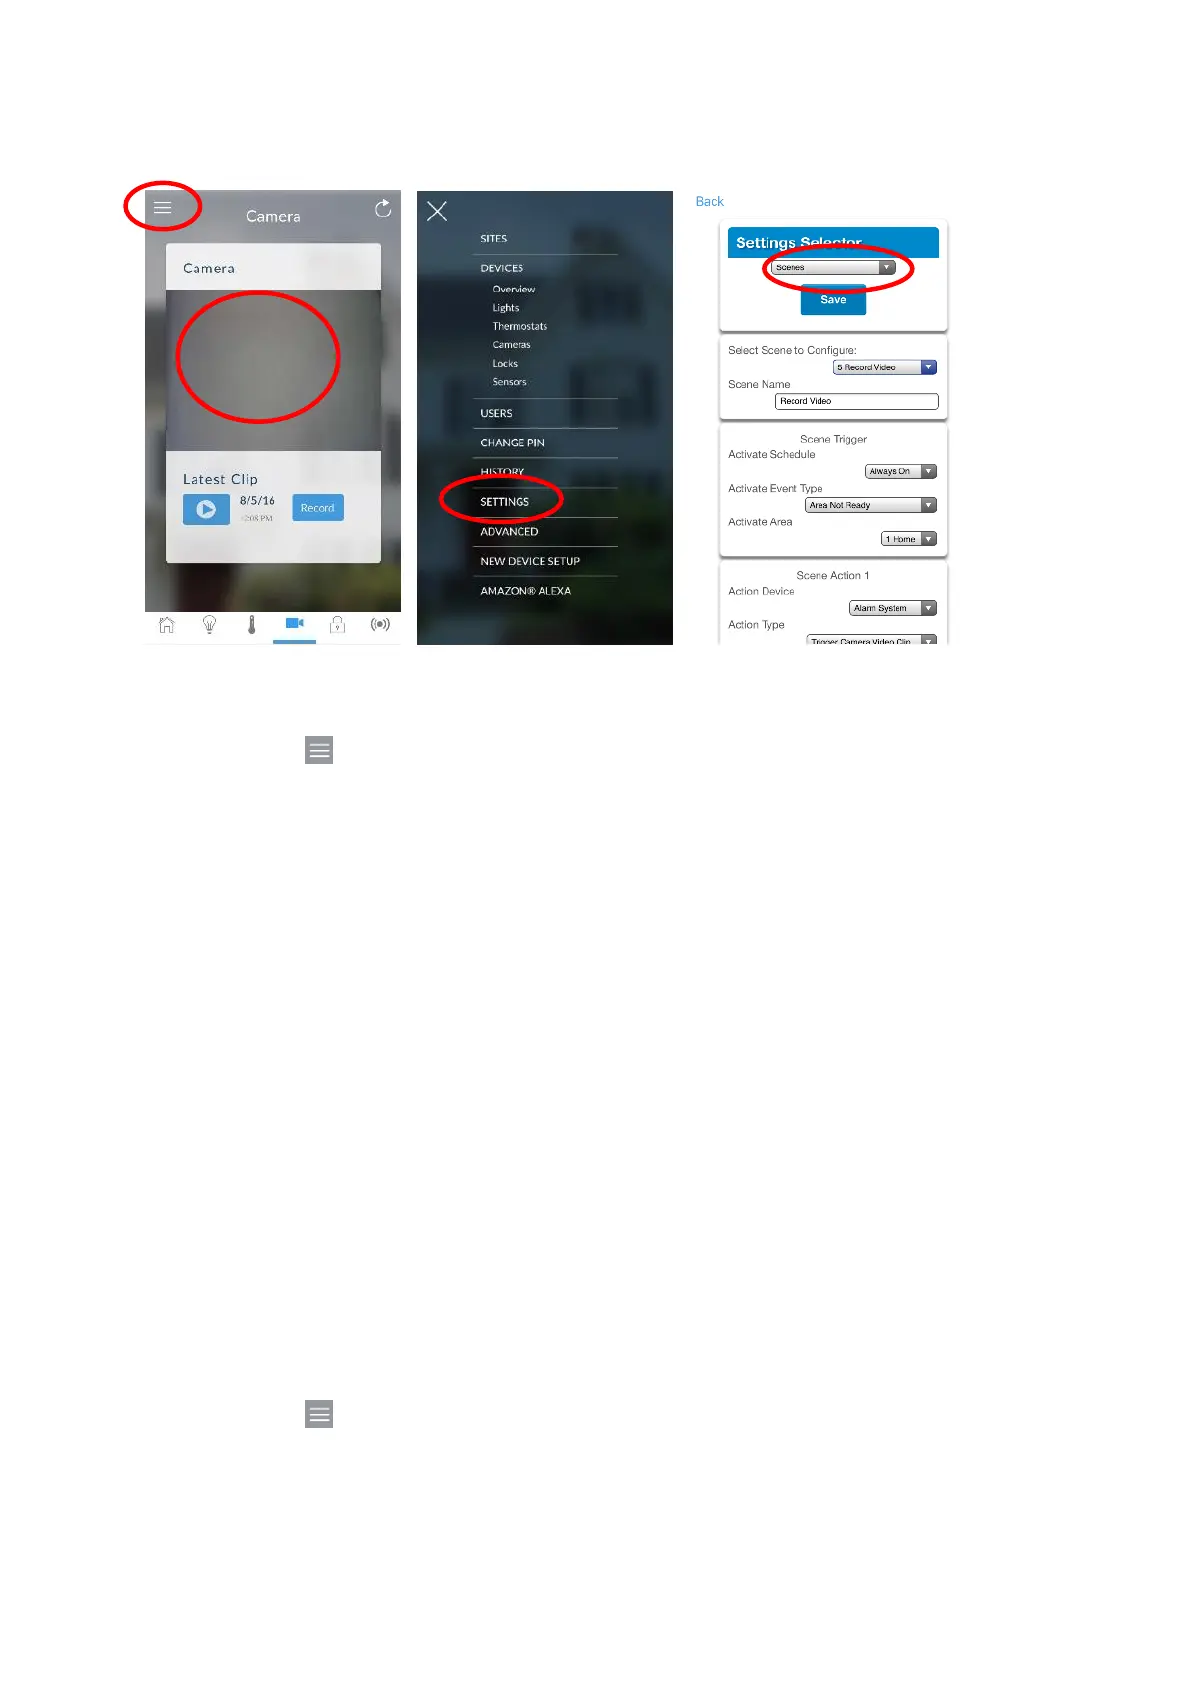
1. Log in to the UltraSync+ app.
2. Touch Menu then Settings.
3. Select Scenes under the Settings Selector.
4. Select the Scene to Configure and type a Scene Name.
5. Leave the “Enable App Button” ticked to show a shortcut button on the home
screen of the UltraSync+ app. Untick this option to hide it.
6. Select the Activate Schedule - Always On to allow recording at all times.
7. Select the event that will trigger recording a video clip using the Activate
Event Type drop-down box.
8. Select the Activate Zone/Area/User/Action if applicable.
9. Select Action Device (1) Alarm System, Action Type “Trigger Camera Video
Clip”, then the cameras you wish to record a video clip when the event is
triggered.
10. Click Save, Back.
11. Activate the event and wait for the programmed recording time (typically 15
seconds). Camera will record to the camera’s microSD card.
12. Click the camera icon and check the video clip plays back.
Viewing event triggered clips in History
1. Touch Menu then HISTORY.
2. Find the video event by using the navigation buttons and scrolling down.
 Loading...