P/N 960-000180R_Rev. 1 {EDP #233427} © 2016, JAPAN CASH MACHINE CO., LTD.
Section 6 DBV® Series DBV-400 Banknote Validator Calibration and Testing
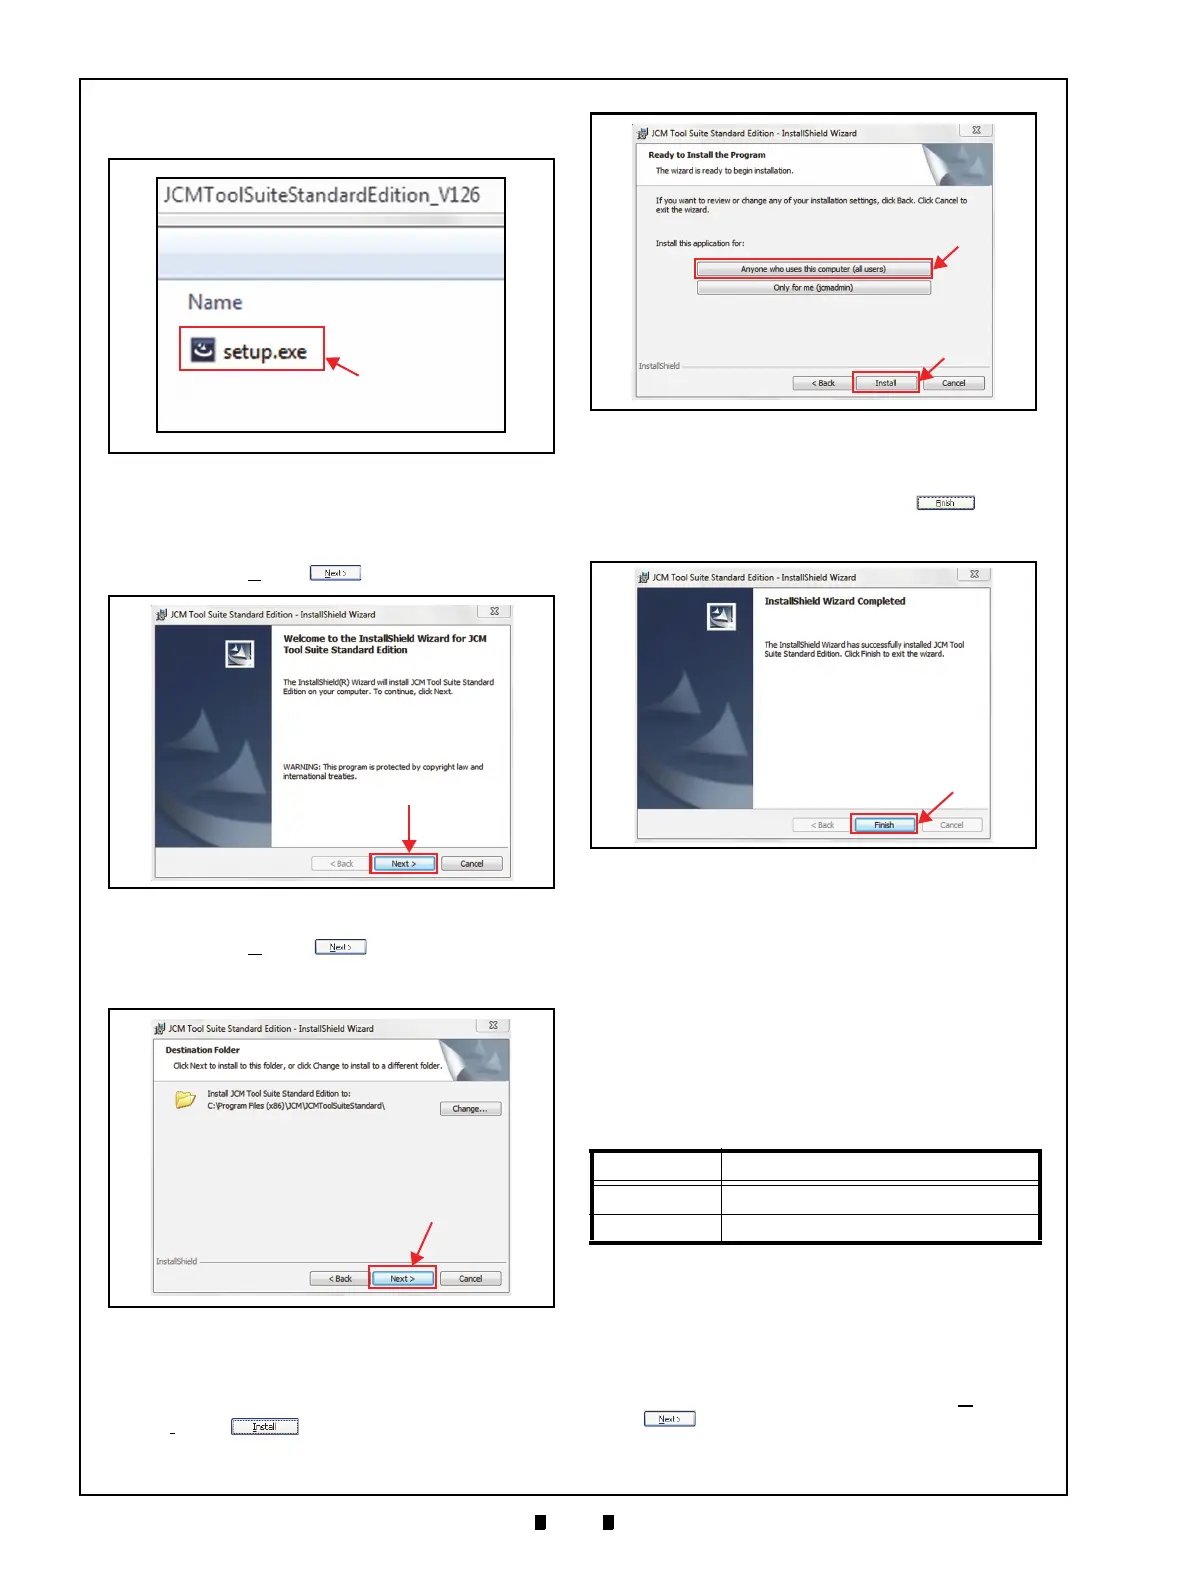
2. Open the third layer of the extracted Folder and
double-click on “
Setup.exe”(Figure 6-4 a).
The “
JCM Tool Suite Standard Edition - Install
Shield Wizard
” Screen shown in Figure 6-5 will
appear.
3. Click the “
Next>” Button (Figure 6-5 a).
4. Click the “N
ext>” Screen Button (Figure
6-6 a) when the “
Destination Folder” Screen
shown in Figure 6-6 appears.
5. When the “
Ready to Install the Program” Screen
appears, click “
Anyone who uses this computer
(all users)
” (Figure 6-7 a), and then click on the
“
Install” Screen Button (Figure 6-7 b) to
start the installation.
6. Once installation is complete, the “
InstallShield
Wizard Completed
” Screen shown in Figure 6-8
will appear. Click on the “Finish” Screen
Button (Figure 6-8 a) to end the installation pro-
cess.
This completes the “JCM Tool Suite Standard
Edition
” installation procedure.
Driver Installation Procedure
DBV-400 USB Drivers need to be installed on the
PC before the JCM Tool Suite Standard Edition can
be used. To install the DBV-400 Software Driver,
proceed as follows:
1. Copy the DBV-400 Driver into the desired PC
Folder (e.g., folder_name).
2. Connect the USB Cable to the USB Connector for
maintenance (Refer to Figure 6-1 and Figure 6-2
for the Tool Requirements and Harness Connector
locations).
3. Apply electrical power to the DBV-400 Unit.
4. When the Device Driver Installation Wizard
Screen (Figure 6-9) appears, click the “N
ext>”
Screen Button (Figure 6-9 a) to install the
driver for the DBV-400 Unit.
Figure 6-4 Setup.exe File Location
Figure 6-4 Setup.exe File Location
Figure 6-5 InstallShield Wizard Screen
Figure 6-5 InstallShield Wizard Screen
Figure 6-6 Destination Folder Screen
Figure 6-6 Destination Folder Screen
Table 6-1 USB Driver Files
OS Version
USB Driver Files
Windows XP DBV-400 USB driver.inf
Windows 7 DBV-400 USB driver-win7.inf
Figure 6-7 Current Settings Confirmation
Figure 6-7 Current Settings Confirmation
Figure 6-8 Installation Completion Screen
Figure 6-8 Installation Completion Screen