P/N 960-000180R_Rev. 1 {EDP #233427} © 2016, JAPAN CASH MACHINE CO., LTD.
Section 6 DBV® Series DBV-400 Banknote Validator Calibration and Testing
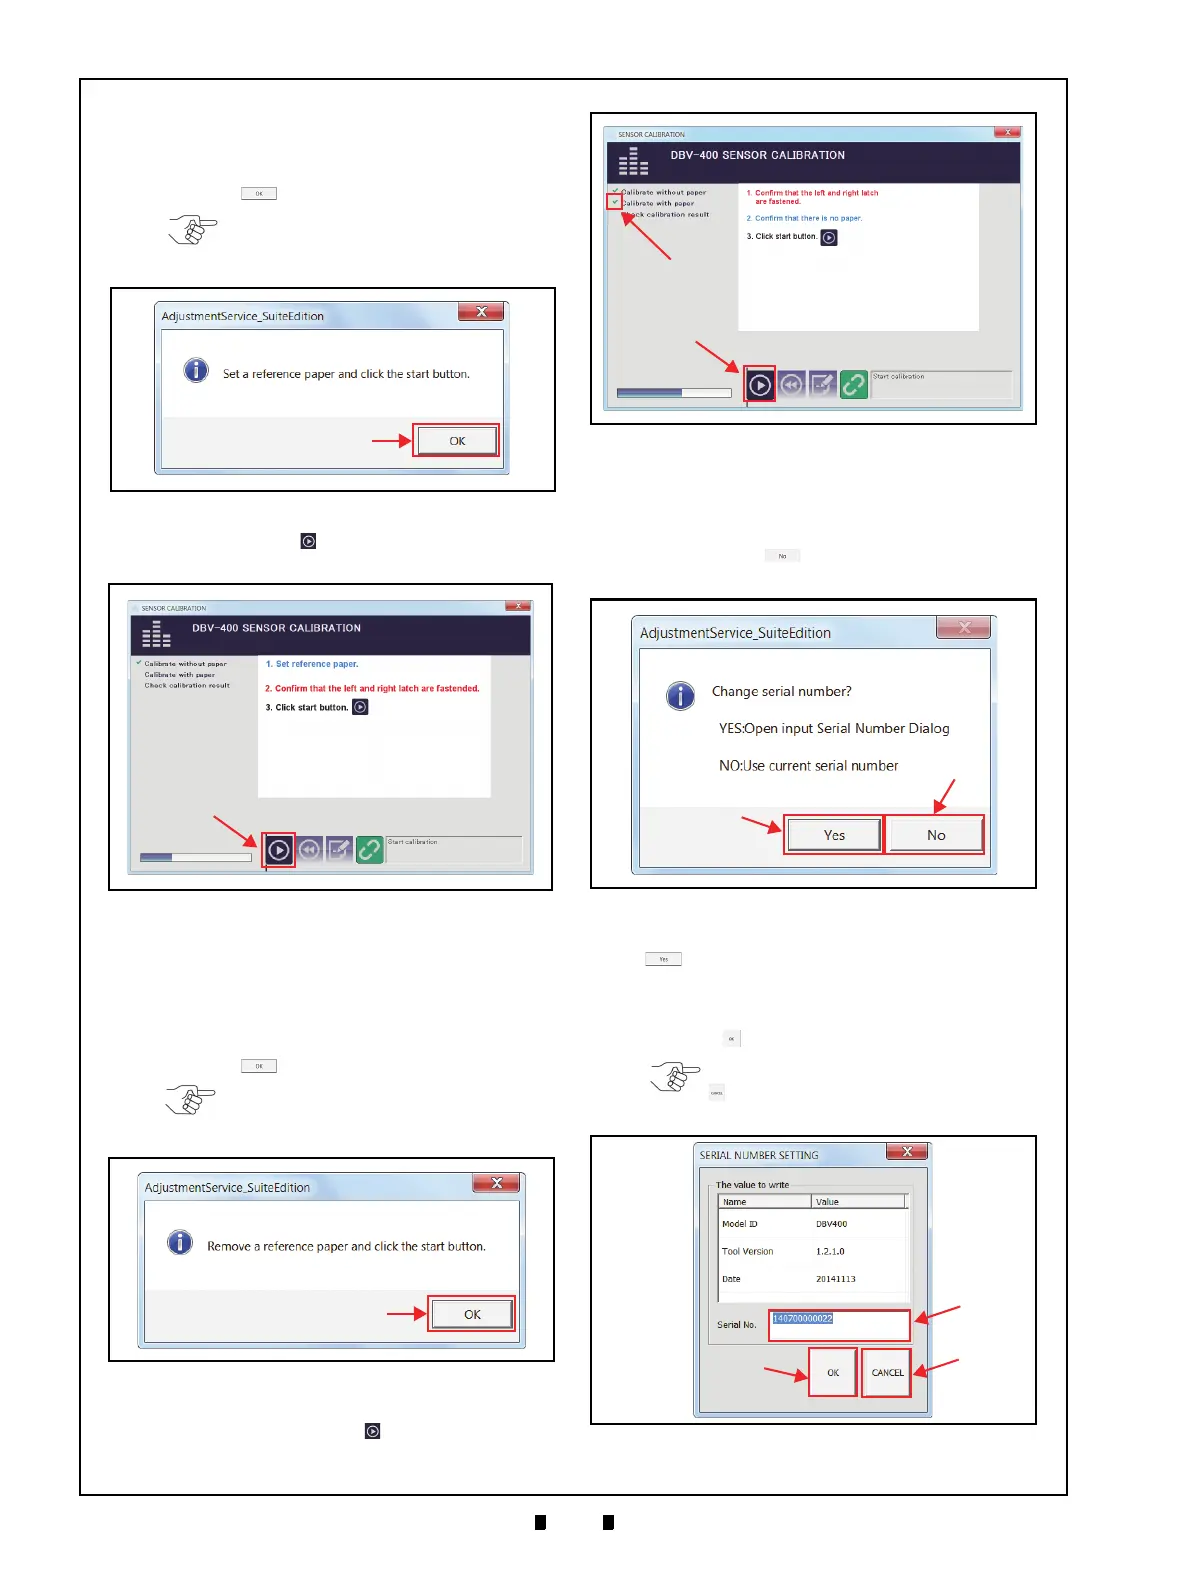
5. The “Set a reference paper and click the start
button.
” message dialogue box will appear. Place
the KS-095A Reference Paper into the DBV-400
Device and insert the Validation Guide, then click
the “
OK” button (Figure 6-36 a).
6. Click the “
Start” button (Figure 6-37 a) to
begin the Reference Paper Calibration.
7. Confirm that “
Calibration with paper” calibration
is completed with a check mark (Figure 6-39 a)
next to the “
Calibration with paper” text line.
8. Confirm that the “
Remove a reference paper and
click start button.
” message dialogue box appears.
Remove the KS-095A Reference Paper and click
the “
OK” button (Figure 6-38 a).
9. Confirm that the Validation Guide is locked
firmly, then click “
Start” button (Figure 6-39
b) to begin the second Non-paper Calibration.
10. When the second Non-paper Calibration is
completed, the “Maintenance Calibration Tool”
dialogue screen appears to change the Serial
Number. When using the default Serial Number,
click the “
No” button (Figure 6-40 a) to
finish the calibration.
To change the Serial Number, click the “
YES”
button (Figure 6-40 b) and type the desired
10-digit (Maximum: 12-digit) Serial Number in
the Serial No. text box (Figure 6-41 a) on the
SERIAL NUMBER SETTING Screen. Then click
the “OK” button (Figure 6-41 b).
NOTE: Refer to Step 1 of “Placing
the KS-095A Reference Paper” on
page 6-5.
Figure 6-36 Placing Reference Paper Mes-
Figure 6-36 Placing Reference Paper Message
Figure 6-37 Reference Paper Calibration
Figure 6-37 Reference Paper Calibration
NOTE: Remove the Validation Guide
(refer to Figure 6-25 on page 6-5)
before removing a reference paper.
Figure 6-38 Removing Reference Paper Mes-
Figure 6-38 Removing Reference Paper Message
Figure 6-39 Second Non-Paper Calibration
Figure 6-39 Second Non-Paper Calibration
Figure 6-40 Serial Number Change Dialogue
Figure 6-40 Serial Number Change Dialogue
NOTE: When clicking the “CANCEL”
button (Figure 6-41 c), the Serial
Number change is not saved.
Figure 6-41 Serial Number Setting
Figure 6-41 Serial Number Setting
 Loading...


