– 103 –
①
Selecting the new-pattern creating function
Display the "new sewing pattern creation screen" referring to
①
in "8-1-1. Creation of a new pattern"
p.97.
②
Setting the feed locus of polygonal-shape stitching
Select the feed locus referring to
②
in "8-1-1.
Creation of a new pattern" p.97.
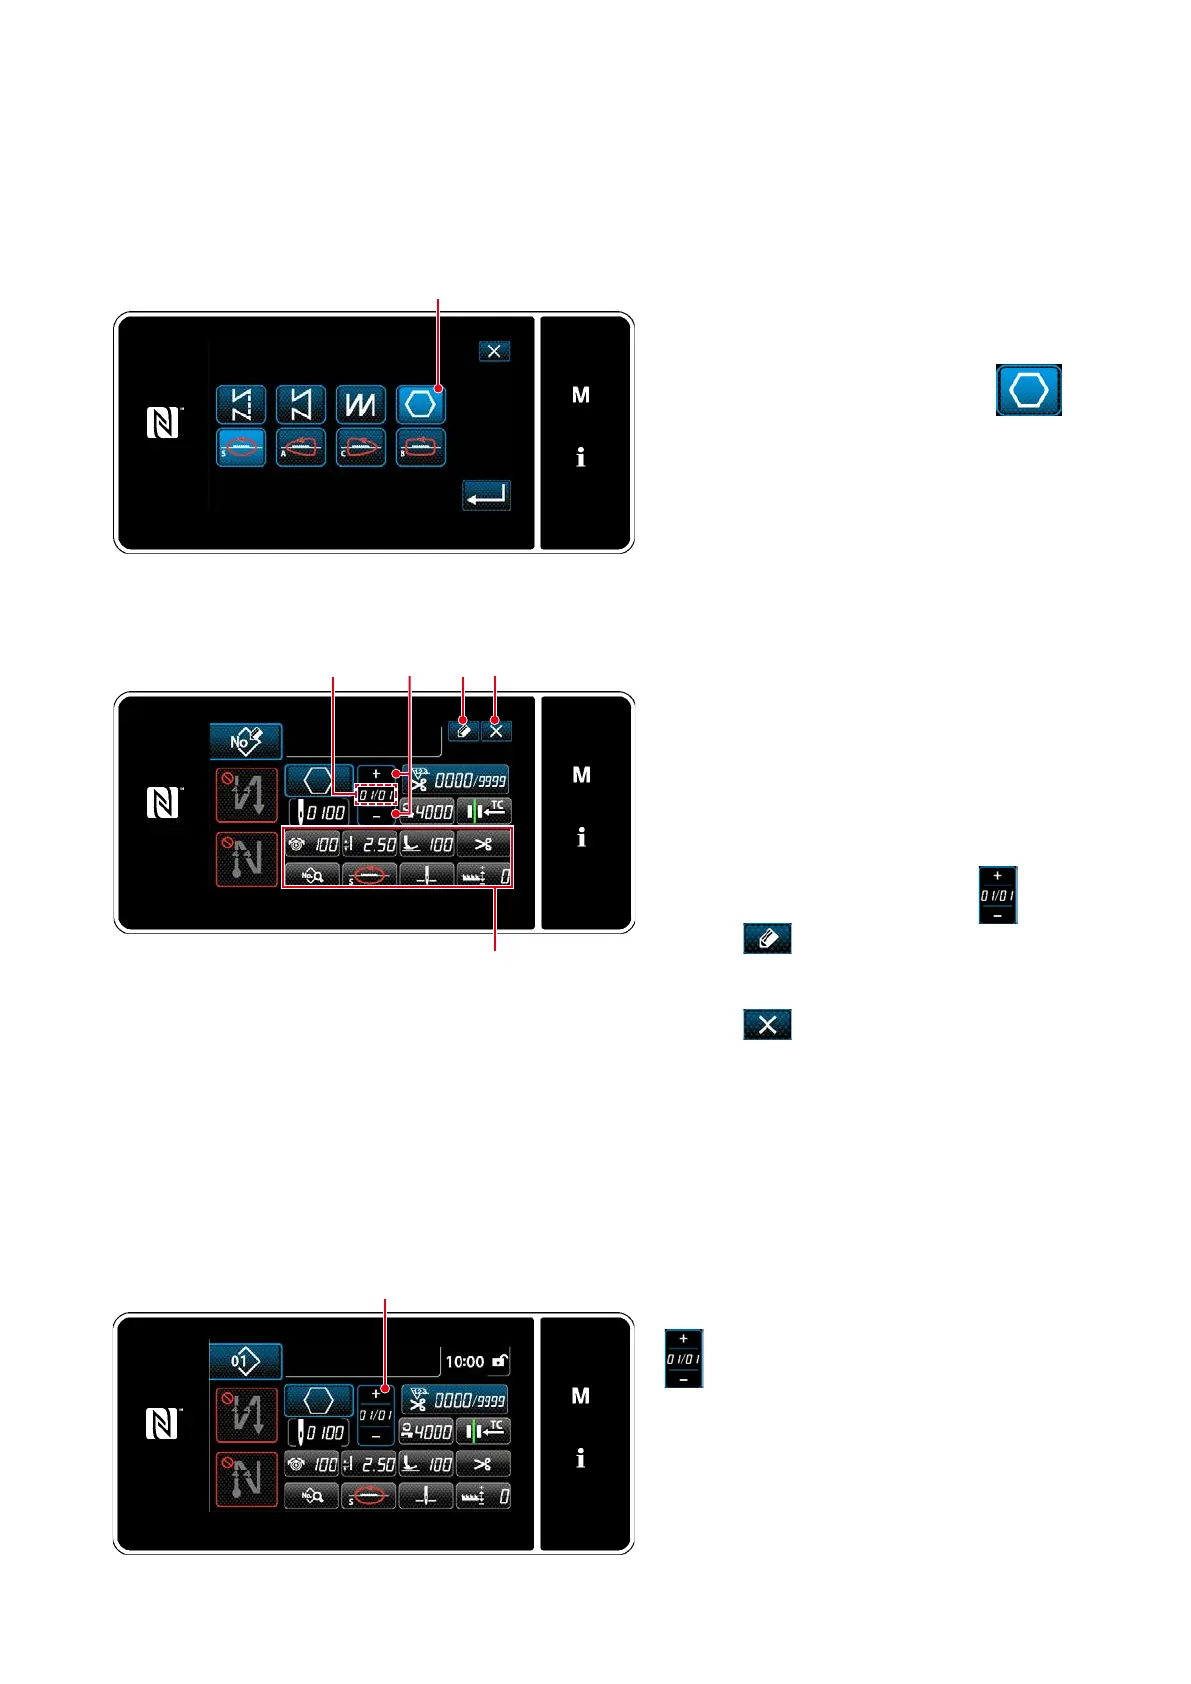
Select polygonal-shape stitch pattern
❶
on the stitch shape selection screen.
The "new sewing pattern edit screen" is dis-
played.
<New pattern creation screen>
③
Setting the pattern function on a step-by-step basis
<New sewing pattern edit screen>
1. Set the pattern function with buttons
❷
on a
step-by-step basis.
Refer to
"4-2. Sewing patterns" p.33.
2.
The total number of steps you have set is dis-
played on the right of section A. The current
step is displayed on the left of section A. The
current step can be changed with
❸
.
3. Press
❹
.
The "sewing pattern number registration
screen" is displayed.
Press
❺
to display the data discard
conrmation screen.
Steps of procedure to be taken after the afore-
mentioned step are same as steps
③
to
④
in
"8-1-1. Creation of a new pattern" p.97.
❶
❷
A
❹ ❺❸
8-2-2. Creating a new polygonal-shape stitching pattern
8-2-3. Setting the step from which polygonal-shape stitching is started
In the case it is necessary to re-sew a pattern from the middle of the pattern after the occurrence of troubles
such as thread breakage, it is possible to re-start sewing from an arbitrary step of the pattern.
The current step can be changed by pressing
❶
on the sewing screen for polygo-
nal-shape stitching pattern.
❶
<Sewing screen (Polygonal-shape stitching pattern)>

 Loading...


