ERRATA
INCORRECT CORRECT
• If the power cord is unplugged from the wall socket for more
than an hour
, the internal clock, program, etc. of the main unit
may require resetting. When this occurs, please set the clock
(and timer functions) again.
• If the power cord is unplugged from the wall socket for more
than a few seconds
, the internal clock, program, etc. of the main
unit may require resetting. When this occurs, please set the
clock (and timer functions) again.
1
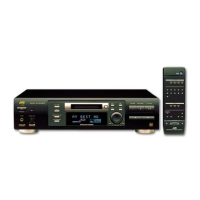
Load CDs into the trays of the 3-CD changer.
• Only tracks on the CDs loaded in the 3-CD changer can be reg-
istered into the program (i.e., tracks on a CD loaded in the CDR
cannot be selected for playback).
• “CD READ DISC” will be shown in the information display as
the unit reads the information from each disc.
1
Load CDs into the trays of the 3-CD changer.
• Only tracks on the CDs loaded in the 3-CD changer can be reg-
istered into the program (i.e., tracks on a CD loaded in the CDR
cannot be selected for playback).
• “CD READ DISC” will be shown in the information display as
the unit reads the information from each disc.
Note
• To close a tray, press the 0 button for the tray number that is
open. If you press the 0 button for a tray number other than that
for the tray that is open, the program may not be played correctly.
1
Load CDs into the trays of the 3-CD changer.
• Only tracks on the CDs loaded in the 3-CD changer can be reg-
istered into the program (i.e., tracks on a CD loaded in the CDR
cannot be selected for playback).
• “CD READ DISC” will be shown in the information display as
the unit reads the information from each disc.
Note
• To close a tray, press the 0 button for the tray number that is
open. If you press the 0 button for a tray number other than that
for the tray that is open, the program may not be played correctly.
1
Load CDs in the 3-CD changer
1
Load CDs in the 3-CD changer
Note
• To close a tray, press the 0 button for the tray number that is
open. If you press the 0 button for a tray number other than that
for the tray that is open, the program may not be played correctly.
Turning the Power On and
Standby Mode
Programming Playback Using
Main Unit Controls
Programming Playback Using
the Remote Control
Program Edit Recording
Page 10
Page 18
Page 27
There were some errors in the instruction manual. We apologize for this and correct them as follows.
Page 17
Errata sheetA4.fm Page 1 Wednesday, May 9, 2001 9:47 PM