10 | 01 Getting started
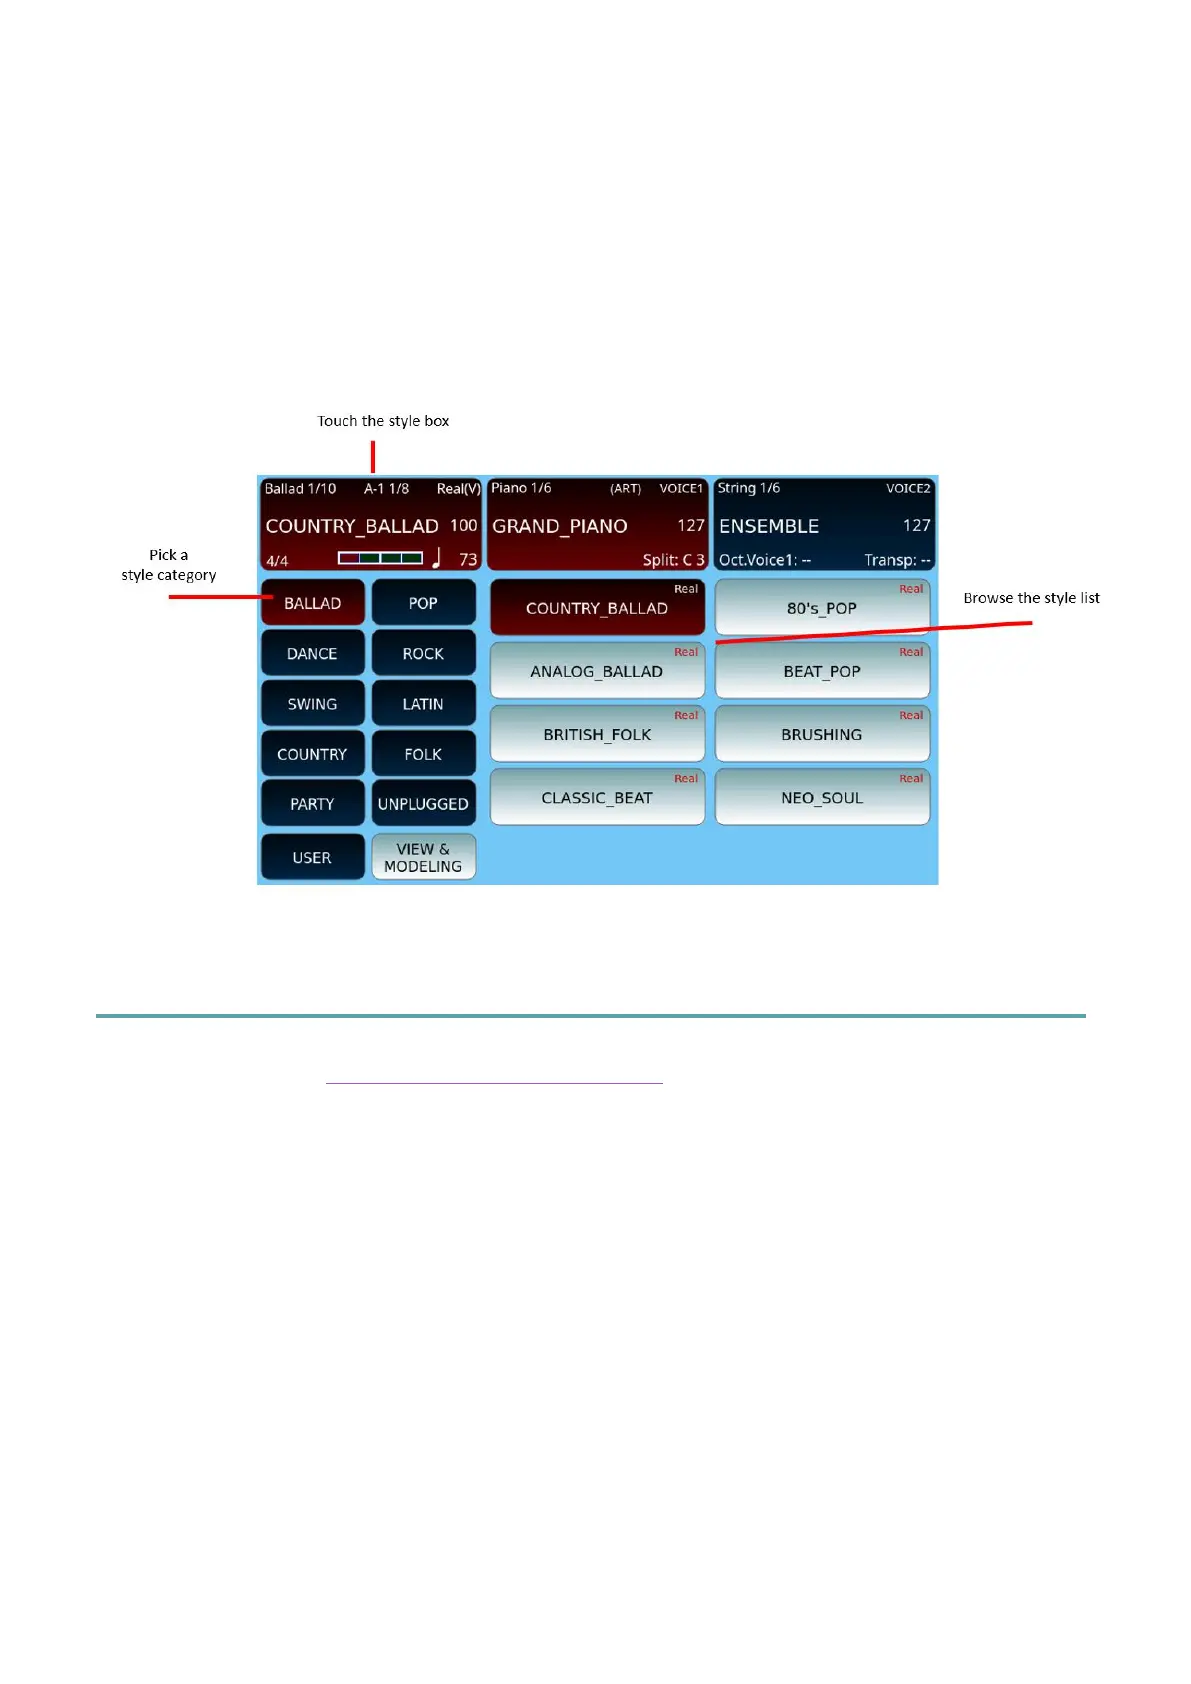
• On the bottom line are the control buttons used to control the currently playing style.
By pressing the USER TAB button on the front panel, you can see even more
functions, including the ones you programmed.
The data scroll areas appear when you press one of boxes: style, Voice 1, Voice 2, Drawbar or
Bass. You can scroll through the list by turning the pages with the data wheel. When you
have found the item you are looking for, select it by touching it on the screen. In the
example, we see the choice of styles, but the same goes for the selection of voices.
Power on the instrument
This chapter is about Audio/video inputs and outputs and will show all the connection
options. Now, to get started, let us plug in what is needed to turn on the meter:
1. Connect the power supply to the DC 9V socket on the rear panel of the
instrument.
2. Plug the other end of the power cord into an AC outlet.
3. To play the module from an external keyboard or accordion, connect the MIDI
OUT port on the external device to the MIDI IN2 (KEYBOARD) port on the EVENT-
X via a cable with 5-pin DIN standard MIDI connectors.
4. Connect to EVENT-X a pair of stereo headphones (optional) to the HEADPHONE
output, alternatively you can connect the instrument to an external PA speaker
system (optional) using the OUT RIGHT/LEFT.
5. Make sure the MASTER volume slider is set to the minimum position.