32
Hybrid DVR (HD Series)
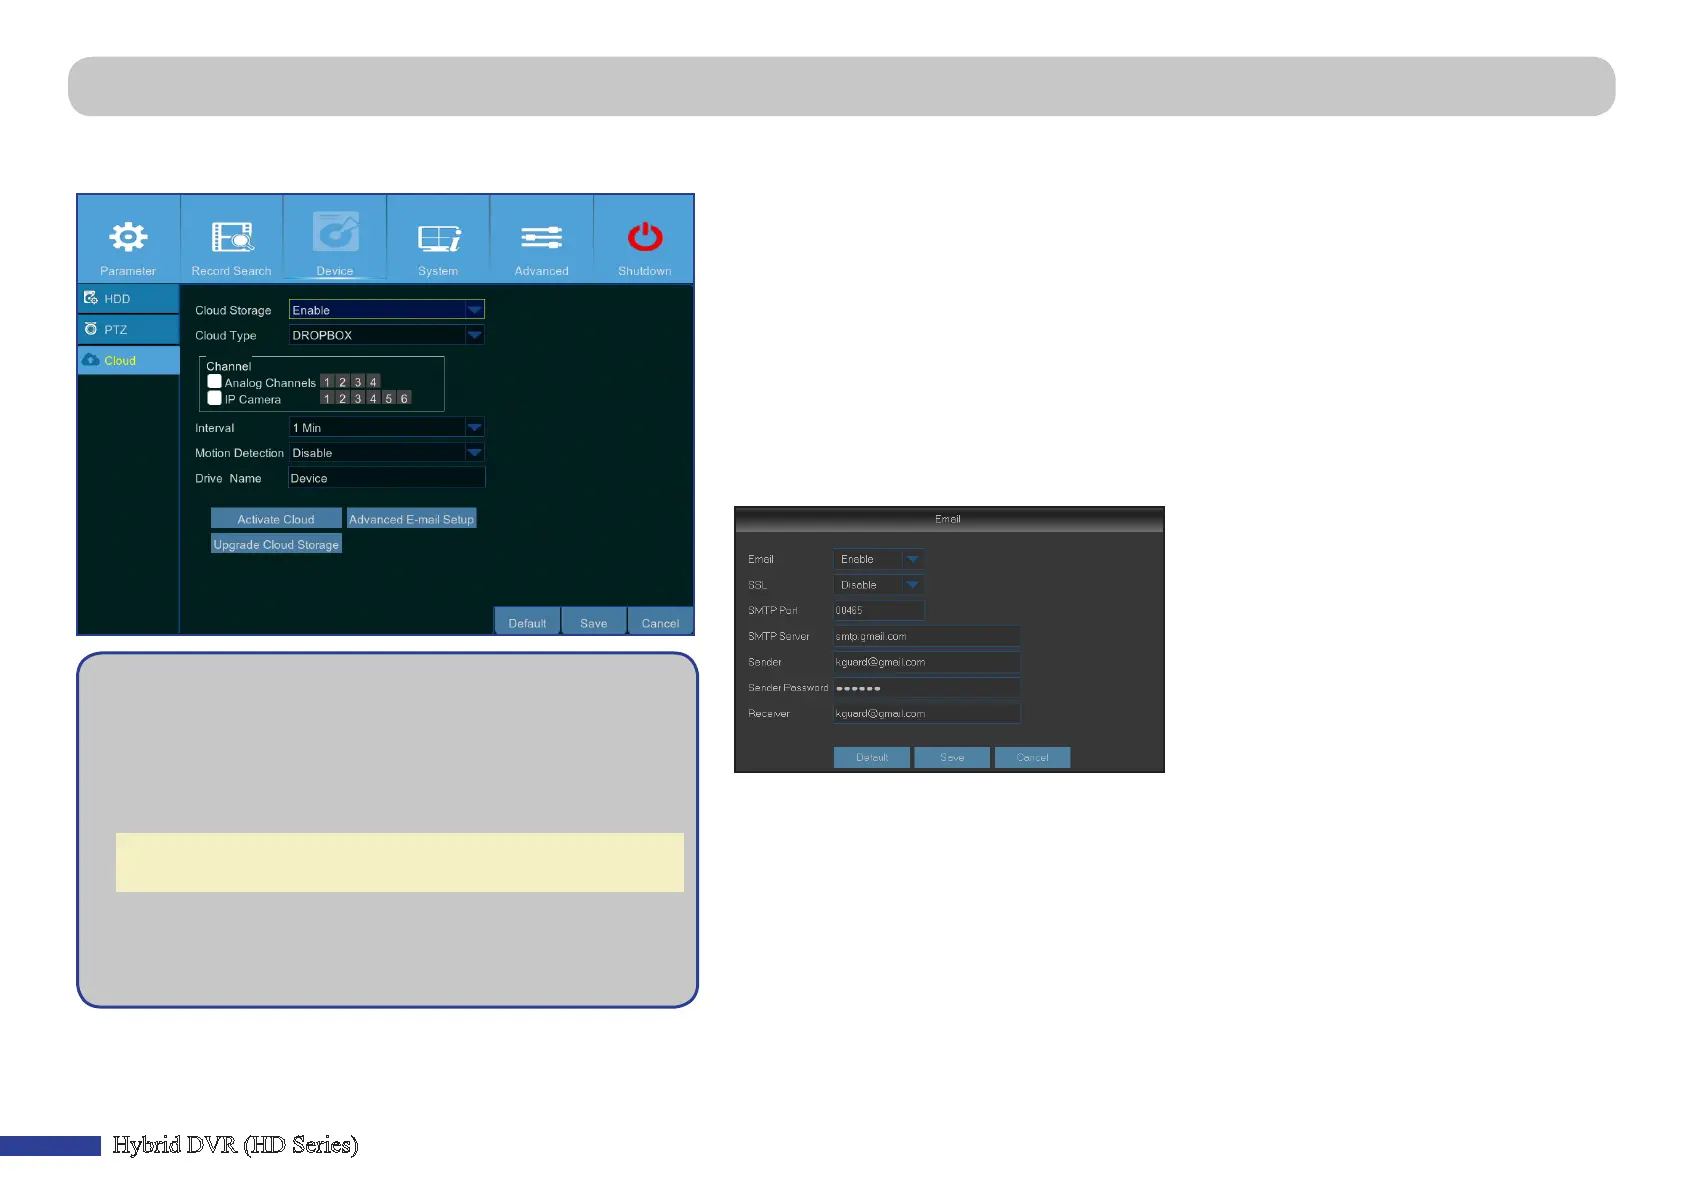
Main Menu > Device > Cloud
This menu allows you to see what is happening on your camera site anyme, anywhere through the Internet. Uploading the snapshots can be based on a me interval or a
moon is detected.
Geng ready to start uploading the snapshots
1) Enable Cloud Storage and congure Cloud sengs for
channel(s).
2) Congure advanced e-mail sengs in Advanced E-mail Setup.
3) Click Acvate Cloud and wait for the vericaon email.
4) Click Acvate Cloud in Dropbox link on vericaon email.
NOTE: Make sure to check your email and follow the link to
complete cloud storage acvaon within 3 minutes.
5) Enter your Dropbox account credenals.
Seng up the Cloud service is now complete. If you
encountered any problems while acvang the Cloud service,
please repeat steps from 3 to 5.
• Cloud Storage: Enable to allow cloud sengs.
• Cloud Type: This DVR only supports Dropbox cloud storage.
• Channel: Select the channels where you want to upload the snapshots to Dropbox.
• Interval: Set the image uploading interval. Set OFF if you want to use moon based uploading.
• Moon Detecon: Enable if you want to upload snapshots to Dropbox when the camera detects
a moon.
• Drive Name: Enter the cloud storage name for your DVR.
• Acvate Cloud: Click to acvate the funcon. An acvaon email will be sent to the Receiver
email account.
• Advanced E-mail Setup: Click to congure your email sengs.
• Upgrade Cloud Storage: Click to upgrade the current cloud storage service.