6
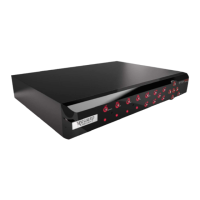
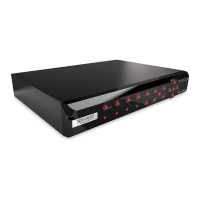
Hybrid DVR (HD Series)
A) HDD LED - This will ash when the hard drive is working.
B) Power LED - This light will turn on when the DVR has power.
C) USB - Connect the supplied mouse here.
D) Audio Out - For connecng speakers.
E) Video In - This is where you connect the cameras.
NOTE: To ensure the image quality, we recommend you to use the supplied
KGUARD cameras, or purchase separately KGUARD Megapixel CCTV Cameras.
F) Audio In - For connecng microphones.
G) HDMI - Connect this to your digital TV or monitor with HDMI input.
H) VGA - Connect this to your TV or a monitor with VGA input.
I) LAN - Connect this to your home network, so that your DVR can be accessed through
Internet. In addion to connecng to a network, you can also access the local
or remote ONVIF IP cameras.
J) USB - Connect the USB ash drive to backup recorded events.
K) RS485 - Connects to a Speed dome camera via RS485.
L) Power - This is where you connect the power adapter.
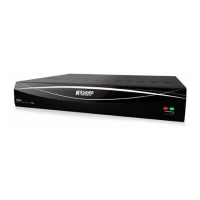
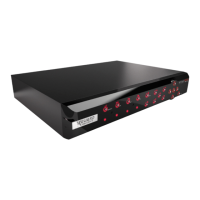
Product Overview
NOTE: The front view of the product is similar for 4-channel, 8-channel, and
16-channel DVR.
Hybrid
Digital Video Recorder
A B
C
Front View (4-Channel DVR*)
VGA
12V
LAN
CAUTION
RISK OF ELECTRIC SHOCK
DO NOT OPEN
HDMI
AUDIO
OUTPUT
1
2
3
4
1
2
3
4
VIDEO
INPUT
AUDIO
INPUT
RS485
Rear View (4-Channel DVR)
RS485
VGA
12V
LAN
CAUTION
RISK OF ELECTRIC SHOCK
DO NOT OPEN
HDMI
AUDIO
OUTPUT
7
8
5
6
3
4
1
2
3
4
1
2
VIDEO
INPUT
AUDIO
INPUT
D EF G H I K LJ
Rear View (8-Channel DVR)
RS485
VGA
12V
LANHDMI
AUDIO
OUTPUT
1
2
3
4
5
6
7
8
1
2
3
4
VIDEO INPUT
9
10
11
12
13
14
15
16
AUDIO
INPUT
DE F GH IK LJ
Rear View (16-Channel DVR)
Making the Connecons