68
3X #8 x 2 WS
A
C
flush to end of Roof End
flush to side edge of Roof End
B
Build 4 of these assemblies
3X #8 x 2 WS
A
C
flush to end of Roof End
flush to side edge of Roof End
B
Build 4 of these assemblies
3X #8 x 2 WS
A
C
flush to end of Roof End
flush to side edge of Roof End
B
Build 4 of these assemblies
3X #8 x 2 WS
A
C
flush to end of Roof End
flush to side edge of Roof End
B
Build 4 of these assemblies
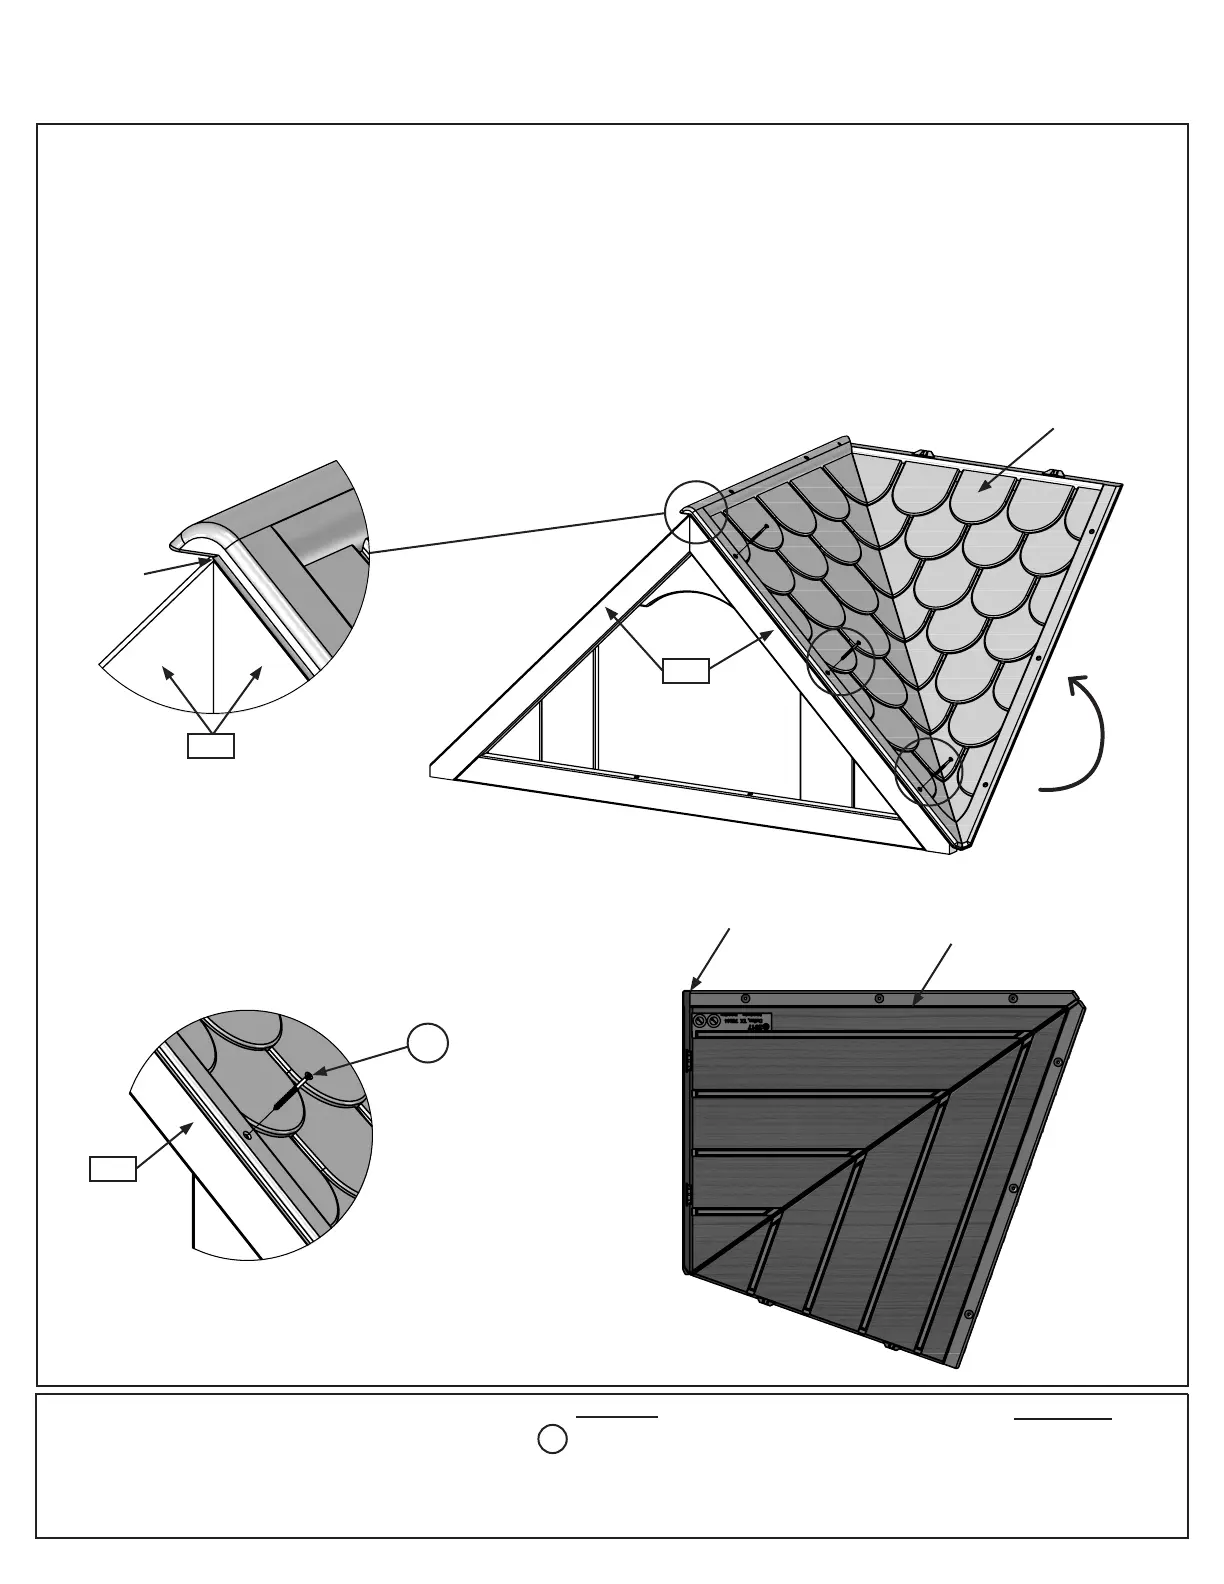
Step 27: Attach Roof Panels
Part 1
Note: It is important to ensure that there is a 5mm square opening in the top, center of the roof. This will
be used in a later step.
A: Bend roof panel along the fold to allow the panel to t between the gables. (g. 27.2)
B: Place panel onto the gable as shown in g. 27.2, making sure that it’s ush to the end and side edge of the
(2852) Roof End. (g. 27.1 and 27.4)
C: Attach the roof panel to (2852) Roof End using 3 (S11) #8 x 2” Wood Screws per side. (g. 27.2 and 27.3)
Flush to end of
Roof End
x 3
Flush to side edge
of Roof End
Roof
Panel
Flush
S11
Hardware
3 x #8 x 2” Wood Screw
S11
Bend Roof
Panels
Other Parts
1 x Roof Panel
Fig. 27.1
Fig. 27.2
Fig. 27.3
Fig. 27.4
2852
2852
2852
 Loading...