65
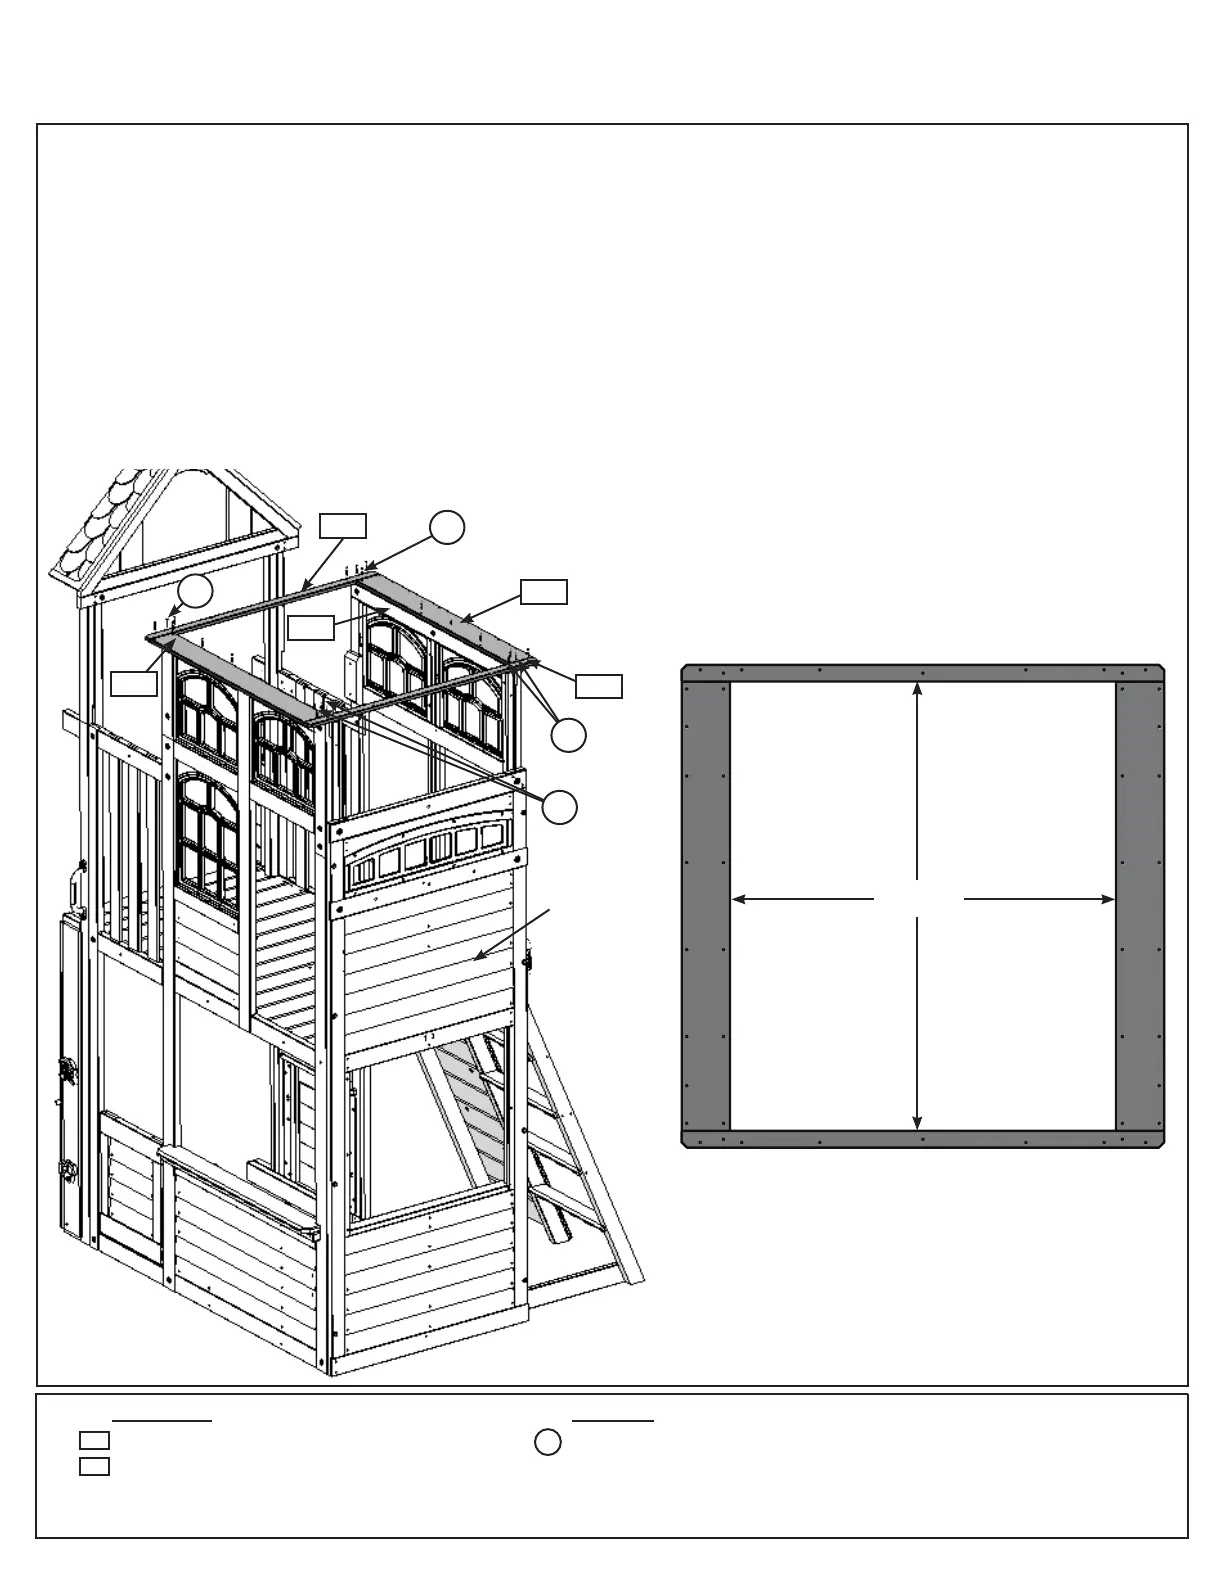
Step 25: Attach Softs
2 x Soft 5/8 x 4-27/64 x 40-5/32”
2 x Soft Narrow 15.9 x 1-19/32 x 43-11/32”
Wood Parts Hardware
9350
9351
18 x #8 x 1-3/8” Wood Screw
S20
Fig. 25.1
Fig. 25.2
Flush
9350
A: On the top of the Front Wall place 1 (9350) Soft so that it’s centered over (9365) TB Support and ush to the
inside edge, making sure to follow the hole orientation closely. Using the inside set of holes, attach (9350) Soft
with 6 (S20) #8 x 1- 3/8” Wood Screws. (g 25.1 and g 25.2)
B: Repeat Step A to install (9350) Soft on the Back Wall Panel. (g 25.1)
C: Place 1 (9351) Soft Narrow across the end of each opening so they are ush and tight to the (9351) Softs.
Attach (9351) Soft Narrow on the SW Wall Panel side using 4 (S20) #8 x 1- 3/8” Wood Screws and on the
opposite side using 2 (S20) #8 x 1- 3/8” Wood Screws taking care to ensure that the correct pre-drilled holes are
being used. (g 25.1 and g 25.2)
S20
x 2
9350
9351
S20
S20
per side
x 6
9351
9365
S20
SW Wall
Panel